On this page
- Watch the HP Pavilion Gaming 15 Complete Teardown
- Video Chapters
- Before Disassembling an HP Pavilion Gaming 15
- 1. Opening the HP Pavilion Gaming 15
- 2. Disconnect and Remove the Battery
- Signs a Pavilion Gaming Battery May Need Replacement
- 3. Accessing RAM and Internal Components
- Upgrading RAM in an HP Pavilion Gaming 15
- Upgrading the M.2 SSD
- 4. Removing the Vent Covers
- 5. Removing the Fans and Heatsink
- Symptoms of Cooling Problems
- 6. Motherboard Removal
- 7. Removing the Display Assembly
- Common Display Problems
- 8. Reassembling the HP Pavilion Gaming 15
- Test the Laptop Before Calling the Repair Finished
- Which HP Pavilion Gaming 15 Do I Have?
- Is an HP Pavilion Gaming 15 Worth Upgrading?
- Repair, Upgrade or Sell Your Pavilion Gaming 15?
- Can You Sell a Broken HP Pavilion Gaming 15?
- Check the Value of Your HP Pavilion Gaming Laptop
- Prepare the Laptop Before Selling or Shipping It
- Frequently Asked Questions
- HP Pavilion Gaming 15 Teardown: Final Notes
Published: November 10, 2026 | Updated: November 10, 2026 | By: SellLaptopBack.com | Read time: 13 min read
The HP Pavilion Gaming 15 combines gaming-class processors and dedicated graphics with internal components that can be accessed for upgrades, maintenance and repair. If you want to add memory, replace an SSD, service the cooling system or diagnose a hardware problem, understanding how the laptop comes apart is the first step.
This guide follows an actual HP Pavilion Gaming 15 disassembly performed by the SellBroke repair team. The complete teardown video has more than 285,000 views and shows the process from opening the laptop through battery removal, internal component access, cooling-system removal, motherboard removal, display separation and reassembly.
Important: Pavilion Gaming 15 is a family of laptops rather than one hardware configuration. HP produced multiple Intel and AMD versions with different processors, GPUs, memory configurations, displays and storage options. Confirm your exact model or product number before ordering replacement parts.
Watch the HP Pavilion Gaming 15 Complete Teardown
The video below provides the visual reference for this guide. Use the chapter links underneath it to jump directly to the major stages of disassembly.
Video Chapters
- 0:00 – Opening the laptop
- 2:19 – Battery removal
- 4:06 – Removing internal components
- 5:54 – Removing vent covers
- 8:55 – Removing fans and heatsink
- 13:32 – Motherboard removal
- 16:58 – Display assembly removal
- 19:26 – Reassembly tips
Those timestamps come directly from the video's chapter navigation. The exact position of individual RAM and storage components can vary by Pavilion Gaming 15 model, so use the video together with the documentation for your specific machine.
Before Disassembling an HP Pavilion Gaming 15
Shut the laptop down completely before beginning. Disconnect the AC adapter and remove USB devices, memory cards, network cables and other peripherals.
You should also work on a clean, well-lit surface where screws can be organized as they are removed.
Useful tools typically include:
- Small Phillips screwdriver
- Plastic opening tool or guitar pick
- Plastic spudger
- Small container or magnetic mat for screws
- ESD protection when working around sensitive electronics
Avoid using excessive force. If a panel or component does not release normally, stop and check for another screw, clip or cable before pulling harder.
1. Opening the HP Pavilion Gaming 15
Watch from 0:00 – Opening the laptop
The teardown begins with access through the bottom of the laptop. After the required screws are removed, the lower cover must be separated from the chassis clips.
This is one of the stages where patience matters. Laptop covers are commonly secured by both screws and plastic retaining clips. Forcing the cover upward while clips are still engaged can crack the panel or damage the chassis edge.
Use a plastic opening tool rather than a metal screwdriver whenever possible when releasing plastic clips.
2. Disconnect and Remove the Battery
Watch from 2:19 – Battery removal
Once the bottom cover is removed, the battery should be disconnected before deeper internal work.
This is not just a battery-replacement step. Disconnecting the internal power source reduces the risk of accidentally energizing the motherboard while working with RAM, storage, cables or other components.
If you are replacing the battery, compare the replacement against the exact battery installed in your laptop rather than ordering solely from the words “Pavilion Gaming 15.” Different models and configurations can use different parts.
Signs a Pavilion Gaming Battery May Need Replacement
- Very short runtime
- Laptop shuts down unexpectedly on battery
- Battery does not charge normally
- Windows reports significant battery degradation
- Physical swelling or chassis deformation
A swollen lithium-ion battery should not be punctured, compressed or reused.
3. Accessing RAM and Internal Components
Watch from 4:06 – Removing internal components
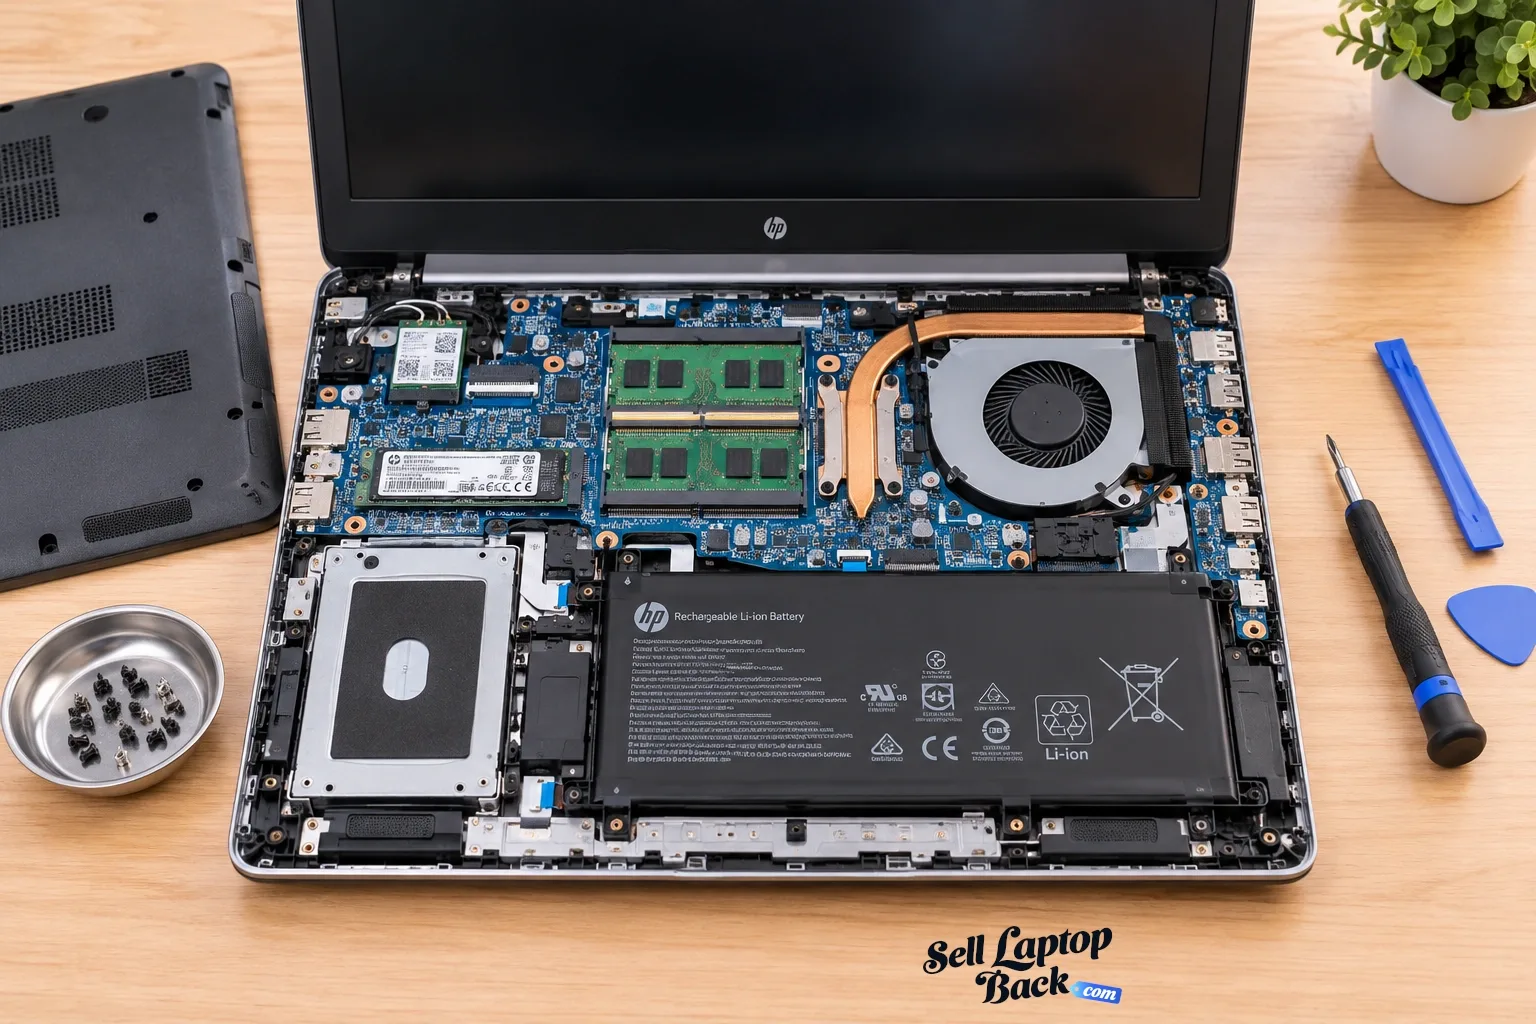
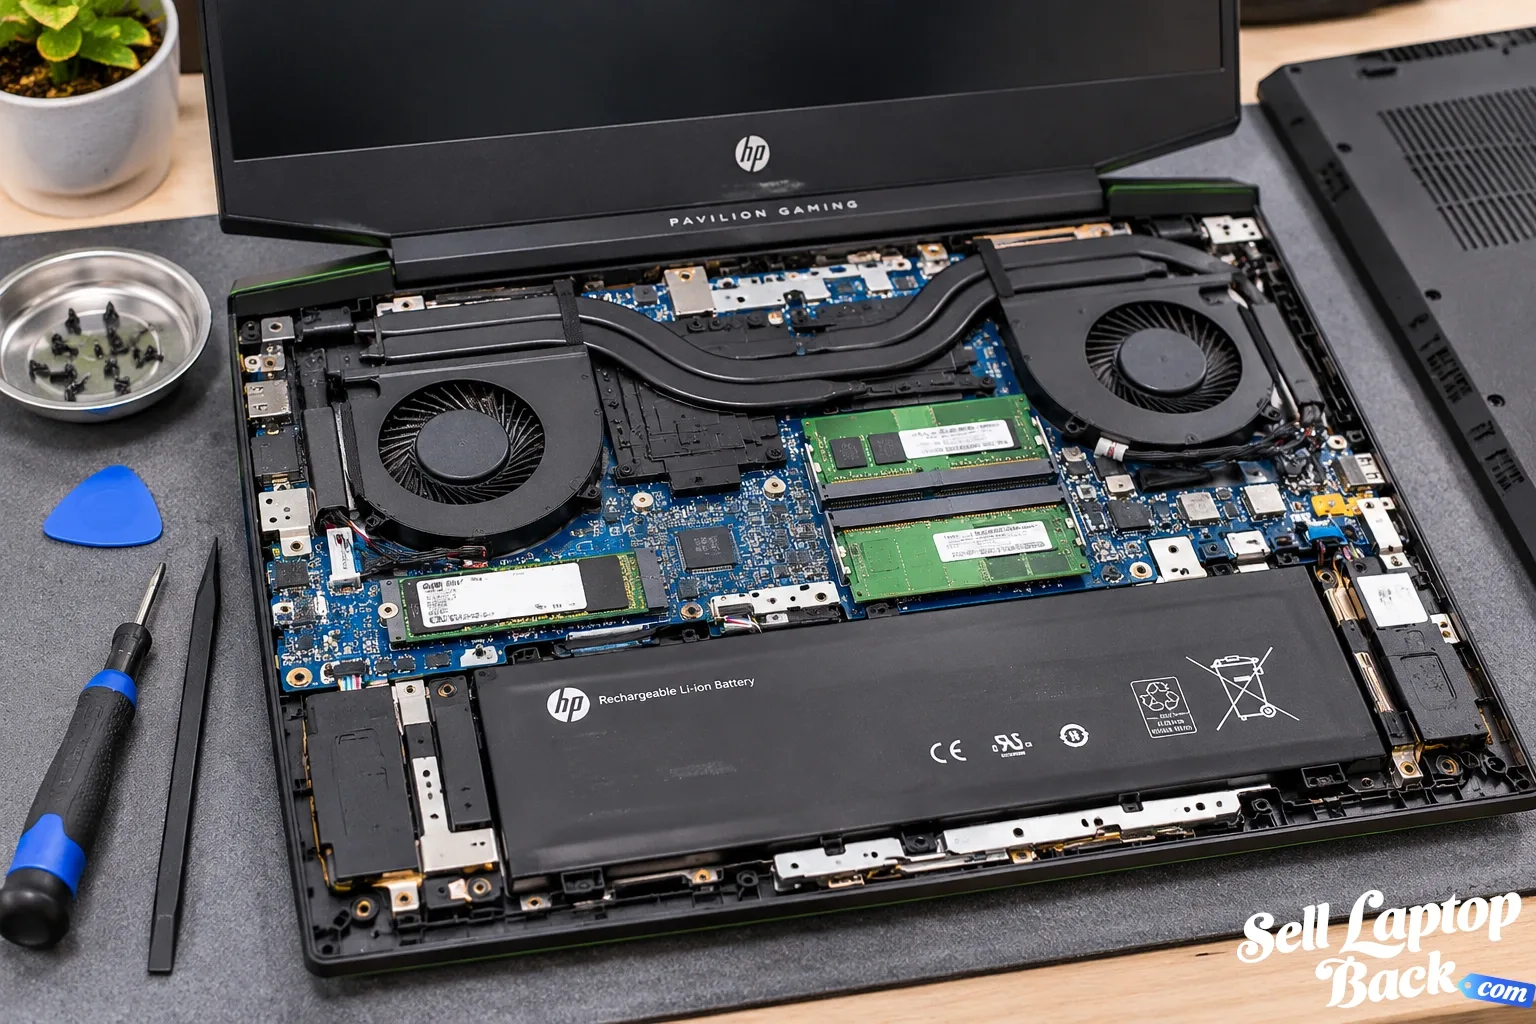
With the bottom cover removed and battery disconnected, the internal layout becomes accessible. This is the stage relevant to many common Pavilion Gaming 15 upgrades.
Depending on the exact configuration, accessible hardware can include memory, M.2 storage, wireless hardware and other internal components.
Upgrading RAM in an HP Pavilion Gaming 15
Many Pavilion Gaming 15 configurations use DDR4 SODIMM memory. HP's published specifications for multiple models show configurations using two DDR4 modules, but the supported memory speed and capacity depend on the exact system.
Before buying RAM:
- Identify the exact Pavilion Gaming 15 model
- Check the currently installed memory
- Verify the required DDR generation and speed
- Check the supported capacity for that model
- Confirm whether one or both slots are already populated
If you are upgrading rather than replacing failed memory, matching compatible modules can also help avoid unnecessary compatibility problems.
Upgrading the M.2 SSD
HP Pavilion Gaming 15 configurations were also sold with PCIe NVMe M.2 solid-state storage.
An SSD upgrade can provide additional space for games, applications and files. Before ordering a replacement, verify the storage interface and physical format supported by your exact laptop.
If the existing SSD contains your operating system, remember that physically installing a new drive is only part of the job. You will also need to clone the existing installation or reinstall the operating system and restore your data.
4. Removing the Vent Covers
Watch from 5:54 – Removing vent covers
Gaming laptops rely heavily on airflow. The Pavilion Gaming 15 cooling assembly must move heat away from the CPU and GPU while maintaining enough airflow through the chassis.
The teardown shows the vent-cover removal process before progressing deeper into the cooling assembly.
While the laptop is open, inspect the vents for accumulated dust. Heavy buildup can restrict airflow and contribute to higher temperatures and fan noise.
5. Removing the Fans and Heatsink
Watch from 8:55 – Removing fans and heatsink
This is one of the most useful sections for an older gaming laptop.
The cooling system is responsible for transferring heat away from the CPU and dedicated GPU. Over time, dust accumulation, fan wear and degraded thermal interface material can contribute to thermal problems.
Symptoms of Cooling Problems
- Fans constantly running at high speed
- Grinding or rattling fan noise
- High temperatures during gaming
- Performance dropping after the laptop becomes hot
- Unexpected shutdowns under load
- A fan that does not spin
If the heatsink is removed from the CPU or GPU, the old thermal compound should normally be cleaned appropriately and replaced before the heatsink is reinstalled.
Do not simply remove and reinstall a heatsink repeatedly with old, disturbed thermal compound.
6. Motherboard Removal
Watch from 13:32 – Motherboard removal
Motherboard removal is considerably more involved than a RAM or SSD upgrade.
Before lifting the board, connected cables and components must be identified and disconnected correctly. Ribbon cables are particularly easy to damage if their locking connectors are not released properly.
Motherboard removal may be necessary for repairs involving:
- Power or charging problems
- Liquid damage inspection
- Damaged ports
- Board-level faults
- Cooling-system service requiring deeper access
- Chassis replacement
If the laptop only needs additional RAM or storage, there is normally no reason to remove the motherboard unnecessarily.
7. Removing the Display Assembly
Watch from 16:58 – Display assembly removal
The video then progresses to separating the display assembly from the lower chassis.
This type of disassembly may be required for a damaged screen, broken hinge, damaged display cable, lid replacement or other display-related repair.
Before ordering a replacement LCD or complete display assembly, verify the exact panel and laptop configuration. Pavilion Gaming 15 systems were offered with different display specifications, so screen size alone is not enough to guarantee compatibility.
Common Display Problems
- Cracked LCD
- Vertical or horizontal lines
- Flickering image
- Dim or failed backlight
- Dead pixels
- Loose or damaged hinges
- Image changes when the lid moves
An image that changes when the display is moved may indicate a cable or connector problem rather than a failed LCD panel, so diagnosis matters before ordering parts.
8. Reassembling the HP Pavilion Gaming 15
Watch from 19:26 – Reassembly tips
Reassembly should generally reverse the disassembly process, but do not rush this stage.
Before closing the bottom cover:
- Confirm ribbon cables are fully seated and locked
- Verify fan connectors are attached
- Check Wi-Fi antenna connections if they were removed
- Make sure RAM is fully seated
- Verify the SSD is secured
- Check that no screws or tools remain inside the chassis
- Reconnect the battery at the appropriate stage
Keep track of screw locations. Installing an incorrect screw into the wrong position can damage plastic mounts or, in some laptop designs, components beneath the screw hole.
Test the Laptop Before Calling the Repair Finished
After reassembly, test more than the power button.
Verify:
- Laptop powers on normally
- RAM is detected correctly
- SSD appears in BIOS and the operating system
- Battery charges
- Keyboard and touchpad work
- Wi-Fi works
- USB and display ports work
- Both cooling fans operate normally
- Display works at different lid angles
- The laptop remains stable under load
If you replaced RAM or storage, checking BIOS/UEFI before booting fully into the operating system is a quick way to confirm that the new hardware is detected.
Which HP Pavilion Gaming 15 Do I Have?
This question matters because “Pavilion Gaming 15” covers numerous configurations.
HP sold Pavilion Gaming 15 systems with different Intel and AMD processors, NVIDIA graphics options, RAM configurations, SSD capacities and displays.
Check the product label on the laptop and use the exact product or model number with HP Support before ordering parts.
SellLaptopBack's own catalog illustrates the variation within this family, including Pavilion Gaming 15 configurations with Ryzen processors, 10th-generation Intel processors, GTX graphics and later RTX configurations.
If you are trying to identify the machine for resale rather than repair, browse our HP gaming laptop catalog and compare the CPU and GPU with your system.
Is an HP Pavilion Gaming 15 Worth Upgrading?
That depends on what is limiting the laptop.
A RAM upgrade can make sense when the machine is memory constrained. A larger SSD can be useful when storage is the primary limitation. Cleaning a clogged cooling system can help an otherwise healthy gaming laptop operate properly.
But an upgrade is not automatically worthwhile simply because the laptop can accept the component.
Consider:
- Age of the laptop
- CPU performance
- GPU performance
- Current RAM and storage
- Battery condition
- Display condition
- Cost of the upgrade
- Current resale value
For example, spending heavily on RAM and storage does not transform an older GPU into a newer gaming platform.
Repair, Upgrade or Sell Your Pavilion Gaming 15?
Repair makes sense when the laptop still meets your needs and the repair cost is reasonable. Upgrading makes sense when one replaceable component is creating the primary limitation.
Selling may make more sense when several problems are appearing at once or when the CPU and GPU no longer provide the performance you need.
Before purchasing expensive replacement parts, compare the repair cost against the laptop's current value.
Our laptop depreciation guide explains why older hardware generally continues losing value even when it remains functional.
Can You Sell a Broken HP Pavilion Gaming 15?
Potentially, yes.
A gaming laptop can retain value even when it has a damaged screen, worn battery, broken keyboard, cooling problem or other defect.
Depending on the exact model and failure, usable components may include:
- CPU/GPU motherboard assembly
- RAM
- SSD
- Display
- Cooling fans and heatsink
- Keyboard
- Wi-Fi hardware
- Battery
- Chassis components
- Power adapter
See our broken laptop selling guide if repair no longer makes financial sense.
Check the Value of Your HP Pavilion Gaming Laptop
If you decide not to repair or upgrade the laptop, identify its exact processor and GPU before requesting a quote. Those specifications are especially important with gaming laptops because visually similar Pavilion Gaming 15 systems can contain very different hardware.
SellLaptopBack currently catalogs multiple HP Pavilion Gaming configurations alongside newer HP gaming systems.
Browse HP gaming laptops and check your model.
Check My HP Gaming Laptop Value
Prepare the Laptop Before Selling or Shipping It
Back up files you want to keep before selling the laptop. Sign out of personal accounts and remove your personal data using the appropriate reset or drive-wipe process.
If you recently opened the laptop for repair or an upgrade, make sure the bottom cover is fully secured and no screws are missing before shipping.
Gaming laptops are relatively heavy, and the power adapter can damage the computer if it moves freely inside the box. Pack the adapter separately from the laptop and use adequate cushioning.
See our laptop packing and shipping guide before sending the computer.
Frequently Asked Questions
Can you upgrade the RAM in an HP Pavilion Gaming 15?
Can you upgrade the SSD in an HP Pavilion Gaming 15?
Where is the battery in the HP Pavilion Gaming 15?
How do I clean the fans on an HP Pavilion Gaming 15?
Can I replace the screen on an HP Pavilion Gaming 15?
Why is my HP Pavilion Gaming 15 overheating?
Is an old HP Pavilion Gaming 15 worth repairing?
Can I sell a broken HP Pavilion Gaming 15?
HP Pavilion Gaming 15 Teardown: Final Notes
The Pavilion Gaming 15 is serviceable enough that several common jobs begin with the same basic procedure: remove the bottom cover, disconnect the battery and identify the component you actually need to reach.
For a RAM or SSD upgrade, there is no reason to perform the complete motherboard and display teardown shown in the video. The deeper stages are useful when diagnosing cooling, motherboard, chassis or display problems.
Use the video as the visual reference, verify parts against your exact HP product number and stop if your internal layout differs substantially from the machine shown.
If repairing the laptop no longer makes sense, check your HP gaming laptop model and current offer instead.