On this page
- 1. Lenovo Legion 5 Pro Gaming Laptop: Professional Overview & Upgrade Potential
- โ๏ธ Legion 5 Pro Key Specifications
- ๐ฎ Gaming-Centric Features
- ๐ Major Upgrade Opportunities
- ๐ Model Variants & Identification
- ๐ Gaming Performance Baseline
- ๐ค Community & Support Resources
- โ ๏ธ Warranty & Service Considerations
- โ Pre-Service Assessment Checklist
- 2. Essential Preparation & Safety Protocols for Legion 5 Pro Gaming Laptop Service
- โ ๏ธ Gaming Laptop Service Safety First
- ๐ Pre-Service Diagnostic Checklist
- ๐พ Gaming Data Backup Protocol
- โก ESD Protection for Gaming Components
- ๐ฎ Gaming Workspace Preparation
- ๐ง Gaming Laptop Tool Preparation
- ๐ Proper Shutdown & Power Safety
- ๐ฏ Gaming Component Handling Guidelines
- โฑ๏ธ Gaming Laptop Service Time Management
- ๐จ Emergency Preparedness for Gamers
- ๐ค Gaming Community Support Resources
- โ Final Preparation Checklist
- 3. Required Tools & Recommended Equipment for Legion 5 Pro Gaming Laptop Repair
- ๐ง Essential Gaming Laptop Tool Kit
- ๐ ๏ธ Basic Tool Requirements
- ๐ฎ Gaming-Specific Tool Requirements
- ๐ Recommended Tool Kits for Gamers
- โ๏ธ Legion 5 Pro Specific Tool Notes
- โ๏ธ Thermal Management Tool Guide
- ๐ Alternative & Household Tools
- โ ๏ธ Tool Safety & Best Practices
- ๐ Where to Purchase Gaming Laptop Tools
- ๐๏ธ Tool Maintenance & Storage
- ๐ Gaming Community Tool Recommendations
- โ Essential Tool Checklist
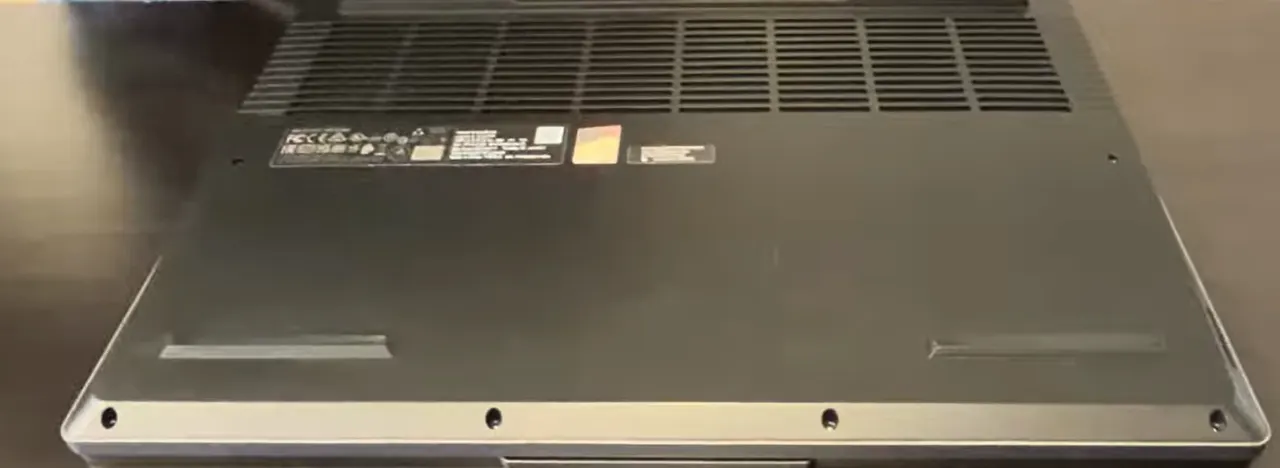
- 4. Legion 5 Pro Bottom Panel Removal: Gaming Laptop Initial Access Guide
- ๐ Gaining Access to Gaming Components
- โ ๏ธ Pre-Removal Gaming Laptop Preparation
- ๐ฉ Screw Identification & Location Mapping
- ๐ง Professional Removal Technique
- ๐ Gaming Laptop Internal Layout Overview
- ๐ง Common Challenges & Gaming Laptop Solutions
- ๐ฏ Gaming Performance Component Identification
- ๐ก๏ธ Gaming Laptop Damage Prevention
- ๐ธ Documentation & Photography Guide
- ๐งน Initial Cleaning Opportunities
- ๐ Reassembly Preparation Tips
- โ Post-Removal Performance Verification
- 5. Legion 5 Pro Battery Disconnection & Gaming Laptop Power Safety
- โ ๏ธ Critical Gaming Laptop Battery Safety
- ๐ Legion 5 Pro Battery Specifications
- ๐ Pre-Disconnection Safety Protocol
- ๐ Battery Connector Identification
- ๐ง Professional Disconnection Technique
- ๐จ Gaming Laptop Battery Hazards & Mitigation
- ๐ Complete Battery Removal Guide (If Required)
- โก ESD Protection for Gaming Components
- ๐ Battery Health Assessment Guide
- ๐จ Emergency Response Procedures
- ๐ฎ Gaming Performance Considerations
- ๐ Proper Battery Reconnection Guide
- โป๏ธ Battery Disposal & Recycling
- โ Final Battery Safety Checklist
- 6. Legion 5 Pro SSD & Storage Upgrade: Gaming Performance Optimization Guide
- ๐พ Gaming Laptop Storage Architecture
- ๐ง Storage Configuration Options
- ๐ SSD Compatibility & Selection Guide
- ๐ Gaming SSD Recommendations
- ๐ง Step-by-Step SSD Installation
- โ๏ธ Gaming SSD Thermal Management
- ๐ Game Data Migration Strategies
- โก Gaming Storage Performance Optimization
- ๐ RAID 0 Configuration for Gaming
- ๐ฎ Smart Game Installation Strategy
- ๐ SSD Troubleshooting Guide
- ๐ Gaming Storage Capacity Planning
- โ Performance Validation & Benchmarking
- ๐ฎ Future-Proofing Considerations
- 7. Legion 5 Pro DDR4 RAM Upgrade: Gaming Performance & Memory Optimization
- ๐ง Gaming Laptop RAM Fundamentals
- โ๏ธ Legion 5 Pro RAM Specifications
- ๐ Gaming RAM Recommendations
- ๐ RAM Compatibility Verification
- ๐ง Professional RAM Installation
- โก Dual-Channel Gaming Benefits
- โ๏ธ BIOS Configuration & Optimization
- ๐ฎ Gaming Performance Validation
- โ๏ธ Capacity vs Speed Tradeoffs for Gaming
- ๐ RAM Troubleshooting Guide
- ๐ฏ Advanced Gaming Optimization Tips
- ๐ฎ Future-Proofing Strategy
- โ๏ธ RAM Cooling & Thermal Management
- โ Performance Validation Checklist
- 8. Legion 5 Pro Cooling System: Professional Cleaning & Thermal Repasting Guide
- โ๏ธ Why Cooling Matters for Gaming Performance
- ๐ฌ Legion 5 Pro Cooling System Architecture
- ๐ Gaming Laptop Maintenance Schedule
- ๐ง Cooling System Disassembly Preparation
- ๐งช Gaming-Grade Thermal Materials Guide
- ๐งน Professional Cleaning Protocol
- ๐ฏ Professional Thermal Application Techniques
- โก Cooling System Performance Optimization
- ๐ Gaming Thermal Monitoring & Diagnostics
- ๐ฎ Game-Specific Thermal Profiles
- ๐ Cooling System Troubleshooting
- ๐ก๏ธ Gaming Preventive Maintenance Program
- โ Cooling Performance Validation
- ๐ฐ Gaming Performance ROI Analysis
- 9. Legion 5 Pro Keyboard & Trackpad: Gaming Peripheral Service & Replacement Guide
- โจ๏ธ Gaming Input Device Architecture
- ๐ง TrueStrike Keyboard Specifications
- ๐ฑ๏ธ Precision Trackpad Specifications
- ๐ Gaming Input Diagnostic Procedure
- ๐ง Professional Keyboard Replacement
- ๐ฑ๏ธ Trackpad Replacement Procedure
- ๐ฆ Gaming Parts Procurement Guide
- ๐ Professional Reassembly Guide
- ๐ฎ Gaming Performance Testing
- ๐ฏ Gamer Optimization & Customization
- ๐ก๏ธ Gaming Preventive Maintenance
- ๐ Gaming Warranty & Service Considerations
- ๐ Gaming Input Troubleshooting Flowchart
- ๐ฐ Gaming Performance ROI Analysis
- ๐ Competitive Gaming Tips
- 10. Maximizing Legion 5 Pro Resale Value: Gaming Laptop Upgrade & Service ROI Guide
- ๐ฐ Gaming Laptop Resale Value Strategy
- ๐ Gaming Laptop Resale Market Analysis
- ๐ Gaming Upgrade ROI Analysis
- ๐ Gaming Documentation Package
- ๐ Platform-Specific Optimization
- โจ Gaming Laptop Cosmetic Preparation
- ๐ Gaming Data Sanitization Protocol
- ๐ Essential Gaming Benchmarks to Include
- ๐ต Gaming Laptop Pricing Strategy
- ๐ Gaming Warranty & Transfer Guide
- ๐ค Gaming Laptop Negotiation Strategy
- ๐ฆ Gaming Laptop Shipping Protocol
- โ Final Gaming Resale Checklist
- Need to Sell Your Lenovo Laptop? Get Instant Cash!
- Sell Lenovo ThinkPad P1 Gen 6 16" 64GB RAM 2TB SSD RTX 4090 Intel Core i7-13th Gen laptop
- Sell Lenovo IdeaPad Slim 5 16IRL8 Intel Core i5-13th Gen laptop
- Sell Lenovo ThinkPad X13 Yoga Gen 4 13" 2-in-1 16GB RAM 512GB SSD Intel Core i7 13th Gen laptop
- Sell Lenovo ThinkPad P16v 16" 16GB RAM 1TB SSD RTX A2000 Intel Core i9-13th Gen laptop
- Sell Lenovo Legion Pro 7i Gen 8 16" 16GB RAM 512GB SSD RTX 4080 Intel Core i9-13th Gen laptop
1. Lenovo Legion 5 Pro Gaming Laptop: Professional Overview & Upgrade Potential
The Lenovo Legion 5 Pro represents a pinnacle of gaming laptop engineering, combining desktop-level performance with sophisticated thermal management and extensive upgradeability. This 16-inch powerhouse has become a favorite among gamers, content creators, and power users seeking exceptional value and serviceability.
โ๏ธ Legion 5 Pro Key Specifications
| Component Category | Standard Specifications | Upgrade Potential | Gaming Impact |
|---|---|---|---|
| Processor | AMD Ryzen 7 5800H / Intel Core i7-11800H | Limited (soldered) | High (8-core performance) |
| Graphics | NVIDIA RTX 3060/3070/3080 (up to 165W TGP) | Limited (MXM/BGA) | Extreme (full-power GPUs) |
| Display | 16" 2560x1600 165Hz IPS, 500 nits, 100% sRGB | Advanced (requires full disassembly) | Premium (QHD+ high refresh rate) |
| Memory | Up to 32GB DDR4 3200MHz (2 slots) | Excellent (user-upgradeable) | High (dual-channel support) |
| Storage | Dual M.2 NVMe slots (Gen3/Gen4 compatible) | Excellent (tool-less access on some models) | Critical (fast game loading) |
๐ฎ Gaming-Centric Features
- Advanced Cooling System:
- Lenovo Coldfront 3.0 with vapor chamber (high-end models)
- Dual fans with 0.1mm ultra-thin blades
- Four heat pipes and multiple heat sinks
- Q Control 4.0 for performance modes
- Display Technology:
- 16:10 aspect ratio for productivity and gaming
- NVIDIA G-Sync or AMD FreeSync support
- Dolby Vision HDR certification
- X-Rite Pantone factory calibration
- Gaming Enhancements:
- TrueStrike keyboard with soft-landing switches
- Nahimic Audio for 3D spatial sound
- Legion AI Engine for performance optimization
- Hybrid mode for battery/performance balance
๐ Major Upgrade Opportunities
| Upgrade Component | Difficulty Level | Performance Improvement | Cost Range | Gamer Value |
|---|---|---|---|---|
| RAM Upgrade (32GB/64GB) | Easy (user-serviceable) | 20-40% in memory-intensive games | $100-$250 | High (future-proofing) |
| NVMe SSD Upgrade (Gen4) | Easy to Moderate | 50-100% faster load times | $80-$200 per TB | Very High (game loading) |
| Thermal System Repaste | Moderate | 5-15ยฐC reduction, sustained performance | $20-$40 (materials) | Extreme (prevents throttling) |
| Wi-Fi 6E Card Upgrade | Easy | Lower latency, faster downloads | $30-$60 | Medium (online gaming) |
๐ Model Variants & Identification
- Key Model Numbers:
- 82JQ (AMD Ryzen + NVIDIA models)
- 82JD (Intel + NVIDIA configurations)
- Check label under battery or bottom cover
- Use Lenovo Support Site with serial number
- Yearly Updates:
- 2021: Initial release, Ryzen 5000/Intel 11th gen
- 2022: Refinements, improved cooling
- 2023: Latest models with updated components
- Verify exact specifications before purchasing parts
๐ Gaming Performance Baseline
| Game/Application | RTX 3060 (130W) | RTX 3070 (140W) | RTX 3080 (165W) | Upgrade Impact |
|---|---|---|---|---|
| Cyberpunk 2077 (QHD) | 45-55 FPS (Medium) | 60-70 FPS (High) | 70-80 FPS (Ultra) | Thermal optimization critical |
| Call of Duty: Warzone 2.0 | 90-110 FPS | 110-130 FPS | 130-150 FPS | RAM speed affects minimum FPS |
| Elden Ring (QHD) | 50-60 FPS | 60-70 FPS | 70-80 FPS | SSD improves asset loading |
| Creative Workloads | Good performance | Excellent performance | Professional-grade | RAM capacity most important |
๐ค Community & Support Resources
- Official Resources:
- Lenovo Official Support for manuals and drivers
- Legion Gaming Community
- Lenovo Vantage software for system management
- Legion Arena for game optimization
- Community Platforms:
- Reddit: r/LenovoLegion for user experiences
- NotebookReview forums for technical discussions
- YouTube teardown channels for visual guides
- Discord communities for real-time help
โ ๏ธ Warranty & Service Considerations
- Lenovo Legion Ultimate Support:
- Standard 1-year depot warranty
- Upgrade options: On-site, Accidental Damage Protection
- Check warranty status before disassembly
- Some regions allow self-service without voiding warranty
- Service Parts Availability:
- Genuine parts through Lenovo authorized channels
- Good third-party market for common components
- Cross-compatibility with other Legion 5 models
- Document part numbers for accurate ordering
โ Pre-Service Assessment Checklist
- Record serial number and model information
- Check remaining warranty status
- Backup important data and game saves
- Document current performance with benchmarks
- Gather necessary tools and replacement parts
- Create clean, static-free workspace
- Review entire guide before beginning
2. Essential Preparation & Safety Protocols for Legion 5 Pro Gaming Laptop Service
โ ๏ธ Gaming Laptop Service Safety First
Servicing a high-performance gaming laptop like the Legion 5 Pro requires meticulous preparation. These systems contain sensitive components that can be easily damaged by static electricity, improper handling, or rushed procedures. Following professional protocols ensures both your safety and the integrity of your valuable gaming investment.
๐ Pre-Service Diagnostic Checklist
- System Performance Baseline:
- Run 3DMark Time Spy for GPU performance
- Use Cinebench R23 for CPU benchmarking
- Check SSD health with CrystalDiskInfo
- Monitor temperatures with HWiNFO64 during gaming sessions
- Functionality Verification:
- Test all RGB keyboard lighting zones
- Verify display functionality (dead pixels, backlight bleed)
- Check all ports with gaming peripherals
- Test cooling fans at maximum speed
๐พ Gaming Data Backup Protocol
| Data Type | Backup Method | Gaming Impact | Recommended Tools |
|---|---|---|---|
| Game Saves & Profiles | Cloud sync (Steam, Epic, etc.) + local backup | Critical - prevents progress loss | Platform clients, manual file copy |
| Game Installations | External drive or secondary system | High - reduces re-download time | Steam Backup, manual game file copy |
| System & Driver Settings | Export configurations, screenshot settings | Medium - preserves optimization | NVIDIA GeForce Experience, AMD Adrenalin |
| RGB & Macro Profiles | Export from Legion Control Center | Low - easily recreated | Lenovo Vantage software |
โก ESD Protection for Gaming Components
- Essential ESD Equipment:
- Anti-static wrist strap (1Mฮฉ resistance)
- ESD-safe work mat (larger than laptop footprint)
- Anti-static storage bags for components
- Humidity control (40-60% ideal for electronics)
- Gaming-Specific Sensitivity:
- GPU and VRAM highly ESD-sensitive
- DDR4 memory modules vulnerable
- NVMe controllers easily damaged
- RGB lighting circuits sensitive
๐ฎ Gaming Workspace Preparation
| Workspace Element | Minimum Requirement | Gaming Enthusiast Standard | Professional Recommendation |
|---|---|---|---|
| Work Surface | Clean, dry table | ESD mat with component zones | Dedicated repair station |
| Lighting | Room lighting | LED desk lamp with magnifier | Professional task lighting (500+ lux) |
| Organization | Basic containers | Magnetic parts tray, labeled containers | Component-specific organization system |
| Documentation | Notebook | Smartphone for photos/video | Digital documentation with timestamps |
๐ง Gaming Laptop Tool Preparation
- Essential Tool Verification:
- Phillips #00 and #0 screwdrivers (magnetic preferred)
- Plastic spudger set for case opening
- Tweezers for small connectors
- Thermal paste and pads (gaming-grade)
- Gaming-Specific Supplies:
- 99% isopropyl alcohol for thermal material removal
- Lint-free microfiber cloths
- Compressed air for dust removal
- Replacement thermal pads (multiple thicknesses)
๐ Proper Shutdown & Power Safety
- Complete Shutdown Procedure:
- Close all games and applications
- Shut down through Windows (Start โ Power โ Shut down)
- Disconnect all gaming peripherals (mouse, keyboard, headset)
- Remove AC adapter and any USB-C charging cables
- Power Discharge Protocol:
- Press and hold power button for 15 seconds after shutdown
- Wait 2 minutes for capacitor discharge
- Verify all RGB lighting is completely off
- Check for any remaining indicator lights
๐ฏ Gaming Component Handling Guidelines
| Component | Handling Precautions | Storage Method | Common Gaming Laptop Risks |
|---|---|---|---|
| GPU & VRM Components | Handle by edges only, avoid touching circuitry | Anti-static bag, foam padding | ESD damage, physical flex damage |
| DDR4 Memory Modules | Hold by edges, avoid touching gold contacts | Anti-static container, keep in pairs | Contact corrosion, bent pins |
| NVMe SSDs | Handle by edges, avoid pressure on components | Anti-static bag, protective case | Controller damage, broken connectors |
| Cooling System | Avoid bending heat pipes, protect fan blades | Clean surface, protect fins | Bent fins, damaged fan bearings |
โฑ๏ธ Gaming Laptop Service Time Management
- Realistic Time Estimates:
- Basic SSD/RAM upgrade: 30-45 minutes
- Complete thermal repaste: 60-90 minutes
- Full disassembly (keyboard/screen): 2-3 hours
- Testing and validation: 30-60 minutes
- Gaming Session Planning:
- Schedule service during non-gaming hours
- Allow buffer time for unexpected complications
- Plan for system testing with actual games
- Consider backup gaming options during service
๐จ Emergency Preparedness for Gamers
- Have Backup Gaming Options Ready
- Keep Important Game Codes & Logins Accessible
- Prepare External Display & Peripherals
- Have Contact Information for Lenovo Support
- Keep Basic Tools for Reversal Available
๐ค Gaming Community Support Resources
- Online Communities:
- Reddit: r/LenovoLegion for troubleshooting
- Discord: Legion gaming communities
- YouTube: Legion teardown tutorials
- Forums: NotebookReview technical discussions
- Professional Services:
- Lenovo Service Center Locator
- Local gaming PC repair specialists
- Authorized Legion service providers
โ Final Preparation Checklist
- โ All game data backed up and verified
- โ ESD protection equipment tested and grounded
- โ Workspace clean, organized, and well-lit
- โ All necessary tools gathered and verified
- โ Replacement components compatibility confirmed
- โ System fully powered down and discharged
- โ Documentation system ready (camera, notes)
- โ Emergency contacts and resources available
- โ Ample time allocated (no rushing)
- โ Gaming backup plan in place
3. Required Tools & Recommended Equipment for Legion 5 Pro Gaming Laptop Repair
๐ง Essential Gaming Laptop Tool Kit
Proper tools are critical for servicing the Legion 5 Pro's precision gaming components. Using incorrect or poor-quality tools can damage delicate components, void warranties, and compromise your gaming laptop's performance. This guide covers everything from basic upgrades to professional-level repairs.
๐ ๏ธ Basic Tool Requirements
| Tool Category | Legion 5 Pro Specifics | Quality Requirements | Gaming Laptop Importance |
|---|---|---|---|
| Screwdrivers | Phillips #00 (primary), #0 (secondary) | Precision ground tips, magnetic preferred | Critical - prevents stripped screws |
| Pry Tools | Plastic spudgers, opening picks | Non-marring, various thicknesses | High - prevents case damage |
| Tweezers | Anti-magnetic, fine point | ESD-safe, precision tips | Medium - for small connectors |
| ESD Protection | Wrist strap, mat, bags | 1Mฮฉ resistance, proper grounding | Critical - protects GPU/RAM |
๐ฎ Gaming-Specific Tool Requirements
- Thermal Management Tools:
- High-quality thermal paste (Arctic MX-6, Thermal Grizzly Kryonaut)
- Thermal pads (0.5mm, 1.0mm, 1.5mm thicknesses)
- 99% isopropyl alcohol for cleaning
- Lint-free wipes (coffee filters work well)
- Specialized Gaming Components:
- NVMe screwdriver (often included with SSDs)
- Anti-static foam for GPU/CPU protection
- Compressed air with moisture filter
- Magnifying glass or head-mounted magnifier
๐ Recommended Tool Kits for Gamers
| Kit Level | Price Range | Included Tools | Best For | Recommended Products |
|---|---|---|---|---|
| Beginner Gamer | $25-$50 | Basic screwdrivers, spudger, tweezers | RAM/SSD upgrades only | iFixit Essential Kit |
| Enthusiast Gamer | $60-$100 | Full tool set, ESD protection, thermal supplies | Complete disassembly, thermal repasting | iFixit Pro Tech Toolkit |
| Professional Streamer | $150-$300 | Premium tools, organization, specialized equipment | Frequent maintenance, content creation | Custom kit with premium components |
| E-Sports Team | $400+ | Multiple kits, backup tools, calibration equipment | Team maintenance, tournament preparation | Professional repair station setup |
โ๏ธ Legion 5 Pro Specific Tool Notes
- Special Fastener Information:
- Bottom panel: Phillips #00 (10-15 screws)
- Internal components: Phillips #00 and #0
- No Torx screws in standard models
- Some screws may have thread-locker (blue)
- Model-Specific Considerations:
- 2021 vs 2022 models may have different screw patterns
- AMD vs Intel models have similar disassembly
- Check your specific model before beginning
- Take photos of screw locations as you work
โ๏ธ Thermal Management Tool Guide
| Thermal Material | Legion 5 Pro Application | Performance Rating | Gaming Impact | Recommended Brands |
|---|---|---|---|---|
| CPU/GPU Paste | Pea-sized dot method | Critical for sustained performance | 10-15ยฐC improvement possible | Thermal Grizzly, Arctic, Noctua |
| VRM Thermal Pads | 0.5mm-1.5mm depending on location | Prevents VRM throttling | 5-10ยฐC VRM temperature reduction | Gelid Solutions, Thermalright |
| Memory Thermal Pads | Thin application over memory chips | Improves stability | Reduces memory errors | Fujipoly, ARCTIC |
| SSD Heatsinks | Optional but recommended for Gen4 SSDs | Prevents thermal throttling | Maintains fast game loading | Sabrent, EKWB, stock Lenovo |
๐ Alternative & Household Tools
- Emergency Substitutions:
- Guitar picks or old credit cards for prying
- Small flathead for Phillips screws (use carefully)
- Plastic container with compartments for screws
- Hair dryer on low for stubborn adhesive
- Safety Warnings:
- NEVER use metal tools for prying plastic
- Avoid excessive force with improvised tools
- When in doubt, wait for proper tools
- Test alternatives on inconspicuous areas first
โ ๏ธ Tool Safety & Best Practices
- ESD Protection Always First:
- Wear wrist strap before touching any components
- Ground yourself to a properly earthed surface
- Work on ESD mat when possible
- Handle components by edges only
- Proper Tool Usage:
- Use correct size screwdriver for each screw
- Apply steady pressure, avoid stripping
- Clean tools between uses
- Store tools properly to maintain condition
๐ Where to Purchase Gaming Laptop Tools
| Purchase Source | Tool Quality | Price Range | Gaming Community Rating | Best For |
|---|---|---|---|---|
| Specialized Retailers | Premium quality | $$-$$$ | Excellent | Serious enthusiasts, frequent repairs |
| Online Marketplaces | Variable (read reviews) | $-$$ | Good with research | Budget-conscious gamers |
| Local Electronics Stores | Basic to good | $-$$ | Convenient | Emergency purchases, basic tools |
| Gaming PC Shops | Specialized for gaming | $$-$$$ | Excellent for gaming needs | Gaming-specific tools and materials |
๐๏ธ Tool Maintenance & Storage
- Proper Storage Solutions:
- Use tool cases with foam inserts
- Keep screwdrivers in protective sleeves
- Store thermal materials in sealed containers
- Organize small parts in labeled containers
- Maintenance Schedule:
- Clean tools after each use
- Check screwdriver tips for wear
- Replace worn prying tools
- Test ESD equipment regularly
๐ Gaming Community Tool Recommendations
- Most Recommended by Legion Owners:
- iFixit Pro Tech Toolkit
- Wiha Precision Screwdrivers
- Thermal Grizzly Kryonaut thermal paste
- Gelid Solutions thermal pads
- Budget-Friendly Options:
- Harbor Freight precision tool sets
- Arctic MX-6 thermal compound
- Amazon Basics tool kits (with good reviews)
- Local hardware store combinations
โ Essential Tool Checklist
- โ Phillips #00 screwdriver (magnetic tip preferred)
- โ Phillips #0 screwdriver (for larger screws)
- โ Plastic spudger/pry tool set
- โ Anti-static wrist strap
- โ High-quality thermal paste
- โ 99% isopropyl alcohol and lint-free wipes
- โ Tweezers (non-magnetic, fine point)
- โ Container for screw organization
- โ Compressed air (optional but recommended)
- โ Good lighting (headlamp or task light)
0:26 Bottom Case 1:51 Battery 3:18 SSD Storage 4:03 WiFi Card 4:24 RAM Memory 4:46 Heatsink and Cooling Fans 6:40 Processor and GPU 6:49 Speakers 7:47 USB Board 8:80 Motherboard 10:10 Hinge Cover 11:54 Palmrest Assembly 12:17 Display Assembly 12:22 Front Bezel 14:15 Hinges 14:42 Adhesive Pullout Tabs 16:00 Video Cable 16:20 LCD Screen 16:50 Back Cover 16:58 Web Camera
4. Legion 5 Pro Bottom Panel Removal: Gaming Laptop Initial Access Guide
๐ Gaining Access to Gaming Components
Removing the bottom panel is your first step to accessing the Legion 5 Pro's upgradeable components. This gaming laptop features thoughtful design that balances structural integrity with serviceability. Proper technique prevents damage to the premium chassis and ensures smooth reassembly for optimal cooling performance.
โ ๏ธ Pre-Removal Gaming Laptop Preparation
- Complete System Shutdown:
- Save all game progress and close applications
- Shut down through Windows (not sleep/hibernate)
- Disconnect all gaming peripherals (mouse, keyboard, headset)
- Remove AC adapter and any charging cables
- Workspace & Safety Setup:
- Use anti-static wrist strap connected to ground
- Work on clean, soft surface to prevent scratches
- Ensure good lighting for seeing small screws
- Have magnetic tray ready for screw organization
๐ฉ Screw Identification & Location Mapping
| Screw Location | Type | Quantity | Length/Color | Gaming Laptop Notes |
|---|---|---|---|---|
| Front Edge (Near Touchpad) | Phillips #00 | 4 | Short (4mm), silver | Easy access, standard length |
| Rear Edge (Near Vents) | Phillips #00 | 5-6 | Medium (5mm), black | Near cooling system, may have threadlocker |
| Side Edges | Phillips #00 | 3-4 each side | Short (4mm), silver | Secures structural integrity |
| Central Reinforcement | Phillips #00 | 2-3 | Medium (5mm), black | Additional chassis support |
| Total Screws | Phillips #00 | 14-17 | Variable | Count before and after removal |
๐ง Professional Removal Technique
- Screw Removal Sequence:
- Use magnetic Phillips #00 screwdriver
- Remove screws in diagonal pattern (not sequential)
- Place screws in magnetic tray in relative positions
- Note any screws that feel different (may be threadlocker)
- Clip Release Methodology:
- Start at front-right corner (near status indicators)
- Insert plastic spudger at 30-degree angle
- Gently twist to release first clip (listen for click)
- Work around perimeter, releasing clips every 2-3 inches
- Use guitar pick for stubborn clips
- Panel Separation Protocol:
- Lift from front edge first (near touchpad)
- Check for any remaining connections
- Set panel aside on soft, clean surface
- Avoid bending or forcing the panel
๐ Gaming Laptop Internal Layout Overview
| Component Area | Accessibility | Upgrade Potential | Gaming Performance Impact |
|---|---|---|---|
| DDR4 RAM Slots | โ Immediately accessible | Excellent (user-upgradeable) | High (affects frame pacing) |
| M.2 NVMe Slots | โ Immediately accessible | Excellent (dual slots available) | Critical (game loading times) |
| Wi-Fi Card | โ Immediately accessible | Good (easy replacement) | Medium (online gaming latency) |
| Battery | โ ๏ธ Partially accessible | Moderate (requires disconnection) | Low (LAN party consideration) |
| Cooling System | โ Not directly accessible | Advanced (requires further disassembly) | Extreme (thermal throttling prevention) |
๐ง Common Challenges & Gaming Laptop Solutions
| Challenge | Gaming Laptop Specific Cause | Professional Solution | Prevention for Future |
|---|---|---|---|
| Stubborn Clips | Previous improper reassembly, gaming heat cycles | Apply gentle heat (hair dryer low, 10 seconds) | Clean clip channels during reassembly |
| Stripped Screws | Previous over-tightening, incorrect tool use | Rubber band method, screw extraction kit | Use proper torque (finger tight + ยผ turn) |
| Panel Won't Separate | Missed screw, internal cable interference | Double-check all screws, look for hidden fasteners | Systematic removal approach |
| Clip Damage | Excessive force, incorrect tool angle | Note damaged location, adjust reassembly | Use proper 30-degree tool insertion |
๐ฏ Gaming Performance Component Identification
- GPU & VRM Area:
- Identify NVIDIA GPU heatsink (largest copper area)
- Locate VRM components around CPU/GPU
- Note thermal pad placement for future reference
- Check for dust accumulation in cooling fins
- Cooling System Inspection:
- Observe fan blades for dust accumulation
- Check heat pipe connections
- Note thermal paste condition on visible areas
- Identify air intake and exhaust paths
๐ก๏ธ Gaming Laptop Damage Prevention
- Chassis Protection:
- Use plastic tools only against plastic components
- Support panel when removing to prevent bending
- Work on microfiber cloth to prevent scratches
- Handle by edges only to prevent fingerprint marks
- Internal Component Protection:
- ESD protection mandatory throughout process
- Check for cables attached to bottom panel
- Avoid touching circuitry with tools
- Keep screws organized to prevent loss inside chassis
๐ธ Documentation & Photography Guide
- Essential Photos to Take:
- Overall internal layout before any changes
- Close-ups of screw patterns and locations
- Thermal pad and paste condition
- Cable routing paths and connections
- Gaming-Specific Documentation:
- RGB lighting cable connections
- Fan power cable routing
- Any existing modifications or repairs
- Component model numbers and serials
๐งน Initial Cleaning Opportunities
| Cleaning Area | Gaming Performance Impact | Cleaning Method | Frequency Recommendation |
|---|---|---|---|
| Cooling Vents | High (airflow restriction) | Compressed air from inside out | Every 3-6 months |
| Fan Blades | Very High (fan efficiency) | Soft brush, compressed air | Every 6 months |
| Heat Sink Fins | Extreme (thermal transfer) | Compressed air, soft brush | Annually |
| Internal Surfaces | Low (aesthetics mainly) | Dry microfiber cloth | During upgrades |
๐ Reassembly Preparation Tips
- Clean panel edges with isopropyl alcohol
- Inspect all clips for damage before reassembly
- Test fit panel before installing screws
- Ensure all internal cables are properly routed
- Verify no tools or debris remain inside chassis
โ Post-Removal Performance Verification
- Before Proceeding Further:
- Test system boots properly (temporary reassembly)
- Verify all components detected in BIOS
- Check fan operation at different speeds
- Ensure no new noises or issues
- Gaming-Specific Checks:
- Monitor temperatures in idle state
- Verify RGB lighting functionality
- Check game performance baseline
- Ensure no new thermal throttling
5. Legion 5 Pro Battery Disconnection & Gaming Laptop Power Safety
โ ๏ธ Critical Gaming Laptop Battery Safety
Proper battery disconnection is the most critical safety step when servicing any gaming laptop, especially the high-performance Legion 5 Pro. These systems contain large capacity batteries that can deliver dangerous current if mishandled. Following professional protocols protects both you and your valuable gaming components.
๐ Legion 5 Pro Battery Specifications
| Battery Specification | Technical Details | Gaming Impact | Safety Classification |
|---|---|---|---|
| Chemistry & Configuration | Lithium-Ion Polymer, 4-cell | 2-4 hours gaming, 4-6 hours normal | Class 9 Hazardous Material |
| Capacity & Voltage | 80Wh (typical), 11.4V nominal | Supports full GPU power briefly | High-energy density |
| Part Numbers | L20C4PF0, L20C4PF1 (verify exact) | Compatibility critical | Genuine Lenovo recommended |
| Management System | Smart battery with Lenovo Vantage | Optimizes gaming performance | Multiple safety circuits |
๐ Pre-Disconnection Safety Protocol
- Complete System Shutdown:
- Close all games and applications
- Shut down through Windows (Start โ Power โ Shut down)
- Disconnect AC adapter and all USB-C charging
- Remove all gaming peripherals
- Power Discharge Procedure:
- Press and hold power button for 15 seconds
- Wait 2 minutes for capacitor discharge
- Verify all RGB lighting is completely off
- Check for any remaining indicator lights
๐ Battery Connector Identification
| Connector Feature | Legion 5 Pro Specifics | Location Guide | Safety Notes |
|---|---|---|---|
| Connector Type | White 4-pin connector with latch | Center-left of battery, near RAM slots | Standard laptop battery connector |
| Latch Mechanism | Slide-to-unlock (usually left or right) | Small plastic tab on connector body | Never pull wires, use connector body |
| Cable Routing | Typically under battery or along edge | Follow cable from battery to motherboard | Note routing for reassembly |
| Visual Identification | Look for "BATT" or battery symbol nearby | Usually largest internal connector | Take photos before disconnection |
๐ง Professional Disconnection Technique
- Latch Release Method:
- Identify latch direction (usually slides toward battery)
- Use plastic spudger or fingernail to slide latch
- Listen for click indicating release
- If stuck, apply gentle pressure while sliding
- Connector Removal:
- Grasp connector body firmly (never pull by wires)
- Pull straight out with even pressure
- If resistance, rock gently side-to-side while pulling
- Use plastic spudger for leverage if needed
- Post-Disconnection Verification:
- Press power button again for 5 seconds
- Wait additional 1 minute before proceeding
- Verify no electrical activity anywhere
- Proceed only when confident system is safe
๐จ Gaming Laptop Battery Hazards & Mitigation
| Potential Hazard | Risk Level for Gamers | Prevention Strategy | Emergency Response |
|---|---|---|---|
| Short Circuit | High (component damage risk) | Cover terminals immediately after removal | Power disconnect, isolate component |
| Thermal Runaway | Critical (fire hazard) | Work in cool environment, no heat sources | Class D fire extinguisher, evacuate area |
| ESD Damage | High (latent component failure) | Full ESD protection throughout | Component testing, failure analysis |
| Physical Damage | Medium (punctures cause fire) | Careful handling, no sharp tools nearby | Isolate damaged battery immediately |
๐ Complete Battery Removal Guide (If Required)
- Screw Identification:
- Locate 4-6 Phillips #00 screws securing battery
- Note screw lengths (may vary)
- Check for adhesive strips under battery
- Document screw pattern with photos
- Safe Removal Technique:
- Remove screws in criss-cross pattern
- Lift from connector end first (30ยฐ angle)
- If adhesive present, use isopropyl alcohol to release
- Place battery immediately in safe location
โก ESD Protection for Gaming Components
- Essential ESD Equipment:
- 1Mฮฉ anti-static wrist strap (tested daily)
- ESD-safe work mat properly grounded
- Anti-static bags for removed components
- Humidity control (40-60% ideal)
- Gaming Component Sensitivity:
- GPU and VRAM: Extremely ESD-sensitive
- DDR4 memory: Very sensitive
- NVMe controllers: Highly sensitive
- Motherboard circuits: Moderate sensitivity
๐ Battery Health Assessment Guide
| Health Status | Capacity Indicator | Gaming Performance Impact | Recommended Action |
|---|---|---|---|
| Excellent (90-100%) | Lenovo Vantage reports "Excellent" | Full gaming performance on battery | Maintain 20-80% charge habit |
| Good (70-89%) | Shows "Good" with moderate wear | Reduced gaming time on battery | Monitor, plan for future replacement |
| Poor (50-69%) | Suggests "Consider replacement" | Significant gaming time reduction | Replace soon, affects resale value |
| Critical (<50%) | "Replace now" warning | Unstable for gaming on battery | Immediate replacement required |
๐จ Emergency Response Procedures
- Battery Swelling/Puffing:
- STOP work immediately
- Do NOT puncture or apply pressure
- Place in fire-proof container
- Contact professional disposal service
- Battery Thermal Event:
- Evacuate area immediately
- Use Class D fire extinguisher or sand
- NEVER use water on lithium battery fires
- Call emergency services if uncontrollable
๐ฎ Gaming Performance Considerations
| Gaming Scenario | Battery Impact | Performance Setting | Professional Recommendation |
|---|---|---|---|
| Competitive Gaming | Always use AC power | Performance mode, full GPU power | Disable hybrid mode for max FPS |
| Casual Gaming | Battery acceptable for short sessions | Balanced mode, moderate settings | Enable battery conservation features |
| LAN Parties | Battery backup during transitions | Quiet mode for battery life | Carry multiple charged batteries if possible |
| Tournament Play | AC power mandatory | Performance mode, max cooling | Test battery disconnect during practice |
๐ Proper Battery Reconnection Guide
- Pre-Reconnection Checks:
- Verify battery terminals are clean
- Check connector for bent pins
- Ensure cable routing is correct
- Clean connection points if necessary
- Safe Reconnection:
- Connect battery before any other components
- Align connector properly (no forcing)
- Push firmly until click is heard
- Verify secure connection with gentle tug test
โป๏ธ Battery Disposal & Recycling
- Proper Disposal Methods:
- Call2Recycle drop-off locations
- Best Buy electronics recycling
- Local hazardous waste facilities
- Lenovo battery return program (check availability)
- Safety Precautions for Disposal:
- Cover terminals with electrical tape
- Store in cool, dry place until disposal
- Never dispose in regular trash
- Handle swollen batteries with extreme care
โ Final Battery Safety Checklist
- โ System completely powered down and discharged
- โ ESD protection equipment properly grounded
- โ Battery connector correctly identified
- โ Latch mechanism understood and released
- โ Connector removed safely (no wire pulling)
- โ System verified as dead (no LED activity)
- โ Workspace clear of liquids and heat sources
- โ Emergency equipment accessible (if needed)
- โ Battery handled carefully (no punctures/drops)
- โ Documentation complete (photos, notes)
6. Legion 5 Pro SSD & Storage Upgrade: Gaming Performance Optimization Guide
๐พ Gaming Laptop Storage Architecture
The Legion 5 Pro features advanced storage capabilities with dual M.2 NVMe slots, supporting lightning-fast game loading and content creation workflows. Proper storage upgrades can transform your gaming experience, reducing load times and improving overall system responsiveness for competitive advantage.
๐ SSD Compatibility & Selection Guide
- Supported Form Factors:
- M.2 2280 (22mm width, 80mm length) - PRIMARY
- M.2 2242 (42mm length) - Some secondary slots
- No 2.5" SATA bay in Legion 5 Pro
- Check your specific model's documentation
- Interface Requirements:
- PCIe Gen3 x4 (most models)
- PCIe Gen4 x4 (newer 2022+ models)
- NVMe protocol required (not SATA M.2)
- Single-sided recommended for thermal clearance
๐ Gaming SSD Recommendations
| Performance Tier | Recommended Models | Speed (Read/Write) | Gaming Benefit | Price per TB |
|---|---|---|---|---|
| Budget Gaming | WD Blue SN570, Crucial P3 | 3,500/3,000 MB/s | Good load times, reliable | $40-$60 |
| Mainstream Gaming | Samsung 970 Evo Plus, WD Black SN770 | 5,000/4,500 MB/s | Excellent game loading | $60-$90 |
| High-Performance | Samsung 980 Pro, WD Black SN850X | 7,000/6,500 MB/s | Competitive edge, streaming | $80-$120 |
| Content Creation | Sabrent Rocket 4 Plus, Seagate FireCuda 530 | 7,300/6,900 MB/s | Video editing, game recording | $100-$150 |
๐ง Step-by-Step SSD Installation
- Preparation & Safety:
- Complete battery disconnection (previous section)
- Verify ESD protection is active
- Gather tools: Phillips #00, plastic spudger
- Have thermal pad/heatsink ready if using
- Slot Identification:
- Locate M.2 slots (typically near center)
- Primary slot: Usually labeled M2_1 or similar
- Secondary slot: May be under shield or near RAM
- Note screw/standoff locations
- SSD Installation Technique:
- Insert SSD at 30-degree angle into slot
- Press down gently until screw hole aligns
- Secure with provided screw (do not overtighten)
- Install thermal pad/heatsink if included
โ๏ธ Gaming SSD Thermal Management
| Thermal Solution | Effectiveness | Gaming Impact | Installation Complexity | Recommended For |
|---|---|---|---|---|
| Factory Thermal Pad | Basic cooling | Prevents basic throttling | Easy (pre-installed) | All users |
| Aftermarket Heatsink | Excellent cooling | Maintains max speeds | Moderate | Competitive gamers, Gen4 SSDs |
| Copper Shims | Good cooling | Improves sustained performance | Easy | Enthusiasts on budget |
| Thermal Pads Only | Better than stock | Reduces throttling | Easy | Most gamers |
๐ Game Data Migration Strategies
- Clean Windows Installation:
- Download latest Windows Media Creation Tool
- Install fresh, then reinstall games
- Best for performance, eliminates bloat
- Time-intensive but optimal results
- Game Data Migration Tools:
- Steam: Use built-in game migration tool
- Epic Games: Manually move game folders
- Battle.net: Scan for existing game files
- Origin/EA App: Use game move function
โก Gaming Storage Performance Optimization
| Optimization | Configuration Method | Gaming Performance Impact | Tools Required |
|---|---|---|---|
| AHCI vs RAID Mode | BIOS setting (F2 at boot) | 20-30% difference in some games | BIOS access, Windows reinstall for RAID |
| Windows Optimization | Disable defrag, enable write caching | 5-15% improvement | Windows Admin Tools |
| Driver Updates | Latest NVMe/storage drivers | Improved stability | Lenovo Vantage, manufacturer tools |
| Game Optimization | Install games on fastest drive | Faster level loading | Game client settings |
๐ RAID 0 Configuration for Gaming
- RAID Advantages for Gaming:
- Nearly double sequential read speeds
- Faster game loading and level transitions
- Improved texture streaming in open-world games
- Better performance for game recording/streaming
- RAID Setup Procedure:
- Enter BIOS (F2 during boot)
- Change SATA operation to RAID mode
- Save and reboot, press Ctrl+I during POST
- Configure RAID 0 array with both SSDs
Warning: RAID 0 offers no redundancy - backup important data regularly
๐ฎ Smart Game Installation Strategy
| Game Type | Recommended Drive | Reasoning | Performance Impact |
|---|---|---|---|
| Competitive FPS | Fastest SSD (primary) | Fast map loading, asset streaming | High (get in game faster) |
| Open World RPG | Large capacity SSD | Texture streaming, fast travel | Very High (reduced pop-in) |
| Strategy Games | Any SSD | Less dependent on storage speed | Medium (faster level loading) |
| MMOs | Secondary SSD | Large size, frequent updates | Medium (zone transitions) |
๐ SSD Troubleshooting Guide
| Issue | Potential Cause | Diagnostic Steps | Solution |
|---|---|---|---|
| SSD Not Detected | Incompatible, loose connection, BIOS setting | Check BIOS, try different slot, verify compatibility | Update BIOS, reseat SSD, check compatibility |
| Slow Performance | Thermal throttling, driver issues, wrong mode | Check temperatures, update drivers, verify AHCI/RAID | Add heatsink, update drivers, BIOS settings |
| BSOD/Crashes | Driver conflicts, firmware issues, hardware fault | Check Event Viewer, update firmware, test in another system | Clean driver install, firmware update, replace if faulty |
| Disappearing Drive | Loose connection, power management, dying drive | Reseat connection, disable power saving, run diagnostics | Secure connection, power settings, replace if failing |
๐ Gaming Storage Capacity Planning
- Modern Game Sizes:
- Call of Duty: Warzone 2.0 - 125GB+
- Red Dead Redemption 2 - 150GB
- Microsoft Flight Simulator - 170GB+
- Typical AAA game: 50-100GB
- Recommended Capacities:
- Casual gamer: 512GB-1TB
- Mainstream gamer: 1TB-2TB
- Serious gamer/streamer: 2TB+
- Content creator: 4TB+ (multiple drives)
โ Performance Validation & Benchmarking
- Synthetic Benchmarks:
- CrystalDiskMark for speed testing
- AS SSD Benchmark for real-world simulation
- ATTO Disk Benchmark for transfer size analysis
- PCMark 10 Storage Test for application performance
- Real-World Gaming Tests:
- Time game load screens with stopwatch
- Test fast travel in open-world games
- Measure level transition times
- Compare before/after upgrade results
๐ฎ Future-Proofing Considerations
- DirectStorage Ready:
- Windows 11 feature for faster game loading
- Requires Gen4 SSD and compatible GPU
- Future games will utilize this technology
- Consider Gen4 SSD if your model supports it
- Technology Evolution:
- PCIe Gen5 coming (future-proof with Gen4)
- QLC vs TLC NAND considerations
- DRAM cache importance for gaming
- TBW (Terabytes Written) ratings for longevity
7. Legion 5 Pro DDR4 RAM Upgrade: Gaming Performance & Memory Optimization
๐ง Gaming Laptop RAM Fundamentals
RAM is one of the most impactful upgrades for gaming performance, especially in the Legion 5 Pro. Proper memory configuration can significantly improve frame rates, reduce stuttering, and enhance overall gaming smoothness. This guide covers professional installation techniques and optimization strategies for competitive gaming.
โ๏ธ Legion 5 Pro RAM Specifications
| Specification | Details | Gaming Impact | Upgrade Limitations |
|---|---|---|---|
| Memory Type | DDR4 SO-DIMM (260-pin) | Standard for gaming laptops | Not compatible with DDR5 |
| Speed Support | Up to 3200MHz (JEDEC) | Affects minimum FPS | XMP profiles may not work |
| Capacity per Slot | Up to 32GB per SO-DIMM | 64GB maximum system capacity | Check BIOS compatibility |
| Channels | Dual-channel architecture | Critical for gaming performance | Must populate correctly |
| Timings | CL22 typical (JEDEC) | Lower = better gaming latency | Limited BIOS adjustment |
๐ Gaming RAM Recommendations
| Gamer Profile | Recommended Configuration | Approximate Cost | Performance Improvement | Best For Games Like |
|---|---|---|---|---|
| Casual Gamer | 16GB (2x8GB) DDR4 3200 | $40-$60 | Good for most games | Fortnite, Apex Legends |
| Competitive Gamer | 32GB (2x16GB) DDR4 3200 CL18 | $80-$120 | Eliminates stuttering | VALORANT, CS2, Warzone |
| Streamer/Content Creator | 64GB (2x32GB) DDR4 3200 | $150-$220 | Smooth streaming + gaming | Streaming + AAA games |
| Future-Proof Enthusiast | 32GB (2x16GB) DDR4 3200 CL16 | $100-$160 | Best latency for gaming | All current and future titles |
๐ RAM Compatibility Verification
- Lenovo-Certified Modules:
- Samsung M471A series
- SK hynix HMA82GS6 series
- Micron (Crucial) CT series
- Check Lenovo Support Site for specific compatibility
- Verification Tools:
- CPU-Z for current configuration
- Crucial System Scanner for compatibility
- Lenovo Vantage for system information
- Check BIOS for supported speeds
๐ง Professional RAM Installation
- Safety First Protocol:
- Complete battery disconnection (mandatory)
- ESD wrist strap properly grounded
- Clean, organized workspace
- Document existing configuration with photos
- Slot Configuration Strategy:
- Identify slot numbering (typically marked on motherboard)
- For dual-channel: Use both slots (A and B)
- Remove existing modules if upgrading
- Note orientation (notch alignment)
- Module Installation Technique:
- Release side latches (push outward simultaneously)
- Align notch in module with key in slot
- Insert at 30-degree angle, then press down firmly
- Listen for audible click from both latches
- Verify both latches are fully engaged
โก Dual-Channel Gaming Benefits
| Game Type | Single-Channel Impact | Dual-Channel Improvement | Real Gaming Difference |
|---|---|---|---|
| Competitive FPS | Higher frame time variance | 15-25% more stable FPS | Smoother aiming, less stutter |
| Open World RPG | Texture pop-in, loading hitches | 20-30% faster asset streaming | Seamless world traversal |
| Strategy Games | AI calculation delays | 10-20% faster turn processing | Smoother late-game performance |
| Simulation Games | Physics calculation bottlenecks | 15-25% more complex simulations | Higher object counts, better physics |
โ๏ธ BIOS Configuration & Optimization
- Accessing BIOS (F2 during boot):
- Navigate to "Configuration" or "Advanced"
- Check memory speed detection
- Verify dual-channel operation
- Save and exit to test
- Performance Settings:
- Memory Frequency: Set to maximum supported
- Gear Mode: May have Gear 1/Gear 2 options
- Power Management: Disable for maximum performance
- XMP/EXPO: Enable if supported (check compatibility)
๐ฎ Gaming Performance Validation
| Test Type | Professional Tool | What to Measure | Acceptable Results | Gaming Impact |
|---|---|---|---|---|
| Synthetic Benchmark | AIDA64 Memory Benchmark | Read/Write/Copy speeds, latency | Within 5% of expected performance | Predicts real-world performance |
| Stability Test | MemTest86 | Memory errors, stability | 0 errors after 4 passes | Ensures reliable gaming sessions |
| Real Game Test | Built-in game benchmarks | FPS, 1% lows, frame times | Improved minimum FPS | Actual gaming improvement |
| Latency Test | LatencyMon, CapFrameX | System responsiveness | Lower DPC latency | Smoother gaming experience |
โ๏ธ Capacity vs Speed Tradeoffs for Gaming
| Gaming Scenario | Priority | Recommended Configuration | Reasoning |
|---|---|---|---|
| Competitive Esports | Speed > Capacity | 16GB 3200MHz CL16 | Lower latency = better responsiveness |
| AAA Gaming | Capacity = Speed | 32GB 3200MHz CL18 | Modern games use 12-16GB+ |
| Streaming + Gaming | Capacity > Speed | 32GB+ 3200MHz | OBS + game need 24GB+ |
| Modded Games | Capacity Critical | 32GB-64GB 3200MHz | Mods can double memory usage |
๐ RAM Troubleshooting Guide
| Symptom | Potential Cause | Diagnostic Steps | Professional Solution |
|---|---|---|---|
| System Won't Boot | Incompatible RAM, improper installation | Reset CMOS, test with single module | Verify compatibility, re-seat modules |
| Blue Screen Errors | Memory errors, timing issues | Run MemTest86, check Event Viewer | Adjust BIOS settings, test each module |
| Limited Capacity Detected | 32-bit OS, BIOS limitation, bad module | Check OS version, test modules individually | Upgrade to 64-bit OS, replace faulty module |
| Performance Below Expected | Single-channel mode, speed mismatch | Verify slot population, check BIOS settings | Reconfigure for dual-channel, match speeds |
๐ฏ Advanced Gaming Optimization Tips
- Game-Specific Memory Management:
- VALORANT/CS2: 16GB sufficient, prioritize low latency
- Warzone 2.0: 32GB recommended, helps with large maps
- Microsoft Flight Simulator: 32GB+ for smooth experience
- Modded Skyrim/Fallout: 32GB-64GB for heavy modding
- Windows Optimization:
- Disable page file if you have 32GB+ RAM
- Adjust visual effects for performance
- Use High Performance power plan
- Close background applications before gaming
๐ฎ Future-Proofing Strategy
- Capacity Planning:
- 2023-2024: 16GB minimum, 32GB recommended
- 2025-2026: 32GB minimum, 64GB for enthusiasts
- Consider game trends (increasing requirements)
- Plan for next 3-4 years of gaming
- Technology Considerations:
- DDR4 will be standard for several more years
- DDR5 transition happening but slowly
- Invest in quality modules for longevity
- Consider resale value when upgrading
โ๏ธ RAM Cooling & Thermal Management
| Cooling Method | Effectiveness | Gaming Benefit | Installation Notes |
|---|---|---|---|
| Stock Thermal Pads | Basic | Prevents overheating | Usually pre-installed |
| Aftermarket Thermal Pads | Good | Lowers temperatures 5-10ยฐC | Easy to install, various thicknesses |
| Heat Spreaders | Very Good | Improves stability during long sessions | May not fit in all laptops |
| Liquid Metal Pads | Excellent | Best thermal transfer | Advanced users only, conductive |
โ Performance Validation Checklist
- โ RAM detected at correct capacity in BIOS
- โ Running in dual-channel mode (CPU-Z confirmation)
- โ Operating at advertised speed (Task Manager/CPU-Z)
- โ MemTest86 passes with 0 errors (4 passes minimum)
- โ Game benchmarks show improved 1% lows
- โ No system instability or crashes during gaming
- โ Temperatures stable during extended sessions
- โ Windows reports full capacity available
8. Legion 5 Pro Cooling System: Professional Cleaning & Thermal Repasting Guide
โ๏ธ Why Cooling Matters for Gaming Performance
The Legion 5 Pro's cooling system is engineered for extreme gaming loads, but dust accumulation and degraded thermal paste can cause thermal throttling, reducing FPS and system longevity. Proper maintenance can restore 10-20ยฐC temperature reductions, translating to higher sustained clock speeds and smoother gaming experiences.
๐ฌ Legion 5 Pro Cooling System Architecture
| Component | Specifications | Gaming Function | Maintenance Impact |
|---|---|---|---|
| Heat Pipes | 4-5 copper heat pipes | Distributes heat from CPU/GPU | Critical - must not be bent |
| Dual Fans | 90mm fans, 77 ultra-thin blades each | Maximum airflow at lower noise | High - dust reduces efficiency |
| Heatsink Array | 124 cooling fins per fan | Increases surface area for cooling | Very High - clogging common |
| Vapor Chamber | High-end models only | Superior heat distribution | Advanced - requires careful handling |
| Airflow Design | Quad-vent exhaust system | Efficient hot air removal | High - vents must stay clear |
๐ Gaming Laptop Maintenance Schedule
| Maintenance Task | Frequency | Gaming Performance Impact | Estimated Time | Tools Required |
|---|---|---|---|---|
| External Vent Cleaning | Monthly | Prevents 5-10ยฐC increases | 5 minutes | Compressed air |
| Internal Dust Removal | Every 3-6 months | Restores 10-15ยฐC cooling | 30-45 minutes | Full disassembly tools |
| Thermal Paste Replacement | Every 12-18 months | Improves 5-15ยฐC temps | 60-90 minutes | Thermal materials |
| Complete Cooling Service | Annually | Maximum performance restoration | 2-3 hours | Professional tool kit |
| Fan Bearing Inspection | Every 6 months | Prevents fan failure | 15 minutes | Listening, visual check |
๐ง Cooling System Disassembly Preparation
- Safety First Protocol:
- Complete battery disconnection (mandatory)
- ESD protection verified and active
- Document thermal performance baseline
- Gather professional thermal materials
- Accessing Cooling System:
- Remove bottom panel (refer to earlier section)
- Disconnect fan power cables (note orientation)
- Remove heatsink screws in criss-cross pattern
- Carefully lift heatsink assembly (avoid bending pipes)
๐งช Gaming-Grade Thermal Materials Guide
| Material Type | Legion 5 Pro Application | Performance Rating | Gaming Impact | Top Brands |
|---|---|---|---|---|
| CPU/GPU Thermal Paste | Pea method (5mm dot) or X pattern | Critical for heat transfer | 10-15ยฐC improvement possible | Thermal Grizzly, Arctic, Noctua |
| VRM Thermal Pads | 0.5mm-1.5mm depending on location | Prevents VRM throttling | 5-10ยฐC VRM temperature reduction | Gelid Solutions, Thermalright |
| Memory Thermal Pads | Thin application over memory chips | Improves stability | Reduces memory errors in games | Fujipoly, ARCTIC |
| SSD Thermal Pads | 1.0mm for controller + NAND | Prevents thermal throttling | Maintains fast game loading | Stock Lenovo or quality aftermarket |
๐งน Professional Cleaning Protocol
- Heatsink Cleaning:
- Use soft brush to loosen dust from fins
- Blow compressed air through fins (inside to out)
- Clean heat pipe surfaces with isopropyl alcohol
- Inspect for bent fins and straighten carefully
- Fan Maintenance:
- Hold fan blades while using compressed air
- Clean between blades with soft brush
- Check bearings for wear or noise
- Lubricate if accessible (some models sealed)
- Component Surface Preparation:
- Remove old thermal paste with 99% isopropyl
- Use lint-free wipes (coffee filters work well)
- Clean CPU/GPU dies thoroughly
- Ensure surfaces are completely dry
๐ฏ Professional Thermal Application Techniques
| Application Method | Best For | Pros | Cons | Gaming Recommendation |
|---|---|---|---|---|
| Pea Method | Beginners, most CPUs | Simple, reliable | May not cover entire die | Good for most gamers |
| X Pattern | Experienced users | Good coverage | Risk of air bubbles | Recommended for gaming laptops |
| Spread Method | Perfectionists | Perfect coverage | Risk of uneven application | Advanced users only |
| Dot Array | Large dies, GPUs | Even distribution | Time-consuming | Good for Legion 5 Pro GPU |
โก Cooling System Performance Optimization
- Pressure Optimization:
- Screw tightening sequence: Criss-cross pattern
- Torque: Finger tight + ยผ turn (do not overtighten)
- Apply pressure gradually and evenly
- Check paste spread after reassembly if possible
- Airflow Management:
- Ensure laptop sits on hard, flat surface
- Use laptop stand with ventilation
- Keep intake and exhaust vents unobstructed
- Consider external cooling pad for marathon sessions
๐ Gaming Thermal Monitoring & Diagnostics
| Monitoring Tool | Key Metrics | Gaming Thresholds | Professional Action Points |
|---|---|---|---|
| HWiNFO64 | CPU/GPU temps, clock speeds, throttling | CPU: 95ยฐC max, GPU: 87ยฐC max | Thermal paste replacement if >90ยฐC |
| MSI Afterburner | Real-time in-game monitoring | Thermal throttling <5% of runtime | Cleaning needed if throttling >10% |
| Lenovo Vantage | Fan speeds, performance modes | Fans should ramp appropriately | Clean if fans run at max unnecessarily |
| 3DMark | Performance under sustained load | Score within 5% of expected | Service if score drops >10% |
๐ฎ Game-Specific Thermal Profiles
| Game Genre | Typical Temperatures | Cooling Demands | Optimization Strategy |
|---|---|---|---|
| Competitive Esports | CPU: 75-85ยฐC, GPU: 70-80ยฐC | Sustained high clocks | Performance mode, maximize airflow |
| AAA Single-Player | CPU: 85-92ยฐC, GPU: 80-87ยฐC | Peak thermal load | Balanced mode, monitor hotspots |
| Open World Games | CPU: 80-88ยฐC, GPU: 78-85ยฐC | Sustained rendering load | Undervolt CPU, optimize settings |
| Strategy/Simulation | CPU: 90-95ยฐC, GPU: 70-78ยฐC | CPU-intensive | CPU-focused cooling, limit boost |
๐ Cooling System Troubleshooting
| Symptom | Potential Cause | Diagnostic Procedure | Professional Solution |
|---|---|---|---|
| Excessive Fan Noise | Dust accumulation, bearing wear, imbalance | Audio analysis, visual inspection | Clean thoroughly, replace fans if worn |
| Thermal Throttling | Poor thermal interface, dust, pump-out effect | Benchmark monitoring, temperature logging | Repaste with quality compound, clean system |
| Hot Spots | Uneven pressure, dried paste, poor contact | Thermal imaging, pressure testing | Reinstall heatsink with proper torque sequence |
| Intermittent Overheating | Fan failure, blocked vents, degraded paste | Fan speed monitoring, airflow testing | Replace failed fans, ensure clear airflow paths |
๐ก๏ธ Gaming Preventive Maintenance Program
- Regular Maintenance Tasks:
- Monthly: External vent cleaning with compressed air
- Quarterly: Internal inspection through bottom panel
- Semi-annual: Full cleaning if heavy gaming use
- Annual: Complete thermal system service
- Environmental Considerations:
- Keep gaming area clean to reduce dust
- Avoid gaming on soft surfaces (beds, couches)
- Use air purifier if in dusty environment
- Monitor room temperature during gaming sessions
โ Cooling Performance Validation
- Pre-Service Baseline:
- Record idle and gaming temperatures
- Document benchmark scores (Cinebench, 3DMark)
- Note fan noise levels and patterns
- Capture thermal throttling percentages
- Post-Service Verification:
- Verify 5-15ยฐC temperature reduction under load
- Confirm benchmark score improvements
- Test fan operation across all speed ranges
- Validate system stability in extended gaming sessions
๐ฐ Gaming Performance ROI Analysis
| Service Investment | Cost | Performance Improvement | Gaming Benefit | ROI Period |
|---|---|---|---|---|
| Professional Thermal Repaste | $20-$40 (materials) | 10-15ยฐC temperature reduction | Higher sustained FPS | Immediate |
| Complete Cleaning Service | $0-$50 (tools) | 10-20ยฐC improvement | Reduced thermal throttling | Immediate |
| Premium Thermal Materials | $30-$60 | 5-10ยฐC better than stock | Longer boost durations | 3-6 months |
| Cooling Pad/Stand | $20-$100 | 3-8ยฐC external cooling | Comfort, additional cooling | 1-3 months |
9. Legion 5 Pro Keyboard & Trackpad: Gaming Peripheral Service & Replacement Guide
โจ๏ธ Gaming Input Device Architecture
The Legion 5 Pro features premium TrueStrike gaming keyboard and precision trackpad designed for competitive gaming and content creation. Professional service requires understanding the complex integration between these input devices and the laptop's gaming-focused chassis.
๐ง TrueStrike Keyboard Specifications
| Feature | Legion 5 Pro Details | Gaming Benefit | Service Complexity |
|---|---|---|---|
| Keyboard Type | TrueStrike with soft-landing switches | Quiet yet tactile feedback | Advanced (requires full disassembly) |
| Key Travel | 1.5mm with soft-landing mechanism | Fast actuation for gaming | Standard laptop key mechanisms |
| Backlighting | White LED (standard) or 4-zone RGB | Visibility in low light | Medium (RGB requires more cables) |
| Anti-Ghosting | N-key rollover (varies by model) | Multiple simultaneous key presses | N/A (software/hardware feature) |
| Spill Resistance | Basic drainage system | Protection against minor spills | Affects disassembly approach |
๐ฑ๏ธ Precision Trackpad Specifications
- Surface & Technology:
- Glass surface with Windows Precision drivers
- 115mm x 75mm dimensions (standard size)
- Multi-touch gesture support
- Integrated physical click buttons
- Gaming Integration:
- Separate from keyboard assembly
- Dedicated trackpad controller board
- Multiple ribbon cable connections
- Palm rejection for gaming use
๐ Gaming Input Diagnostic Procedure
| Symptom | Diagnostic Test | Gaming Tools | Likely Cause | Repair Complexity |
|---|---|---|---|---|
| Non-responsive Keys | Keyboard test utility, in-game testing | KeyTest, built-in keyboard tester | Damaged switch, debris, ribbon cable | Medium to High |
| Backlight Failure | LED test, Lenovo Vantage check | RGB control software | LED failure, controller issue, cable | Medium |
| Trackpad Issues | Windows calibration, gesture test | Windows settings, drawing test | Driver issue, ribbon cable, hardware | Medium to High |
| Sticky/Stuck Keys | Physical inspection, cleaning test | Keycap puller, compressed air | Debris, spilled liquid, mechanism | Low to Medium |
๐ง Professional Keyboard Replacement
- Pre-Replacement Preparation:
- Complete data backup and power down
- Disconnect battery (mandatory safety step)
- Document keyboard layout and backlight settings
- Verify replacement part compatibility
- Chassis Disassembly Sequence:
- Remove bottom cover (15+ Phillips #00 screws)
- Disconnect battery and discharge system
- Remove palmrest assembly (additional 20+ screws)
- Carefully lift palmrest, noting cable connections
- Keyboard Removal Technique:
- Locate keyboard retention clips (8-12 around perimeter)
- Release clips using plastic spudger (work from edges inward)
- Disconnect backlight and data ribbon cables
- Lift keyboard from chassis at 45-degree angle
๐ฑ๏ธ Trackpad Replacement Procedure
- Trackpad Access:
- Follow keyboard removal procedure for access
- Trackpad is mounted under palmrest assembly
- Note: Some models have integrated trackpad assembly
- Document cable routing before disconnection
- Component Removal:
- Remove trackpad mounting screws (4-6 total)
- Disconnect ribbon cable(s) using latch mechanism
- Lift trackpad assembly carefully (glass is fragile)
- Clean mounting area before installing replacement
๐ฆ Gaming Parts Procurement Guide
| Component Source | Gaming Advantages | Considerations | Lead Time | Gamer Rating |
|---|---|---|---|---|
| Lenovo Genuine | Guaranteed compatibility, full RGB support | Highest cost, may require service center | 7-14 business days | Excellent (for warranty) |
| Authorized Resellers | Good availability, moderate cost | Verify authenticity, limited warranty | 3-7 business days | Good (balance of cost/quality) |
| Third-Party Gaming | Lower cost, immediate availability | RGB compatibility risks, variable quality | 1-3 business days | Fair (budget option) |
| Refurbished/Used | Cost-effective, environmentally friendly | Cosmetic imperfections, limited testing | Variable | Good (for out-of-warranty) |
๐ Professional Reassembly Guide
- Keyboard Installation:
- Align keyboard with chassis mounting points
- Connect ribbon cables before final seating
- Engage retention clips (listen for audible clicks)
- Test key function before completing reassembly
- Trackpad Installation:
- Ensure trackpad sits flush in mounting area
- Connect ribbon cable(s) with proper orientation
- Secure with mounting screws (even pressure)
- Test click mechanism and tracking
๐ฎ Gaming Performance Testing
| Test Category | Testing Procedure | Gaming Tools | Acceptance Criteria | Professional Documentation |
|---|---|---|---|---|
| Keyboard Functional | All keys register, correct key codes | Keyboard tester, in-game testing | 100% key functionality | Key test report, screenshots |
| Backlight Testing | All LEDs functional, brightness control | Lenovo Vantage, keyboard shortcuts | Consistent illumination | Backlight settings, photos |
| Trackpad Precision | All gestures, palm rejection, precision | Windows settings, drawing test | Smooth tracking, all gestures | Calibration report, photos |
| Gaming Integration | In-game performance, macros | Actual game testing (FPS, etc.) | No input lag, proper response | Game performance logs |
๐ฏ Gamer Optimization & Customization
- Keyboard Customization for Gaming:
- Configure backlight profiles for different games
- Set up macro keys for MMO or competitive games
- Adjust key repeat rates for rapid-fire needs
- Create game-specific profiles in Lenovo Vantage
- Trackpad Optimization:
- Configure gesture settings for productivity
- Adjust palm rejection sensitivity for gaming
- Set scrolling and pointer speeds for precision
- Disable trackpad during gaming (use external mouse)
๐ก๏ธ Gaming Preventive Maintenance
| Maintenance Task | Frequency | Gaming Procedure | Tools Required | Performance Impact |
|---|---|---|---|---|
| Keyboard Cleaning | Monthly | Compressed air, isopropyl wipes | Keyboard vacuum, cleaning gel | Prevents key sticking |
| Trackpad Calibration | Quarterly | Windows calibration, driver updates | Calibration software | Maintains precision |
| Backlight Inspection | Semi-annual | LED test, brightness uniformity | Visual inspection | Ensures visibility |
| Mechanical Inspection | Annual | Key switch test, travel measurement | Switch tester | Prevents switch failure |
๐ Gaming Warranty & Service Considerations
- Lenovo Legion Ultimate Support:
- Standard 1-year warranty (check your coverage)
- Accidental Damage Protection available
- Check warranty status before disassembly
- Consider professional service for in-warranty units
- Gaming-Specific Service Notes:
- RGB lighting repairs may require special tools
- Keycap replacements available individually
- Trackpad glass can be replaced separately
- Document all repairs for future reference
๐ Gaming Input Troubleshooting Flowchart
- Start: Identify symptom (key failure, RGB issue, trackpad problem)
- Software Check: Update drivers, check Lenovo Vantage
- External Test: Test with external keyboard/mouse
- Physical Inspection: Check for damage, debris, loose connections
- Component Test: Test in another system if possible
- Repair Decision: Determine repair feasibility vs replacement
- Documentation: Record findings and actions
๐ฐ Gaming Performance ROI Analysis
| Service Scenario | Cost (Parts + Time) | Gaming Impact | Tournament Readiness | Total Value |
|---|---|---|---|---|
| Keyboard Replacement | $150-$300 | Restores full control | Critical for competition | $500+ (tournament value) |
| Trackpad Replacement | $100-$200 | Mobile gaming restored | Important for LAN events | $300+ (mobility value) |
| RGB Repair | $50-$150 | Aesthetic, streaming | Streaming/recording | $200+ (content value) |
| Preventive Maintenance | $20-$50 annually | Prevents downtime | Proactive readiness | Priceless (reliability) |
๐ Competitive Gaming Tips
- Tournament Preparation:
- Carry spare keycaps for frequently used keys (WASD, spacebar)
- Test keyboard response times before events
- Have external keyboard as backup for LAN events
- Document keyboard settings for quick restoration
- Streamer Considerations:
- RGB lighting synchronization for branding
- Macro keys for scene switching in OBS
- Quiet keyboard for microphone quality
- Backup input devices for live streams
10. Maximizing Legion 5 Pro Resale Value: Gaming Laptop Upgrade & Service ROI Guide
๐ฐ Gaming Laptop Resale Value Strategy
The Legion 5 Pro represents a significant investment for gamers, and strategic upgrades can substantially increase its resale value. Professional service documentation and gaming-focused improvements appeal to both enthusiast buyers on platforms like SellLaptopBack and SellLaptopBack, as well as institutional buyers (.gov, .edu).
๐ Gaming Laptop Resale Market Analysis
| Resale Channel | Target Buyers | Value Factors | Gaming Premium | Documentation Needs |
|---|---|---|---|---|
| SellLaptopBack | Gaming enthusiasts, refurbishers | Upgrade history, thermal performance | 20-35% above market | Benchmark results, service logs |
| SellLaptopBack | Budget gamers, students | Condition, recent upgrades | 15-25% above market | Upgrade receipts, photos |
| .Gov/.Edu Markets | Schools, government offices | Reliability, service history | 10-20% above market | Professional service records |
| Gaming Communities | Enthusiasts, streamers | Performance tuning, cooling | 25-40% above market | Gaming benchmarks, thermal data |
๐ Gaming Upgrade ROI Analysis
| Upgrade/Service | Cost | Value Added | ROI | Gamer Appeal | Best Selling Platform |
|---|---|---|---|---|---|
| RAM to 32GB | $80-$120 | $150-$200 | 80-120% | Very High (streamers) | SellLaptopBack |
| 1TB NVMe SSD | $60-$100 | $120-$180 | 100-150% | Extreme (all gamers) | Both platforms |
| Professional Thermal Repaste | $20-$40 | $80-$120 | 200-300% | Very High (enthusiasts) | SellLaptopBack |
| Wi-Fi 6E Upgrade | $30-$50 | $50-$80 | 60-100% | Medium (online gamers) | SellLaptopBack |
| Complete Cleaning Service | $0-$20 (time) | $60-$100 | 300-500% | High (all buyers) | Both platforms |
๐ Gaming Documentation Package
- Essential Gaming Documentation:
- Original purchase receipt with specs
- Complete upgrade history with dates
- Thermal repaste documentation (before/after temps)
- Lenovo warranty status and remaining coverage
- Performance Documentation:
- 3DMark Time Spy scores
- Cinebench R23 multi-core scores
- Gaming benchmarks (FPS in popular titles)
- Thermal performance under load
๐ Platform-Specific Optimization
| Platform | Listing Strategy | Keywords to Use | Photo Requirements | Price Premium |
|---|---|---|---|---|
| SellLaptopBack | Highlight professional upgrades | "Gaming Optimized", "Professionally Serviced" | Benchmark screenshots, internal photos | 25-35% |
| SellLaptopBack | Emphasize condition and recent work | "Like New", "Fresh Thermal Paste" | Clean exterior, RGB lighting demo | 15-25% |
| Gaming Forums | Technical details, gaming performance | "Esports Ready", "Thermal Optimized" | Gameplay screenshots, temperature logs | 20-30% |
| .Gov/.Edu Listings | Professional maintenance, reliability | "Professionally Maintained", "Reliable" | Service records, warranty documents | 10-20% |
โจ Gaming Laptop Cosmetic Preparation
- Deep Cleaning for Gamers:
- Clean keyboard keys with isopropyl alcohol
- Polish display with microfiber cloth
- Remove stickers/residue carefully
- Clean vents and ports thoroughly
- Cosmetic Repairs:
- Replace worn rubber feet
- Buff out minor scratches with plastic polish
- Ensure all logos are intact and clean
- Test all RGB lighting zones
๐ Gaming Data Sanitization Protocol
- Game Data Management:
- Backup Steam/Epic game saves to cloud
- Export game settings and configurations
- Remove personal accounts and logins
- Factory reset Lenovo Vantage settings
- Secure Data Wiping:
- Use NVMe secure erase through BIOS
- Perform multiple-pass wipe for HDDs
- Remove BitLocker encryption keys
- Document wiping method for buyers
๐ Essential Gaming Benchmarks to Include
| Benchmark Test | Purpose | Target Results (RTX 3060) | Target Results (RTX 3070) | Selling Impact |
|---|---|---|---|---|
| 3DMark Time Spy | Overall gaming performance | 8,500-9,000 | 10,500-11,000 | High (technical buyers) |
| Cinebench R23 Multi | CPU performance | 12,500-13,500 | 12,500-13,500 | Medium (content creators) |
| Shadow of the Tomb Raider | Real game performance | 80-90 FPS (High) | 100-110 FPS (High) | Very High (all gamers) |
| Temperature Under Load | Cooling efficiency | CPU: <85ยฐC, GPU: <80ยฐC | CPU: <87ยฐC, GPU: <82ยฐC | Extreme (enthusiasts) |
๐ต Gaming Laptop Pricing Strategy
| Configuration Level | Original MSRP | Current Market Value | After-Upgrade Value | Platform Recommendation |
|---|---|---|---|---|
| Base (RTX 3060, 16GB) | $1,400-$1,600 | $800-$1,000 | $1,000-$1,200 | SellLaptopBack |
| Mid (RTX 3070, 16GB) | $1,700-$1,900 | $1,000-$1,200 | $1,300-$1,500 | Both platforms |
| High (RTX 3070, 32GB) | $1,900-$2,100 | $1,200-$1,400 | $1,500-$1,800 | SellLaptopBack |
| Fully Upgraded | $2,200+ | $1,400-$1,600 | $1,700-$2,000 | Gaming communities |
๐ Gaming Warranty & Transfer Guide
- Lenovo Warranty Transfer:
- Check remaining warranty at Lenovo support site
- Gather original purchase documentation
- Contact Lenovo for transfer process if needed
- Include warranty details in listing
- Third-Party Warranty Options:
- SquareTrade for gaming equipment
- Upsie for laptop extended warranties
- Consider offering 30-day personal warranty
- Document any existing accidental damage coverage
๐ค Gaming Laptop Negotiation Strategy
- Preparation Phase:
- Research comparable gaming laptop listings
- Prepare documentation package for serious buyers
- Set minimum acceptable price based on investment
- Identify unique gaming value propositions
- Negotiation Tactics for Gamers:
- Highlight gaming performance improvements
- Provide benchmark comparisons vs stock units
- Offer bundle with gaming accessories
- Consider partial trades for gaming equipment
๐ฆ Gaming Laptop Shipping Protocol
| Platform | Shipping Method | Packaging Requirements | Insurance Coverage | Gamer Tips |
|---|---|---|---|---|
| SellLaptopBack | Prepaid labels, scheduled pickup | Original box preferred, double-box | Full value coverage | Include accessory boxes if available |
| SellLaptopBack | Free prepaid shipping | Secure packaging, adequate padding | Included up to quoted value | Photograph packaging process |
| Direct Sales | Buyer arranges or local pickup | Professional packaging essential | Purchase separately | Offer local demo for serious buyers |
โ Final Gaming Resale Checklist
- โ Complete documentation package prepared
- โ Gaming benchmarks recorded and saved
- โ System fully cleaned and cosmetically prepared
- โ All personal data removed and drives wiped
- โ Warranty information gathered and organized
- โ Professional photos taken (exterior, interior, benchmarks)
- โ Pricing researched and competitive
- โ Chosen platform optimized for gaming sales
- โ Shipping materials gathered and ready
- โ Backup plan for unsold unit prepared
Need to Sell Your Lenovo Laptop? Get Instant Cash!
If your Lenovo Legion 5 Pro (or other Legion gaming laptop) has performance issues or you're upgrading to a newer model, we offer competitive cash payouts for your device. We buy broken, used, and refurbished Lenovo Legion laptopsโincluding all Legion 5 Pro configurationsโwith free insured shipping and no-hassle evaluations.
Sell Popular Lenovo Models Now: