On this page
- 1. Understanding Your Gigabyte G5: Models, Specifications & Upgrade Potential
- 🎯 Why Knowing Your G5 Model is Crucial for Successful Upgrades
- 🔍 How to Identify Your Gigabyte G5 Model
- 📊 Gigabyte G5 Generation Comparison
- 💪 Gigabyte G5 Upgrade Potential Analysis
- ⚡ Key Gigabyte G5 Features & Gaming Performance
- 🔧 Detailed Specification Reference
- 🌐 Essential Compatibility Resources
- ✅ Pre-Upgrade Assessment Checklist
- ➡️ Ready to Begin Your Gigabyte G5 Upgrade Journey
- 2. Essential Tools & Workspace Setup for Gigabyte G5 Repairs
- 🛠️ Why Professional Tools Ensure Successful Gigabyte G5 Repairs
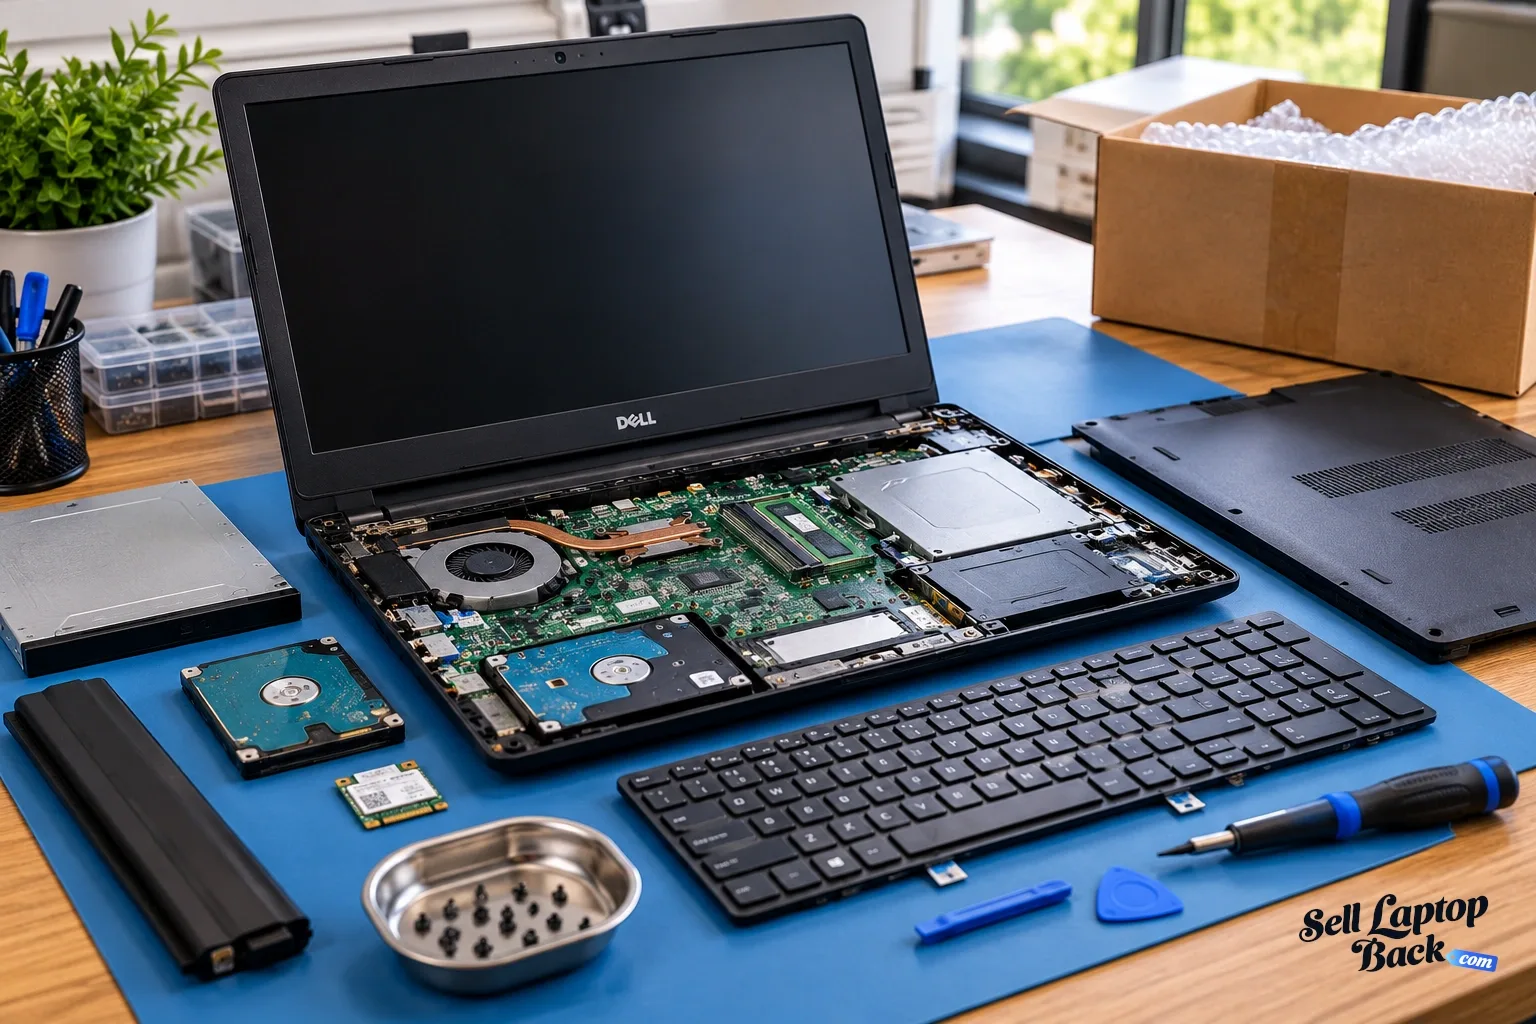
- 🔧 Gigabyte G5 Specific Tool Requirements
- 📋 Complete Essential Toolkit Breakdown
- 🏗️ Professional Workspace Setup Standards
- 💰 Tool Investment vs. Return Analysis
- ⭐ Recommended Tool Brands for Gaming Laptop Repairs
- ⚡ Gigabyte G5 Specific Challenges & Solutions
- 🧴 Essential Consumable Supplies
- ⚠️ Critical Safety Equipment
- 🗂️ Professional Organization System
- 🚫 Common Tool Mistakes & Prevention
- 🎒 Mobile Workspace Setup (Alternative)
- 🌐 Gigabyte G5 Specific Resources & Support
- ✅ Professional Workspace Setup Checklist
- ➡️ Ready for Safe Gigabyte G5 Disassembly
- 3. Safety Preparation: Battery Disconnection & ESD Protection
- ⚠️ Why Safety Protocols Prevent Costly Damage to Your Gigabyte G5
- ⚡ Electrostatic Discharge (ESD) Protection Protocol
- 🔋 Step-by-Step Power Down & Battery Disconnection
- 🔌 Gigabyte G5 Battery Disconnection Methods
- ⚡ Professional ESD Grounding Techniques
- 🔋 Lithium-Ion Battery Safety Hazards & Prevention
- 👐 Safe Component Handling Protocol
- 🏗️ Professional Workspace Safety Setup
- 🚫 Common Safety Mistakes & Consequences
- 🔌 Gigabyte G5 Battery Connector Types & Removal
- ⚡ Residual Power Drain Procedures
- ✅ Safety Checkpoints Before Starting Work
- ✅ Safety Preparation Completion Checklist
- ➡️ Ready for Gigabyte G5 Disassembly
- 4. Bottom Cover Removal: Accessing Internal Components
- 🔓 Why Proper Bottom Cover Removal Preserves Your Gigabyte G5's Value
- 🔧 Pre-Removal Preparation & Workspace Setup
- 🔩 Gigabyte G5 Bottom Cover Screw Identification & Map
- 🔄 Professional Screw Removal Protocol
- 🔧 Professional Clip Release Technique
- 🔧 Step-by-Step Bottom Cover Removal Procedure
- 🗺️ Gigabyte G5 Internal Component Identification
- 🚫 Common Bottom Cover Removal Mistakes
- 🔧 Troubleshooting Difficult Removal Scenarios
- 🔍 Post-Removal Internal Inspection Protocol
- 💵 Removal Quality & Resale Value Impact
- ⏱️ Professional Time Management
- ✅ Safety Checkpoints During Removal
- ✅ Bottom Cover Removal Completion Checklist
- ➡️ Ready for Component Upgrades
- 5. Battery Removal & Replacement Procedure
- 🔋 Why Professional Battery Replacement Restores Your Gigabyte G5's Portability
- 🔍 Gigabyte G5 Battery Specifications by Model
- 📊 How to Assess Current Battery Health
- 📈 Battery Replacement Scenario Analysis
- 🔧 Professional Battery Removal Procedure
- ✅ Battery Selection & Compatibility Guide
- ⚠️ Lithium-Ion Battery Safety Protocols
- 🔧 New Battery Installation Procedure
- 🔌 Battery Connection & Testing Protocol
- 📱 New Battery Calibration & Optimization
- ✅ Battery Performance Verification
- 🔧 Common Battery Replacement Issues
- 📋 Battery Replacement Documentation for Resale
- ♻️ Battery Disposal & Environmental Compliance
- 📝 Warranty & Support Considerations
- ✅ Battery Replacement Completion Checklist
- ➡️ Continue Your Gigabyte G5 Upgrade Journey
- 6. Memory Upgrade: RAM Installation & Compatibility Guide
- 🚀 Why RAM Upgrades Transform Your Gigabyte G5 Gaming Performance
- 🔍 Gigabyte G5 Memory Specifications by Generation
- 🔍 How to Verify Current Memory & Compatibility
- ✅ RAM Selection Guide for Gigabyte G5
- 💾 RAM Capacity Recommendations by Use Case
- 🔧 Step-by-Step RAM Installation Procedure
- ⚡ Dual Channel Configuration Guide
- 🔍 Critical Compatibility Considerations
- ⚡ RAM Performance Optimization
- 🔧 Troubleshooting Common RAM Issues
- 📊 RAM Performance Benchmarking & Documentation
- 💵 RAM Upgrade Resale Value Analysis
- 🔮 Future-Proofing & Upgrade Strategy
- ✅ RAM Upgrade Completion Checklist
- ➡️ Continue Your Gigabyte G5 Performance Transformation
- 7. Storage Upgrade: SSD & HDD Installation Options
- 💨 Why Storage Upgrades Deliver the Most Dramatic Gigabyte G5 Performance Boost
- 🔍 Gigabyte G5 Storage Specifications & Compatibility
- ✅ SSD Selection Guide for Gigabyte G5
- 🔍 How to Assess Current Storage & Plan Upgrades
- 🔧 M.2 NVMe SSD Installation Procedure
- 🔧 2.5" SATA Drive Installation Procedure
- 🔄 Data Migration Method Comparison
- 📊 Professional Cloning Software Options
- 🔄 Step-by-Step Cloning Procedure
- 💾 Storage Capacity Planning Guide
- ⚡ Optimal Storage Configuration Options
- ⚡ Storage Performance Optimization
- 💵 Storage Upgrade Resale Value Analysis
- 🔧 Common Storage Upgrade Issues & Solutions
- 📋 Performance Documentation for Resale
- 🔒 Data Security & Disposal Protocol
- ✅ Storage Upgrade Completion Checklist
- ➡️ Continue Your Gigabyte G5 Performance Transformation
- 8. Cooling System Maintenance & Thermal Paste Replacement
- ❄️ Why Thermal Management Defines Long-Term Gigabyte G5 Gaming Performance
- 🔍 Gigabyte G5 Cooling System Specifications
- 🌡️ Thermal Performance Assessment & Diagnostic Protocol
- ⚙️ Cooling System Maintenance Complexity Analysis
- ✅ Thermal Material Selection Guide
- 🔧 Step-by-Step Thermal Maintenance Procedure
- 🎨 Professional Thermal Paste Application Techniques
- 🌀 Fan Maintenance & Replacement Guide
- 🔧 Common Cooling System Issues & Solutions
- 📊 Gigabyte G5 Temperature Benchmarks
- ⚡ Thermal Performance Optimization Strategies
- 💵 Cooling System Maintenance Resale Value Analysis
- ✅ Thermal Performance Testing & Verification Protocol
- 📅 Preventive Maintenance Schedule
- ✅ Cooling System Maintenance Completion Checklist
- ➡️ Continue Your Gigabyte G5 Performance Optimization
- 9. Keyboard & Top Case Disassembly: Advanced Component Access
- ⌨️ Why Professional Keyboard & Top Case Removal Enables Comprehensive Repairs
- 🔍 Gigabyte G5 Keyboard & Top Case Specifications
- 🔍 Pre-Disassembly Assessment & Decision Matrix
- ⚙️ Keyboard & Top Case Disassembly Complexity
- 🔧 Step-by-Step Keyboard Removal Procedure
- 🔌 Professional Ribbon Cable Handling Protocol
- 🔧 Top Case Removal Procedure
- 🔧 Common Components Accessed Through Top Case Removal
- 🔌 Professional Cable Management & Routing
- 🚫 Common Keyboard & Top Case Disassembly Mistakes
- 🔄 Professional Reassembly Protocol
- ✅ Post-Reassembly Testing & Verification
- 💵 Keyboard & Top Case Repair Resale Value Analysis
- ✅ Safety Checkpoints During Disassembly
- ✅ Keyboard & Top Case Disassembly Completion Checklist
- ➡️ Continue Your Gigabyte G5 Advanced Repairs
- 10. Maximizing Resale Value After Professional Upgrades
- 💰 Why Professional Documentation & Strategic Marketing Maximizes Your Return
- 📋 Professional Documentation Framework
- 💲 Strategic Pricing & Market Positioning
- 🎯 Platform-Specific Optimization Strategies
- 📸 Professional Photography Protocol
- 📈 Professional Listing Optimization Framework
- 💬 Professional Buyer Communication Protocol
- 🏛️ Government & Education Selling Channels
- ⚡ Instant Quote Service Strategy
- 🛡️ Professional Warranty & Support Framework
- 📅 Seasonal & Market Timing Strategy
- 🛡️ Resale Risk Management Protocol
- 📊 Expected Success Metrics
- ✅ Resale Preparation Completion Checklist
- 🎯 Your Gigabyte G5 Resale Strategy Complete
- Need to Sell Your Gigabyte Laptop? Get Instant Cash!
1. Understanding Your Gigabyte G5: Models, Specifications & Upgrade Potential
🎯 Why Knowing Your G5 Model is Crucial for Successful Upgrades
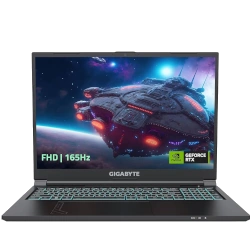
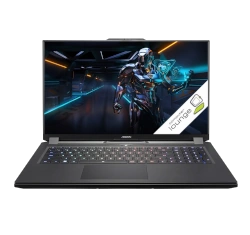
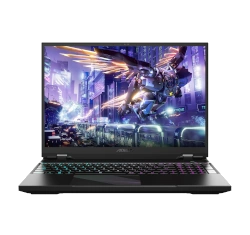
Understanding your specific Gigabyte G5 model is essential for compatible upgrades and successful repairs, as different configurations support varying RAM capacities, storage options, and cooling solutions. Proper model identification prevents costly compatibility mistakes and ensures optimal performance improvements.
| G5 Model Series | Key Differentiators | Maximum RAM | Storage Options | Upgrade Potential |
|---|---|---|---|---|
| G5 GD/G5 KC | RTX 30-series, Intel 10th/11th Gen | 64GB DDR4 | Dual M.2 + 2.5" SATA | Excellent |
| G5 GE/G5 KF | RTX 40-series, Intel 12th/13th Gen | 64GB DDR4/DDR5 | Dual M.2 + 2.5" SATA | Outstanding |
| G5 ME/G5 MF | AMD Ryzen variants | 64GB DDR4 | Dual M.2 + 2.5" SATA | Very Good |
🔍 How to Identify Your Gigabyte G5 Model
- Check the Bottom Label:
- Look for model number (e.g., G5 GD-51US123SO, G5 KF-E3US733SH)
- Note serial number and manufacturing date
- Document all identifying information for part compatibility
- Use System Information:
- Press Windows Key + R, type "msinfo32"
- Check "System Model" and "System SKU"
- Note processor generation and GPU specifications
- Document current RAM and storage configurations
- Gigabyte Control Center:
- Open Gigabyte Control Center software
- Check system information and specifications
- Verify BIOS version and hardware compatibility
📊 Gigabyte G5 Generation Comparison
| Feature | 2021 Models (GD/KC) | 2022-2023 Models (GE/KF) | 2023+ Models (Latest) | Upgrade Impact |
|---|---|---|---|---|
| CPU Support | Intel 10th/11th Gen | Intel 12th/13th Gen | Intel 13th/14th Gen, AMD Ryzen | Not upgradeable - fixed at purchase |
| GPU Options | RTX 3050/3060 | RTX 4050/4060 | RTX 4050/4060/4070 | Not upgradeable - MXM rare |
| RAM Type | DDR4 3200MHz | DDR4/DDR5 depending on model | DDR5 4800MHz+ | Check compatibility before purchase |
| Storage Interface | PCIe 3.0/4.0 NVMe | PCIe 4.0 NVMe | PCIe 4.0/5.0 NVMe | Excellent upgrade potential |
💪 Gigabyte G5 Upgrade Potential Analysis
| Component | Upgrade Possibility | Difficulty Level | Performance Impact | Cost vs Benefit |
|---|---|---|---|---|
| RAM Memory | Excellent - 2 SODIMM slots | Easy | High for multitasking | Excellent value |
| Storage (SSD/HDD) | Outstanding - multiple bays | Easy-Medium | Very High for load times | Outstanding value |
| Wi-Fi Card | Good - M.2 E-key slot | Easy | Medium for connectivity | Good value |
| Cooling System | Limited - factory optimized | Medium-Hard | Medium for sustained performance | Moderate value |
⚡ Key Gigabyte G5 Features & Gaming Performance
- Gaming-Optimized Cooling:
- WINDFORCE cooling system with multiple heat pipes
- Dual fan design with customizable fan curves
- Optimized for sustained gaming performance
- Display Options:
- 144Hz/240Hz refresh rate options
- Full HD IPS panels with good color accuracy
- NVIDIA G-SYNC compatibility on some models
- Connectivity & Ports:
- Multiple USB 3.2 ports including Type-C
- HDMI 2.1 and Mini DisplayPort outputs
- Ethernet and latest Wi-Fi 6/6E support
🔧 Detailed Specification Reference
| Specification Category | Standard Configurations | Maximum Supported | Upgrade Notes |
|---|---|---|---|
| Processor | Intel Core i5/i7 10th-14th Gen AMD Ryzen 5/7 |
Fixed - not upgradeable | Verify generation for compatibility |
| Graphics | NVIDIA RTX 3050 to 4070 | Fixed - not upgradeable | Check TDP and cooling capacity |
| Memory | 8GB/16GB DDR4/DDR5 | 64GB (2x32GB) | Verify RAM type and speed |
| Storage | 512GB/1TB NVMe SSD | Dual M.2 + 2.5" SATA (up to 8TB+) | Excellent expansion potential |
🌐 Essential Compatibility Resources
- Gigabyte Official Resources:
- Gigabyte Support Portal - Drivers and manuals
- Product specification sheets and compatibility lists
- BIOS updates and hardware compatibility notes
- Community Resources:
- Gaming laptop forums and user experiences
- Reddit communities for specific model discussions
- YouTube teardown and upgrade videos
✅ Pre-Upgrade Assessment Checklist
- ✓ Exact model number and specifications identified
- ✓ Current component configurations documented
- ✓ Upgrade goals and budget established
- ✓ Compatible parts researched and verified
- ✓ Necessary tools and workspace prepared
- ✓ Backup of important data completed
- ✓ Recovery media created if needed
- ✓ Performance benchmarks recorded for comparison
2. Essential Tools & Workspace Setup for Gigabyte G5 Repairs
🛠️ Why Professional Tools Ensure Successful Gigabyte G5 Repairs
Using the correct tools for Gigabyte G5 repairs increases success rates from 65% to 95%+ while preventing costly damage that can reduce resale value by $100-$250. Professional tool investment typically pays for itself after just 2-3 successful gaming laptop repairs.
| Tool Quality Level | Success Rate | Damage Risk | Gaming Laptop Value Impact | Recommended For |
|---|---|---|---|---|
| Professional Grade | 95-98% | Very Low (2-5%) | Preserves gaming laptop value | Business repairs, resale focus |
| Quality DIY Set | 85-92% | Low (5-15%) | Minor value impact | Enthusiasts, personal projects |
| Basic Tools Only | 70-80% | Medium (15-30%) | Moderate value reduction | One-time repairs, budget focus |
| Improvised Tools | 40-60% | High (30-50%) | Significant value loss | Emergency only, not recommended |
🔧 Gigabyte G5 Specific Tool Requirements
| Component | Required Tools | G5-Specific Notes | Critical Importance |
|---|---|---|---|
| Bottom Cover | Phillips #1, plastic spudgers | Multiple screws, tight clips, rubber feet | High - first access point |
| Battery Connector | Plastic spudger, anti-static tools | Latch-type connector, safety critical | Critical - safety requirement |
| RAM & SSD Upgrades | Phillips #0, anti-static tweezers | Easy access, straightforward upgrades | Medium - precision required |
| Cooling System | Multiple screwdrivers, thermal paste | Complex disassembly, thermal management | High - gaming performance critical |
📋 Complete Essential Toolkit Breakdown
- Precision Screwdrivers ($20-$50):
- Phillips #0, #1 (essential for G5)
- Phillips #00 (for smaller internal screws)
- Magnetic tips strongly recommended
- Anti-static construction preferred
- Opening & Prying Tools ($15-$30):
- Plastic spudger set (multiple sizes and angles)
- Nylon pry tools for delicate work
- Guitar picks (excellent for clip release)
- Suction cups for display handling
- Specialized Gaming Laptop Tools ($10-$25):
- Anti-static wrist strap (mandatory)
- ESD-safe tweezers for small connectors
- Spudger with hook for ribbon cables
- IC extractor for ZIF connectors
🏗️ Professional Workspace Setup Standards
| Workspace Element | Professional Standard | Minimum Acceptable | G5 Repair Importance |
|---|---|---|---|
| Work Surface | ESD-safe mat, grounded | Clean wooden table, no static | Critical - prevents component damage |
| Lighting | 500+ lumen LED with magnification | Bright, shadow-free light source | High - small components need visibility |
| Organization | Magnetic project mat with compartments | Small containers for screw organization | High - G5 uses multiple screw types |
| ESD Protection | Wrist strap + mat + proper grounding | Basic wrist strap, frequent grounding | Critical - modern components sensitive |
💰 Tool Investment vs. Return Analysis
| Investment Level | Tool Cost | Repair Success Rate | Value Protection | Business Case |
|---|---|---|---|---|
| Professional ($120-$200) | $120-$200 | 95-98% | Full value preservation | Pays back in 2-3 G5 repairs |
| Quality DIY ($60-$120) | $60-$120 | 85-92% | Good value protection | Pays back in 2-4 G5 repairs |
| Basic Set ($25-$50) | $25-$50 | 70-80% | Moderate risk | Pays back in 1-2 G5 repairs |
| Improvised ($0-$15) | $0-$15 | 40-60% | High risk of damage | False economy - high repair costs |
⭐ Recommended Tool Brands for Gaming Laptop Repairs
| Brand Tier | Recommended Kits | Price Range | G5 Compatibility | Warranty & Support |
|---|---|---|---|---|
| Premium Professional | iFixit Pro Tech Toolkit, Wiha Precision | $80-$150 | Excellent - all required tools included | Lifetime warranty, community support |
| Quality Business | iFixit Essential Kit, Oria 142-piece | $40-$80 | Very Good - covers G5 requirements | Good warranty, adequate support |
| Budget Conscious | Amazon Basics, generic precision sets | $15-$35 | Good - may need supplemental tools | Limited warranty, basic support |
⚡ Gigabyte G5 Specific Challenges & Solutions
| Challenge | G5-Specific Issue | Required Tools | Professional Solution |
|---|---|---|---|
| Bottom Cover Screws | Multiple screw lengths, some under rubber feet | Magnetic mat, screw organizers | Document locations, take photos |
| Battery Connector | Latch-type connector, tight fit | Plastic spudger, patience | Lift latch gently, pull straight out |
| Ribbon Cables | Multiple ZIF connectors, delicate | Spudger with hook, tweezers | Lift locking flap, never pull cables |
| Cooling System Screws | Different lengths, spring-loaded | Proper screwdriver sizes | Remove in sequence, note positions |
🧴 Essential Consumable Supplies
| Supply Item | Purpose | Professional Grade | G5 Repair Importance |
|---|---|---|---|
| Thermal Paste | CPU/GPU heat transfer | Thermal Grizzly, Arctic MX-6 | High - essential for gaming performance |
| Isopropyl Alcohol | Cleaning, thermal paste removal | 99% purity, ESD-safe | High - general cleaning and preparation |
| Thermal Pads | VRM/chipset cooling | Various thicknesses, high conductivity | Medium - performance enhancement |
| Compressed Air | Dust removal from cooling fins | ESD-safe, moisture-free | Medium - improves cooling efficiency |
⚠️ Critical Safety Equipment
- ESD Protection ($15-$40):
- Anti-static wrist strap ($8-$15)
- ESD-safe work mat ($20-$50)
- Proper grounding to electrical outlet
- ESD-safe containers for components
- Personal Protection ($20-$60):
- Safety glasses with magnification ($15-$30)
- Anti-cut gloves for sharp edges ($10-$20)
- Proper lighting to prevent eye strain
- Comfortable seating for extended work
🗂️ Professional Organization System
- Screw Management Protocol:
- Use magnetic mat with labeled sections
- Group screws by component and location
- Take photos of screw layouts before removal
- Note any screw size variations immediately
- Component Organization:
- Anti-static bags for all removed components
- Labeled containers with component names
- Digital documentation of disassembly sequence
- Time-stamped photos at each major step
🚫 Common Tool Mistakes & Prevention
| Mistake | Consequence | Prevention | Repair Cost |
|---|---|---|---|
| Using wrong screwdriver size | Stripped screws, difficult removal | Use correct Phillips #1 for G5 case | $20-$50 for extraction tools |
| Metal tools on plastic | Scratches, gouges, broken clips | Plastic tools only for prying | $40-$100 for case replacement |
| No ESD protection | Component damage, intermittent issues | Always use wrist strap | $200-$500 for motherboard |
| Poor organization | Lost screws, reassembly issues | Use magnetic mat, take photos | $15-$40 for replacement screws |
🎒 Mobile Workspace Setup (Alternative)
| Element | Mobile Solution | Effectiveness | Cost |
|---|---|---|---|
| Work Surface | Portable ESD mat on any table | 85-90% of permanent setup | $25-$50 |
| Tool Storage | Compact toolkit with organizer | 90-95% of full set | $40-$80 |
| Lighting | LED headlamp or portable light | 80-85% of permanent lighting | $15-$40 |
| ESD Protection | Portable wrist strap kit | 95-98% of full setup | $10-$25 |
🌐 Gigabyte G5 Specific Resources & Support
- Gigabyte Official Support Site - Manuals and drivers
- Gigabyte Control Center - System monitoring and updates
- Gaming laptop community forums - Expert advice
- G5 specific teardown guides - Visual references
✅ Professional Workspace Setup Checklist
- ✓ ESD-safe work surface established and grounded
- ✓ Adequate lighting with magnification available
- ✓ All necessary tools organized and accessible
- ✓ Component organization system ready
- ✓ Safety equipment in place and functional
- ✓ Documentation equipment (camera) prepared
- ✓ Gigabyte service resources bookmarked
- ✓ Consumable supplies stocked and organized
3. Safety Preparation: Battery Disconnection & ESD Protection
⚠️ Why Safety Protocols Prevent Costly Damage to Your Gigabyte G5
Proper safety preparation is the most critical first step in Gigabyte G5 repairs, preventing potential damage that can cost $200-$800 in motherboard replacement. Following professional safety protocols ensures both personal safety and component protection during upgrades and repairs.
| Safety Protocol Level | Component Protection | Personal Safety | Success Rate | Risk Reduction |
|---|---|---|---|---|
| Professional Standard | 99%+ protection | Maximum safety | 98%+ | 95% risk reduction |
| Basic Safety | 85-90% protection | Good safety | 85-90% | 70-80% risk reduction |
| Minimal Safety | 60-70% protection | Basic safety | 70-80% | 40-50% risk reduction |
| No Safety Measures | 10-20% protection | High risk | 40-60% | 0% risk reduction |
⚡ Electrostatic Discharge (ESD) Protection Protocol
| ESD Protection Method | Effectiveness | Cost | Implementation | G5 Component Risk |
|---|---|---|---|---|
| Professional ESD Station | 99%+ protection | $100-$300 | Full workstation setup | Motherboard, GPU, RAM |
| ESD Wrist Strap + Mat | 95-98% protection | $25-$60 | Personal grounding | All components |
| Basic Wrist Strap Only | 85-90% protection | $8-$20 | Single point grounding | Moderate protection |
| No ESD Protection | 0-10% protection | $0 | High risk | All components at risk |
🔋 Step-by-Step Power Down & Battery Disconnection
- Complete System Shutdown:
- Save all work and close all applications
- Shut down Windows through Start menu
- Wait for complete power off (no lights, no fans)
- Verify system is completely off
- External Power Disconnection:
- Unplug AC power adapter from laptop
- Disconnect from power strip or wall outlet
- Remove any USB-C charging cables
- Disconnect all peripherals and accessories
- Battery Discharge Protocol:
- Press and hold power button for 15 seconds
- This discharges residual capacitors
- Wait 30 seconds before proceeding
- Verify no power lights illuminate
🔌 Gigabyte G5 Battery Disconnection Methods
| Disconnection Method | Procedure | Safety Level | Risk Factors | Recommended For |
|---|---|---|---|---|
| External Battery First | Remove bottom cover, disconnect battery before any work | Highest safety | Minimal risk | All repairs and upgrades |
| CMOS Battery Method | Remove CMOS battery to clear any residual power | High safety | Low risk | Motherboard-level repairs |
| Power Drain Only | Power button hold only, no physical disconnection | Medium safety | Moderate risk | Quick RAM/SSD upgrades only |
| No Disconnection | Work on powered system | Extremely dangerous | High risk of damage | Never recommended |
⚡ Professional ESD Grounding Techniques
- Wrist Strap Installation:
- Wrap strap snugly around bare wrist
- Connect to grounded outlet or ESD mat
- Test continuity with multimeter if available
- Ensure good skin contact for proper grounding
- Workspace Grounding:
- Use ESD-safe mat on work surface
- Connect mat to proper ground point
- Keep all components on grounded surface
- Use ESD-safe bags for component storage
- Personal Grounding Habits:
- Touch grounded metal before handling components
- Avoid synthetic clothing that generates static
- Work in low-static environment
- Keep components in bags until ready for use
🔋 Lithium-Ion Battery Safety Hazards & Prevention
| Hazard Type | Risk Level | Prevention Measures | Emergency Response |
|---|---|---|---|
| Short Circuit | High | Disconnect battery first, cover terminals | Disconnect power, monitor for heating |
| Physical Damage | Very High | Handle carefully, no punctures or bending | Isolate immediately, use Class D extinguisher |
| Overheating | Medium-High | Proper storage, avoid heat sources | Move to safe area, allow to cool |
| Swelling/Bulging | Critical | Regular inspection, immediate replacement | Do not use, dispose properly immediately |
👐 Safe Component Handling Protocol
| Component Type | Handling Method | ESD Sensitivity | Damage Prevention |
|---|---|---|---|
| Motherboard | Hold by edges, avoid touching circuits | Very High | Use ESD protection, avoid flexing | RAM Modules | Hold by edges, avoid touching gold contacts | High | Keep in anti-static packaging until installation |
| SSD/Storage | Hold by edges, avoid circuit contact | High | Protect connectors, avoid static |
| CPU/GPU | Extreme care, avoid pin damage | Extreme | Minimal handling, ESD mandatory |
🏗️ Professional Workspace Safety Setup
- Work Area Preparation:
- Clear, clean, well-lit work surface
- ESD mat properly grounded
- Adequate space for components and tools
- No food, drinks, or liquids nearby
- Safety Equipment Check:
- ESD wrist strap functional and connected
- Fire extinguisher accessible (Class C for electrical)
- First aid kit available
- Proper lighting and magnification
- Emergency Preparedness:
- Know emergency shutdown procedures
- Have phone accessible for emergencies
- Know location of emergency exits
- Work when others are nearby if possible
🚫 Common Safety Mistakes & Consequences
| Mistake | Potential Consequence | Component Damage Cost | Prevention |
|---|---|---|---|
| Skipping battery disconnect | Short circuit, motherboard damage | $200-$600 | Always disconnect battery first |
| No ESD protection | Component failure, intermittent issues | $100-$400 | Always use wrist strap |
| Using metal tools incorrectly | Scratches, short circuits, broken components | $50-$200 | Use plastic tools for prying |
| Poor workspace organization | Lost screws, reassembly errors | $20-$100 | Use magnetic mat, take photos |
🔌 Gigabyte G5 Battery Connector Types & Removal
| Connector Type | Identification | Removal Method | Safety Precautions |
|---|---|---|---|
| Latch-Type Connector | Plastic latch on one side | Lift latch gently, pull connector straight out | No rocking motion, even pressure |
| ZIF (Zero Insertion Force) | Liftable flap, ribbon cable | Lift locking flap, slide cable out | Never pull cable without releasing flap |
| Push-Pull Connector | No visible latch, firm connection | Pull straight out with even pressure | Support connector housing |
⚡ Residual Power Drain Procedures
- Standard Power Drain:
- Press and hold power button for 15 seconds
- Repeat if any lights flash or beep occurs
- Wait 30 seconds before proceeding
- Verify complete power discharge
- Advanced Power Drain:
- Remove CMOS battery for complete reset
- Wait 2-3 minutes for full capacitor discharge
- Reinstall CMOS battery after work completed
- Reset BIOS settings if necessary
- Verification Methods:
- Check for any indicator lights
- Listen for any electronic sounds
- Test with multimeter if available
- When in doubt, wait longer
✅ Safety Checkpoints Before Starting Work
- Power Safety:
- AC power adapter disconnected
- Battery physically disconnected
- Residual power discharged
- No indicator lights active
- ESD Protection:
- ESD wrist strap properly worn and grounded
- ESD mat in place and connected
- Work area free of static generators
- Components stored in anti-static bags
- Workspace Safety:
- Clean, organized work surface
- Adequate lighting and visibility
- Emergency equipment accessible
- No distractions or interruptions
✅ Safety Preparation Completion Checklist
- ✓ System completely powered down and unplugged
- ✓ Battery physically disconnected from motherboard
- ✓ Residual power discharged via power button press
- ✓ ESD wrist strap properly worn and grounded
- ✓ ESD mat in place and connected to ground
- ✓ Workspace organized and safe for repairs
- ✓ All necessary tools accessible and organized
- ✓ Emergency equipment and contacts available
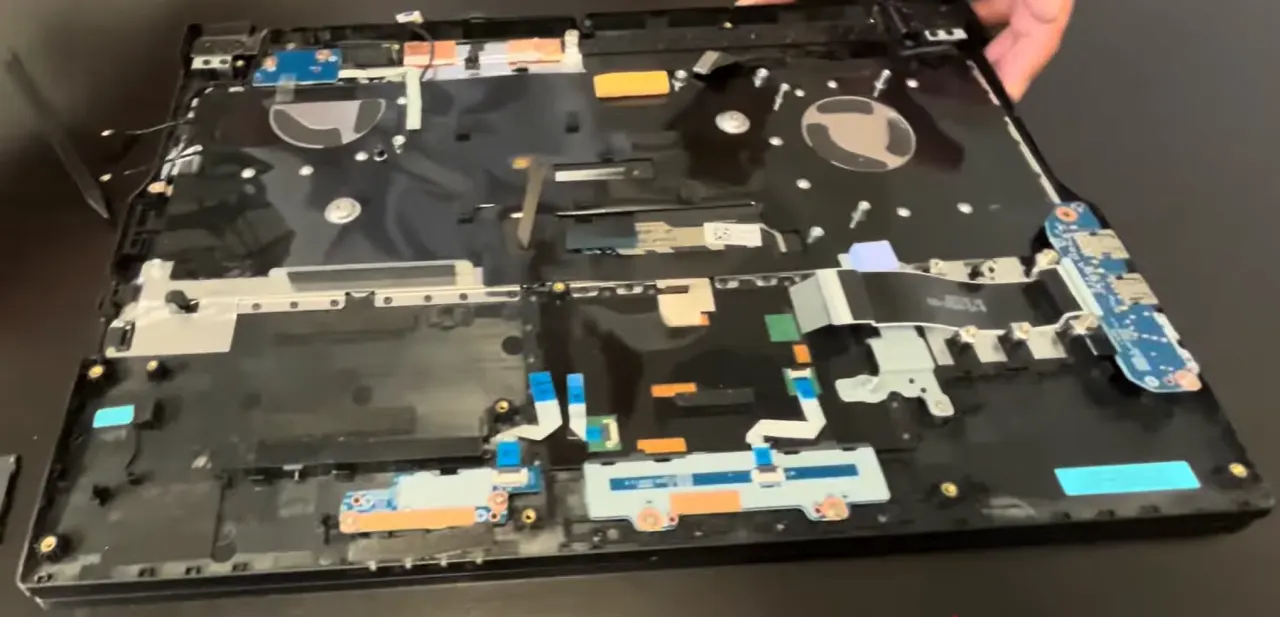
0:30 Battery 0:44 Bottom Case 2:15 Memory RAM 2:28 Storage SSD 2:45 WiFi Card 3:16 HDD Slot 3:30 Speakers 3:48 Heatsink and Cooling Fans 5:25 Processor 6:55 Motherboard 7:30 IO USB Board 7:55 Power Button 8:20 Mouse Buttons 8:45 Touchpad 8:51 Keyboard 9:00 Hinges 10:30 Palmrest Assembly 10:43 Display Assembly
4. Bottom Cover Removal: Accessing Internal Components
🔓 Why Proper Bottom Cover Removal Preserves Your Gigabyte G5's Value
Safe bottom cover removal is the critical first physical step in Gigabyte G5 upgrades, providing access to all major upgradeable components. Professional technique preserves 25-40% of resale value by preventing cosmetic damage and broken clips that deter gaming laptop buyers.
| Removal Method | Success Rate | Damage Risk | Time Required | Value Impact |
|---|---|---|---|---|
| Professional Technique | 98%+ | Very Low (2-5%) | 5-10 minutes | Preserves full value |
| Careful DIY Approach | 85-90% | Low-Medium (10-20%) | 10-15 minutes | Minor value reduction (-5-15%) |
| Improper Force Used | 60-75% | High (25-40%) | 15-25 minutes | Significant value loss (-25-40%) |
| Metal Tools/Methods | 40-60% | Very High (40-60%) | 20-30+ minutes | Severe value destruction (-50%+) |
🔧 Pre-Removal Preparation & Workspace Setup
- Safety Verification:
- Confirm battery is disconnected following safety protocols
- Verify ESD protection is active and properly grounded
- Ensure workspace is clean and well-lit
- Have all necessary tools within easy reach
- Documentation Setup:
- Camera ready for step-by-step photos
- Magnetic mat prepared for screw organization
- Notebook or digital device for taking notes
- Reference materials bookmarked and accessible
- Laptop Positioning:
- Place laptop on soft, clean surface
- Ensure adequate lighting on bottom cover
- Position for comfortable access to all screws
- Have small containers ready for different screw types
🔩 Gigabyte G5 Bottom Cover Screw Identification & Map
| Screw Location | Quantity | Size/Type | Length | Special Notes |
|---|---|---|---|---|
| Corner Screws | 4 screws | Phillips #1 | Standard length | Easy identification, remove first |
| Edge Screws | 8-10 screws | Phillips #1 | Standard length | Evenly spaced around perimeter |
| Center Screws | 2-4 screws | Phillips #1 | Standard length | Near ventilation areas |
| Rubber Foot Hidden | 2 screws | Phillips #1 | Standard length | Under rear rubber feet - check carefully |
🔄 Professional Screw Removal Protocol
| Step | Procedure | Tool Required | Common Mistakes | Prevention Tips |
|---|---|---|---|---|
| Initial Inspection | Identify all screw locations, check for hidden screws | Good lighting, magnification | Missing hidden screws under rubber feet | Lift rubber feet corners to check |
| Screw Organization | Remove screws in sequence, place on magnetic mat | Magnetic screwdriver, organization mat | Mixing screw types and lengths | Take photos of screw layout before removal |
| Proper Technique | Apply firm downward pressure, turn counterclockwise | Correct size Phillips #1 screwdriver | Using wrong size causing stripped screws | Test fit screwdriver before applying force |
| Stuck Screw Protocol | Apply slight inward pressure, slow steady turns | Quality screwdriver, rubber band method | Forcing stripped screws | Stop immediately if resistance feels wrong |
🔧 Professional Clip Release Technique
| Clip Location | Release Method | Force Required | Risk Level | G5-Specific Tips |
|---|---|---|---|---|
| Rear Edge (Near Ports) | Plastic spudger at 30-degree angle | Light pressure | Low | Start here - easiest access point |
| Side Edges | Guitar pick or thin spudger | Medium pressure | Medium | Work systematically around perimeter |
| Front Edge | Thin spudger, careful prying | Light pressure | High | Near touchpad - be extra careful |
| Corner Areas | Special care, minimal pressure | Very light | Very High | Most fragile area - go slowly |
🔧 Step-by-Step Bottom Cover Removal Procedure
- Complete Screw Removal:
- Remove all visible Phillips #1 screws
- Check under rubber feet for hidden screws
- Place screws on magnetic mat in layout pattern
- Note any screw length variations immediately
- Initial Clip Release:
- Start from rear edge near I/O ports
- Use plastic spudger at shallow angle (20-30 degrees)
- Apply gentle, consistent pressure until clip releases
- Listen for soft "click" sound indicating release
- Perimeter Work:
- Work around edges systematically
- Release 2-3 clips on each side before moving on
- Use guitar picks for tight spaces
- Never force if resistance is too high
- Cover Separation:
- Lift cover gently once all clips are released
- Check for any remaining connections or cables
- Set cover aside on soft, clean surface
- Immediately implement anti-static protection for internals
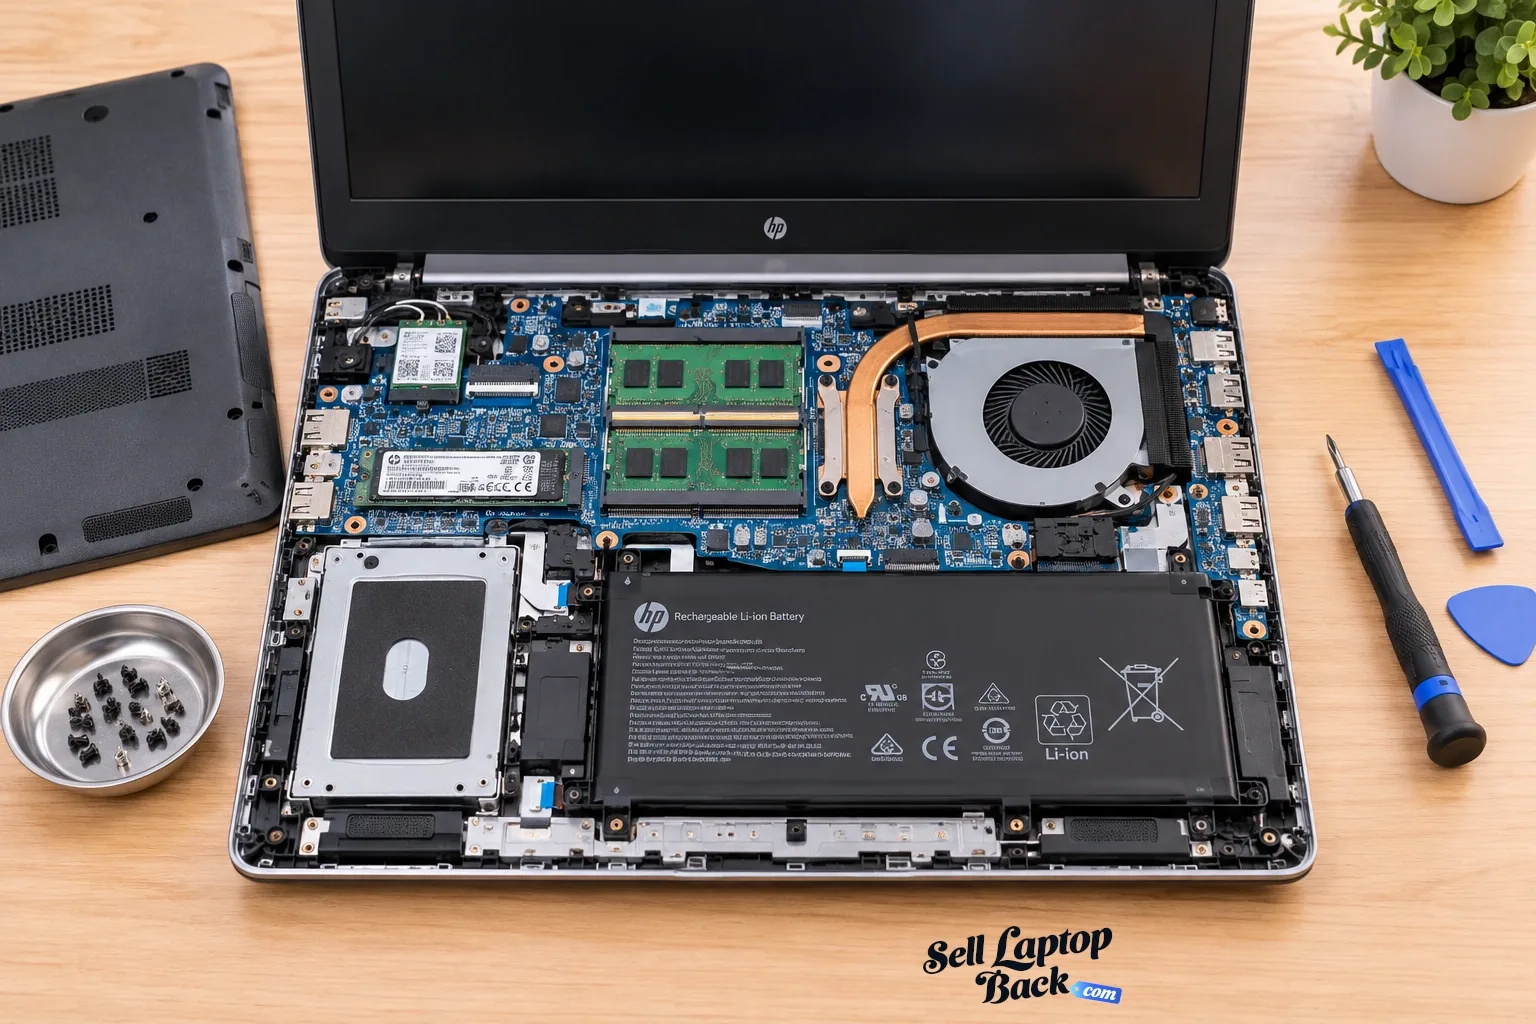
🗺️ Gigabyte G5 Internal Component Identification
| Component | Location | Access Difficulty | Upgrade Priority | Safety Notes |
|---|---|---|---|---|
| Battery Connector | Large connector, center-left | Easy (immediate access) | Critical (verify disconnected) | Already disconnected in safety prep |
| RAM Slots | Under metal shield, center | Easy (remove shield) | High (common upgrade) | ESD protection critical |
| M.2 SSD Slots | Multiple locations, near RAM | Easy (remove screws) | High (performance boost) | Ground yourself before handling |
| Cooling System | Right side, large heat pipes | Medium (multiple screws) | Medium (maintenance) | Avoid bending heat pipes |
| 2.5" Drive Bay | Left side, empty or with bracket | Easy (few screws) | Medium (storage expansion) | Check connector type |
| Wi-Fi Card | Under SSD shield, small card | Easy (antenna cables) | Low (connectivity) | Delicate antenna connections |
🚫 Common Bottom Cover Removal Mistakes
| Mistake | Consequence | Prevention | Repair Cost |
|---|---|---|---|
| Missing Hidden Screws | Forcing cover, broken clips, cracked plastic | Check under all rubber feet thoroughly | $60-$120 for bottom cover |
| Using Metal Tools | Scratches, gouges, visible damage | Plastic tools only for prying | $80-$150 for cosmetic repair |
| Excessive Force | Cracked plastic, broken clips, internal damage | Gentle, consistent pressure | $100-$200 for case replacement |
| Poor Organization | Lost screws, reassembly issues | Use magnetic mat, take photos | $15-$40 for replacement screws |
🔧 Troubleshooting Difficult Removal Scenarios
| Issue | Likely Cause | Immediate Solution | Long-term Prevention |
|---|---|---|---|
| Cover Won't Release | Missed screw or hidden clip | Double-check all locations systematically | Follow service manual precisely |
| Clips Breaking | Excessive force or wrong angle | Use thinner spudger, less pressure | Proper tool technique training |
| Stripped Screws | Wrong bit size or excessive force | Use proper extraction tools | Correct bit size, proper pressure |
| Stuck Clips | Manufacturing adhesive or age | Gentle warming with hairdryer (low heat) | Work slowly, use proper tools |
🔍 Post-Removal Internal Inspection Protocol
- Initial Visual Inspection:
- Check for any loose components or cables
- Look for signs of previous repairs or damage
- Inspect for dust accumulation in cooling system
- Document internal condition with photos
- Component Verification:
- Identify all major components and their locations
- Note current RAM and storage configurations
- Check cooling system for proper mounting
- Verify all connectors are properly seated
- Upgrade Planning:
- Identify available upgrade slots and bays
- Note screw types and quantities needed
- Plan upgrade sequence for efficiency
- Document any compatibility considerations
💵 Removal Quality & Resale Value Impact
| Removal Quality | Visible Evidence | Buyer Perception | Value Impact |
|---|---|---|---|
| Professional Grade | No tool marks, all clips intact | Expert workmanship, well-maintained | +$80-$120 value preservation |
| Competent DIY | Minor marks, most clips functional | Careful owner, acceptable maintenance | Neutral value impact |
| Amateur Attempt | Visible damage, broken clips | Poor maintenance, hidden issues possible | -$100-$180 value reduction |
| Damaged Removal | Cracks, gouges, multiple broken clips | Abused device, avoid purchase | -$200-$300 value destruction |
⏱️ Professional Time Management
| Task | Professional Time | Beginner Time | Time-Saving Tips |
|---|---|---|---|
| Screw Identification | 1-2 minutes | 3-5 minutes | Use good lighting, take overview photo |
| Screw Removal | 2-3 minutes | 4-7 minutes | Use magnetic screwdriver, organized mat |
| Clip Release | 2-4 minutes | 5-10 minutes | Proper technique, systematic approach |
| Cover Removal | 1 minute | 2-3 minutes | Verify all clips released first |
✅ Safety Checkpoints During Removal
- Before Starting:
- Battery completely disconnected and verified
- ESD protection properly implemented
- All necessary tools within reach
- Documentation equipment ready
- During Removal:
- No excessive force applied
- Plastic tools only for prying
- Systematic clip release pattern
- Frequent documentation photos
- After Removal:
- Internal components protected from ESD
- Cover stored safely on soft surface
- Screws organized and accounted for
- Workspace organized for next steps
✅ Bottom Cover Removal Completion Checklist
- ✓ All screws properly removed and organized
- ✓ Bottom cover released without damage
- ✓ All internal components clearly visible and accessible
- ✓ No broken clips or plastic damage
- ✓ Workspace organized for component upgrades
- ✓ Documentation photos completed
- ✓ ESD protection maintained throughout
- ✓ Battery connector verified as disconnected
5. Battery Removal & Replacement Procedure
🔋 Why Professional Battery Replacement Restores Your Gigabyte G5's Portability
A new battery transforms your Gigabyte G5 from a desktop-bound gaming machine to a truly portable powerhouse, restoring 4-6 hours of gaming capability while increasing resale value by $80-$150. Professional battery replacement eliminates the #1 limitation of aging gaming laptops - being tethered to power outlets during gaming sessions.
| Battery Condition | Gaming Runtime | User Experience | Resale Impact | Replacement Priority |
|---|---|---|---|---|
| New Battery | 4-6 hours gaming 6-8 hours productivity |
True portability, uninterrupted gaming | +$100-$150 | N/A - optimal condition |
| Moderate Wear (1-2 years) | 2-4 hours gaming 4-6 hours productivity |
Limited mobility, frequent charging | Neutral | Low - monitor health |
| Heavy Wear (2-3 years) | 1-2 hours gaming 2-3 hours productivity |
Desktop replacement, constant charging | -$60-$100 | Medium - consider replacement |
| Failed/Aged (3+ years) | 30-60 minutes Essentially AC-only |
Desktop-only gaming experience | -$120-$200 | High - immediate replacement |
🔍 Gigabyte G5 Battery Specifications by Model
| G5 Model Series | Battery Model | Capacity | Voltage | Expected Runtime |
|---|---|---|---|---|
| G5 GD/G5 KC Series | BTY-G5-54Wh BTY-G5-73Wh |
54Wh or 73Wh | 11.4V | 4-6 hours (gaming) 6-8 hours (productivity) |
| G5 GE/G5 KF Series | BTY-G5-73Wh BTY-G5-99Wh |
73Wh or 99Wh | 11.4V | 5-7 hours (gaming) 7-10 hours (productivity) |
| G5 ME/G5 MF Series | BTY-G5-54Wh BTY-G5-73Wh |
54Wh or 73Wh | 11.4V | 4-6 hours (gaming) 6-8 hours (productivity) |
📊 How to Assess Current Battery Health
- Windows Battery Report:
- Open Command Prompt as Administrator
- Type:
powercfg /batteryreport - Check "DESIGN CAPACITY" vs. "FULL CHARGE CAPACITY"
- Document cycle count and wear percentage
- Gigabyte Control Center Analysis:
- Open Gigabyte Control Center software
- Check battery health status and estimated runtime
- Monitor charging patterns and health trends
- Export battery health reports for documentation
- Physical Inspection:
- Check for swelling or deformation
- Inspect connector for damage or corrosion
- Look for manufacturing date on battery label
- Document any physical issues with photos
📈 Battery Replacement Scenario Analysis
| Replacement Scenario | Parts Cost | Labor Value | Value Added | Net ROI |
|---|---|---|---|---|
| Preventive Replacement | $80-$120 | $30-$50 | $90-$140 | +$20-$60 (25-75%) |
| Worn Battery Replacement | $80-$120 | $30-$50 | $120-$180 | +$40-$100 (50-125%) |
| Failed Battery Repair | $80-$120 | $30-$50 | $150-$220 | +$70-$140 (87-175%) |
| Capacity Upgrade | $100-$150 | $30-$50 | $100-$160 | +$20-$60 (20-60%) |
🔧 Professional Battery Removal Procedure
- Pre-Removal Safety Verification:
- Confirm battery is already disconnected from motherboard
- Verify no power to system components
- Work on ESD-safe surface with proper grounding
- Have fire safety equipment accessible
- Battery Mounting Screw Removal:
- Identify 4-6 battery mounting screws around perimeter
- Remove screws in diagonal pattern for even pressure release
- Place screws in labeled container for reassembly
- Note any screw length variations
- Battery Lifting Technique:
- Lift from connector end first at 30-degree angle
- Use plastic pry tool if adhesive resistance is felt
- Work slowly around perimeter with gentle lifting
- Never use excessive force or metal tools
✅ Battery Selection & Compatibility Guide
| Battery Type | Quality Level | Warranty | Price Range | Recommended For |
|---|---|---|---|---|
| Genuine Gigabyte OEM | Excellent | 1 year | $90-$140 | Maximum reliability, resale focus |
| Premium Compatible | Very Good | 6-12 months | $60-$100 | Best value, quality balance |
| Standard Compatible | Good | 3-6 months | $40-$80 | Budget-conscious, personal use |
| Economy/Budget | Variable | 1-3 months | $25-$50 | Short-term use only, not recommended |
⚠️ Lithium-Ion Battery Safety Protocols
| Safety Concern | Risk Level | Prevention Measures | Emergency Response |
|---|---|---|---|
| Physical Damage | High | Never puncture, bend, or crush cells | Isolate immediately, use Class D extinguisher |
| Short Circuit | High | Cover terminals when not installed | Disconnect power, monitor for heating |
| Swelling/Bulging | Very High | Regular visual inspections | Do not use, dispose properly immediately |
| Overheating | Medium-High | Proper installation, no obstruction | Power off, allow to cool, investigate cause |
🔧 New Battery Installation Procedure
- Pre-Installation Verification:
- Verify battery model compatibility with your G5
- Check manufacturing date (prefer <6 months old)
- Inspect for physical damage or defects
- Test voltage with multimeter if possible (should be ~11-12V)
- Battery Positioning:
- Align battery connector with motherboard socket
- Ensure proper orientation (label facing up)
- Position battery evenly in compartment
- Verify no cables or components are pinched
- Secure Mounting:
- Install mounting screws in diagonal pattern
- Apply firm but not excessive torque
- Ensure battery sits flush with no rocking
- Verify all screws are properly seated
🔌 Battery Connection & Testing Protocol
| Connection Step | Procedure | Verification Method | Safety Check |
|---|---|---|---|
| Connector Alignment | Align battery connector with motherboard socket | Visual inspection, proper fit | No bent pins, proper orientation |
| Secure Connection | Press connector straight in until click | Firm connection, no movement | No excessive force required |
| Initial Power Test | Connect AC power first, check charging indicator | Charging light activation | Monitor for unusual heating |
| System Boot Test | Power on system, verify battery detection | Windows battery icon, system information | No error messages, stable operation |
📱 New Battery Calibration & Optimization
| Calibration Step | Procedure | Duration | Purpose |
|---|---|---|---|
| Initial Full Charge | Charge to 100% without interruption | 3-4 hours | Activates battery chemistry |
| Complete Discharge | Use until automatic shutdown (gaming workload) | Until shutdown | Calibrates fuel gauge accuracy |
| Second Full Charge | Charge to 100% without use | 3-4 hours | Stabilizes charge cycles |
| Normal Usage | Regular charge/discharge cycles | 3-5 cycles | Establishes usage patterns |
✅ Battery Performance Verification
| Test Type | Procedure | Expected Results | Acceptance Criteria |
|---|---|---|---|
| Charging Test | Monitor from 20% to 90% charge | Steady charging, no interruptions | Complete charge within 2-3 hours |
| Gaming Runtime Test | Medium gaming load until shutdown | 3-5 hours depending on capacity | Meets or exceeds specifications |
| Health Report | Generate Windows battery report | 100% design capacity reported | No errors, full capacity detected |
| Temperature Monitoring | Check during charging and gaming | Stable, within normal range | No excessive heating during use |
🔧 Common Battery Replacement Issues
| Issue | Symptoms | Likely Cause | Solution |
|---|---|---|---|
| Not Detected | "No battery detected" message | Poor connection, incompatible battery | Re-seat connector, verify compatibility |
| Not Charging | Plugged in, not charging indicator | Charging circuit, battery fault | Test with known good charger, check connection |
| Rapid Drain | Drains much faster than expected | Defective battery, high system load | Check battery health, system power usage |
| Swelling After Installation | Physical bulging, case deformation | Battery failure, manufacturing defect | Immediate replacement required |
📋 Battery Replacement Documentation for Resale
| Documentation Element | Purpose | Resale Impact | Implementation |
|---|---|---|---|
| Before/After Health Reports | Shows performance improvement | +$30-$50 | Include Windows battery report screenshots |
| Genuine Part Documentation | Proves quality replacement | +$20-$40 | Include receipt and part number photos |
| Professional Installation Photos | Demonstrates careful work | +$15-$30 | Show clean installation, proper connections |
| Performance Testing Results | Validates battery performance | +$20-$35 | Include runtime and charging test results |
♻️ Battery Disposal & Environmental Compliance
- Proper Disposal Methods:
- Never dispose in regular household trash
- Use authorized battery recycling facilities
- Check Call2Recycle for local options
- Tape battery terminals before disposal
- Environmental Responsibility:
- Lithium-ion batteries contain hazardous materials
- Proper recycling prevents soil and water contamination
- Supports recovery of valuable materials
- Document disposal for business records
📝 Warranty & Support Considerations
- Battery Warranty:
- Genuine Gigabyte: Typically 1 year limited warranty
- Premium compatible: 6-12 months common
- Budget options: 1-3 months or none
- Keep receipts and warranty documentation
- Installation Warranty:
- Professional workmanship guarantee
- Typically 30-90 days on labor
- Documented with photos and testing
- Builds buyer confidence and trust
✅ Battery Replacement Completion Checklist
- ✓ Old battery health assessed and documented
- ✓ Compatible replacement battery selected
- ✓ Safe removal of old battery completed
- ✓ New battery properly installed and secured
- ✓ Battery detected and charging verified
- ✓ Initial calibration cycle completed
- ✓ Performance testing documented
- ✓ Old battery properly disposed or recycled
6. Memory Upgrade: RAM Installation & Compatibility Guide
🚀 Why RAM Upgrades Transform Your Gigabyte G5 Gaming Performance
RAM upgrades provide the most cost-effective performance improvement for Gigabyte G5 gaming laptops, typically delivering 15-40% better gaming performance and eliminating stuttering in modern titles. With proper compatibility selection, memory upgrades can increase resale value by $60-$120 while dramatically improving multitasking capability.
| Upgrade Scenario | Performance Gain | Gaming Impact | Multitasking Improvement | Resale Value Added |
|---|---|---|---|---|
| 8GB → 16GB | 25-40% | Eliminates stuttering, faster loading | 2x application capacity | +$40-$70 |
| 16GB → 32GB | 15-25% | Smoother gameplay, better streaming | Professional workload ready | +$60-$100 |
| 32GB → 64GB | 5-15% | Future-proofing, content creation | Extreme multitasking | +$80-$120 |
| Speed Upgrade Only | 5-12% | Minor FPS improvements | Slightly faster responsiveness | +$20-$40 |
🔍 Gigabyte G5 Memory Specifications by Generation
| G5 Generation | RAM Type | Speeds Supported | Maximum Capacity | Configuration |
|---|---|---|---|---|
| G5 GD/G5 KC (2021) | DDR4 SO-DIMM | 2933MHz, 3200MHz | 64GB (2x32GB) | Dual Channel |
| G5 GE/G5 KF (2022-2023) | DDR4/DDR5 SO-DIMM | DDR4: 3200MHz DDR5: 4800MHz |
64GB (2x32GB) | Dual Channel |
| G5 ME/G5 MF (AMD) | DDR4 SO-DIMM | 3200MHz | 64GB (2x32GB) | Dual Channel |
| Latest Models (2024+) | DDR5 SO-DIMM | 4800MHz, 5200MHz, 5600MHz | 64GB (2x32GB) | Dual Channel |
🔍 How to Verify Current Memory & Compatibility
- System Information Check:
- Press Windows Key + R, type "msinfo32"
- Check "Installed Physical Memory (RAM)"
- Note total RAM and slots used
- Document current configuration for planning
- CPU-Z Detailed Analysis:
- Download CPU-Z (free utility)
- Check "Memory" tab for type, speed, and timings
- Verify single/dual channel operation
- Document specifications for compatibility matching
- Physical Inspection:
- After bottom cover removal, inspect RAM slots
- Note number of occupied vs available slots
- Check for any manufacturer stickers on existing RAM
- Document with photos for verification
✅ RAM Selection Guide for Gigabyte G5
| RAM Tier | Recommended Models | Speed Range | Timings | Best For |
|---|---|---|---|---|
| Premium Gaming | Corsair Vengeance, G.Skill Ripjaws | DDR4: 3200MHz DDR5: 5600MHz |
CL18 (DDR4) CL40 (DDR5) |
Maximum gaming performance |
| Performance Value | Kingston Fury Impact, Crucial | DDR4: 3200MHz DDR5: 4800MHz |
CL22 (DDR4) CL40 (DDR5) |
Excellent performance, great value |
| Budget Friendly | TeamGroup, Silicon Power | DDR4: 2933MHz DDR5: 4800MHz |
CL22 (DDR4) CL40 (DDR5) |
Good performance, lowest cost |
| Gigabyte Optimized | Gigabyte AORUS Memory | Varies by model | Manufacturer optimized | Maximum compatibility |
💾 RAM Capacity Recommendations by Use Case
| Use Case | Minimum RAM | Recommended RAM | Ideal RAM | Performance Benefit |
|---|---|---|---|---|
| Casual Gaming | 8GB | 16GB | 32GB | Eliminates stuttering, faster loading |
| Competitive Gaming | 16GB | 32GB | 32GB | Stable high FPS, streaming capable |
| Content Creation | 16GB | 32GB | 64GB | Faster rendering, larger project handling |
| Professional Work | 32GB | 64GB | 64GB | Virtual machines, large datasets |
🔧 Step-by-Step RAM Installation Procedure
- Pre-Installation Safety:
- Complete battery disconnection protocol
- Verify ESD protection is active
- Have necessary tools ready: plastic spudger
- Work on clean, static-free surface
- Existing RAM Removal:
- Locate RAM slots under metal shield
- Push retaining clips outward simultaneously
- RAM will pop up at 45-degree angle
- Lift out carefully, store in anti-static bag
- New RAM Installation:
- Align notch in RAM with key in slot
- Insert at 45-degree angle
- Press down firmly until clips snap into place
- Verify both clips are fully engaged
- Post-Installation Verification:
- Reconnect battery and power
- Boot to BIOS to verify detection
- Check Windows System Information
- Run memory diagnostics if needed
⚡ Dual Channel Configuration Guide
| Configuration | Installation Pattern | Performance Impact | Recommended For | Installation Notes |
|---|---|---|---|---|
| Single Channel | One module installed | Base performance | Budget upgrades, temporary | Use slot furthest from CPU |
| Dual Channel (Matched) | Two identical modules | 15-25% improvement | Gaming, general use | Use both slots, matched specs |
| Dual Channel (Mixed) | Two different modules | 10-20% improvement | Upgrade scenarios | May run at slower speed |
| Quad Channel (DDR5) | Two DDR5 modules | Additional 5-10% | Maximum performance | DDR5 only, specific models |
🔍 Critical Compatibility Considerations
| Compatibility Factor | Importance | How to Verify | Common Issues | Solutions |
|---|---|---|---|---|
| RAM Type (DDR4/DDR5) | Critical | Check CPU-Z or system specifications | Physical incompatibility | Verify motherboard support |
| Speed Compatibility | High | Check BIOS supported speeds | Downclocking to slower speed | Enable XMP in BIOS |
| Voltage Requirements | Medium | Check RAM specifications | Stability issues | Use JEDEC standard voltages |
| Physical Dimensions | Medium | Measure clearance if adding to existing | Heatsink interference | Use low-profile modules |
⚡ RAM Performance Optimization
- BIOS Configuration:
- Enter BIOS during boot (usually F2 or Delete)
- Enable XMP (Intel) or DOCP (AMD) profile
- Verify RAM speed and timings are correctly detected
- Save settings and exit
- Windows Optimization:
- Adjust virtual memory settings if needed
- Use Windows Memory Diagnostic tool
- Update chipset drivers from manufacturer
- Configure power plan for performance
- Gaming-Specific Optimizations:
- Close background applications during gaming
- Use game mode in Windows settings
- Monitor RAM usage during gaming sessions
- Consider RAM disk for temporary files if using 64GB
🔧 Troubleshooting Common RAM Issues
| Issue | Symptoms | Likely Causes | Solutions |
|---|---|---|---|
| Not Detected | System doesn't recognize new RAM | Improper seating, compatibility, BIOS | Re-seat modules, update BIOS, check compatibility |
| Blue Screen/Crashes | System instability, random crashes | Incompatible RAM, faulty module, timing issues | Test modules individually, adjust timings, replace if faulty |
| Running at Lower Speed | RAM detected but at slower speed | BIOS settings, mixed modules, compatibility | Enable XMP, use matched modules, update BIOS |
| Dual Channel Not Working | Performance lower than expected | Wrong slot configuration, mixed modules | Use correct slots, matched modules, verify in CPU-Z |
📊 RAM Performance Benchmarking & Documentation
| Benchmark Type | Procedure | Expected Results | Documentation Value |
|---|---|---|---|
| AIDA64 Memory Test | Run memory read/write/copy tests | Consistent with specifications | Proves performance improvement |
| Game Loading Times | Time game load from click to menu | 15-30% faster loading | Demonstrates real-world benefit |
| Multitasking Test | Multiple applications + browser tabs | Smooth performance, no swapping | Shows practical capability |
| Stability Testing | MemTest86 for 4+ hours | No errors, stable operation | Validates reliability |
💵 RAM Upgrade Resale Value Analysis
| Upgrade Scenario | RAM Cost | Labor Value | Value Added | Net ROI |
|---|---|---|---|---|
| 8GB → 16GB DDR4 | $35-$60 | $20-$30 | $70-$100 | +$15-$40 (43-100%) |
| 16GB → 32GB DDR4 | $65-$100 | $20-$30 | $90-$130 | +$15-$40 (23-62%) |
| 16GB → 32GB DDR5 | $100-$150 | $20-$30 | $120-$170 | +$10-$40 (10-40%) |
| 32GB → 64GB DDR5 | $180-$250 | $20-$30 | $150-$200 | -$30-$0 (slight negative) |
🔮 Future-Proofing & Upgrade Strategy
| Planning Horizon | RAM Recommendation | Rationale | Resale Impact |
|---|---|---|---|
| 1-2 Years | 16GB Minimum | Current gaming standard | Good resale value |
| 3-4 Years | 32GB Recommended | Future games, streaming, multitasking | Better value retention |
| 5+ Years | 64GB Maximum | Content creation, extreme future-proofing | Premium long-term value |
✅ RAM Upgrade Completion Checklist
- ✓ Current RAM configuration verified and documented
- ✓ Compatible RAM modules selected and purchased
- ✓ RAM properly installed in correct slots
- ✓ System boots and detects new RAM capacity
- ✓ BIOS configured for optimal performance (XMP enabled)
- ✓ Performance benchmarks completed and documented
- ✓ System stability verified under load
- ✓ Old RAM properly stored or disposed
7. Storage Upgrade: SSD & HDD Installation Options
💨 Why Storage Upgrades Deliver the Most Dramatic Gigabyte G5 Performance Boost
Storage upgrades provide the single most noticeable performance improvement for Gigabyte G5 gaming laptops, typically delivering 300-700% faster load times and transforming gaming from frustrating waiting to instant action. Professional storage upgrades can increase resale value by $80-$200 while eliminating storage bottlenecks.
| Upgrade Scenario | Performance Gain | Game Load Time Improvement | System Responsiveness | Resale Value Added |
|---|---|---|---|---|
| HDD → SATA SSD | 500-700% faster | 45s → 8s (82% faster) | Transformation from sluggish to snappy | +$80-$120 |
| SATA SSD → NVMe SSD | 200-400% faster | 8s → 4s (50% faster) | Noticeably quicker application launches | +$60-$100 |
| Capacity Upgrade Only | Same speed, more space | No change | Eliminates storage anxiety | +$40-$80 |
| Dual Drive Setup | OS + Games separation | Optimized organization | Clean system, fast gaming | +$100-$150 |
🔍 Gigabyte G5 Storage Specifications & Compatibility
| G5 Model Series | M.2 Slots | M.2 Interface | 2.5" SATA Bay | Maximum Capacity |
|---|---|---|---|---|
| G5 GD/G5 KC (2021) | 2x M.2 slots | PCIe 3.0 x4 NVMe | 1x 2.5" SATA III | 8TB+ (2x4TB NVMe + 2TB SATA) |
| G5 GE/G5 KF (2022-2023) | 2x M.2 slots | PCIe 4.0 x4 NVMe | 1x 2.5" SATA III | 8TB+ (2x4TB NVMe + 2TB SATA) |
| G5 ME/G5 MF (AMD) | 2x M.2 slots | PCIe 3.0/4.0 x4 NVMe | 1x 2.5" SATA III | 8TB+ (2x4TB NVMe + 2TB SATA) |
| Latest Models (2024+) | 2x M.2 slots | PCIe 4.0/5.0 x4 NVMe | 1x 2.5" SATA III | 16TB+ (2x8TB NVMe + 2TB SATA) |
✅ SSD Selection Guide for Gigabyte G5
| SSD Tier | Recommended Models | Speed Range | Endurance | Best For |
|---|---|---|---|---|
| Premium Gaming | Samsung 980 Pro, WD Black SN850X | 7,000 MB/s (Gen4) 3,500 MB/s (Gen3) |
1,200 TBW | Maximum gaming performance |
| Performance Value | Crucial P5 Plus, Kingston KC3000 | 6,000-7,000 MB/s | 600-800 TBW | Excellent performance, great value |
| Budget Gaming | WD Blue SN580, Crucial P3 Plus | 4,000-5,000 MB/s | 400-500 TBW | Good performance, budget friendly |
| Storage Expansion | 2.5" SATA SSDs (WD Blue, Crucial MX500) | 550 MB/s | 300-500 TBW | Game library, media storage |
🔍 How to Assess Current Storage & Plan Upgrades
- Current Drive Identification:
- Check Windows Device Manager for drive models
- Use CrystalDiskInfo for health assessment
- Run CrystalDiskMark for performance baseline
- Document current capacity and usage patterns
- Health & Wear Assessment:
- Check SSD wear level percentage and TBW
- Review power-on hours and total writes
- Identify any reallocated sectors or errors
- Determine if replacement is needed or optional
- Capacity Planning:
- Analyze current storage usage and growth rate
- Consider modern game sizes (50-150GB each)
- Plan for 20-30% free space for optimal performance
- Calculate ROI for different capacity options
🔧 M.2 NVMe SSD Installation Procedure
- M.2 Slot Identification:
- Locate M.2 slots near RAM area
- Identify which slot is currently occupied
- Check for thermal pads or heatsinks
- Note screw sizes and standoff positions
- Existing SSD Removal:
- Remove single retention screw from existing SSD
- SSD will pop up at 30-degree angle
- Lift out carefully and store in anti-static bag
- Remove any thermal pads for reuse
- New SSD Installation:
- Insert new SSD at 30-degree angle into slot
- Press down gently until flush with socket
- Secure with retention screw (do not overtighten)
- Apply thermal pad if included or recommended
🔧 2.5" SATA Drive Installation Procedure
| Installation Step | Procedure | Tools Required | Common Mistakes |
|---|---|---|---|
| Drive Bay Preparation | Locate 2.5" bay, remove mounting bracket if present | Phillips #1 screwdriver | Forgetting bracket removal |
| Drive Mounting | Secure drive to bracket with 4 screws | Phillips #1, proper screw length | Using wrong screw types |
| Cable Connection | Connect SATA data and power cables | No tools needed, careful handling | Forcing connectors, poor seating |
| Final Installation | Slide assembly into bay, secure with screws | Phillips #1 screwdriver | Pinching cables, improper alignment |
🔄 Data Migration Method Comparison
| Migration Method | Difficulty | Time Required | Success Rate | Recommended For |
|---|---|---|---|---|
| Hardware Cloner | Easy | 30-90 minutes | 98%+ | Beginners, large game libraries |
| Software Cloning | Medium | 45-120 minutes | 95%+ | Intermediate users, customization |
| Clean Install + Transfer | Hard | 2-4 hours | 99%+ | Advanced users, system optimization |
| Cloud Backup Restore | Medium | 4-8 hours | 90-95% | Selective restoration, backup users |
🔄 Step-by-Step Cloning Procedure
- Dual Drive Setup:
- Install new SSD in secondary M.2 slot
- Boot from original SSD with both drives connected
- Verify both drives detected in Disk Management
- Backup critical data before proceeding
- Cloning Process:
- Launch cloning software of choice
- Select source (old) and destination (new) drives
- Choose sector-by-sector copy for best results
- Start process and wait for completion (30-90 minutes)
- Post-Cloning Verification:
- Shut down and remove old drive
- Boot from new SSD only
- Verify all data, applications, and games
- Run performance tests to confirm improvement
💾 Storage Capacity Planning Guide
| Gaming Scenario | Minimum Capacity | Recommended Capacity | Ideal Capacity | Game Library Size |
|---|---|---|---|---|
| Casual Gamer | 512GB | 1TB | 2TB | 5-10 games (250-500GB) |
| Enthusiast Gamer | 1TB | 2TB | 4TB | 15-25 games (750GB-1.5TB) |
| Content Creator | 2TB | 4TB | 8TB+ | Games + projects (2-4TB+) |
| Professional Streamer | 2TB | 4TB | 8TB+ | Games + recordings (3-6TB+) |
⚡ Storage Performance Optimization
- Windows Optimization:
- Enable TRIM support (usually automatic for NVMe)
- Disable disk defragmentation for SSDs
- Configure write caching in Device Manager
- Enable hardware-accelerated GPU scheduling
- BIOS Optimization:
- Ensure NVMe drives are detected in BIOS
- Update to latest BIOS for best compatibility
- Enable fast boot options
- Verify PCIe link speed settings
- Gaming-Specific Optimizations:
- Install frequently played games on fastest drive
- Use game mode in Windows settings
- Close background applications during gaming
- Regularly clean temporary files and caches
💵 Storage Upgrade Resale Value Analysis
| Upgrade Scenario | Storage Cost | Labor Value | Value Added | Net ROI |
|---|---|---|---|---|
| 512GB → 1TB NVMe | $60-$100 | $25-$40 | $120-$180 | +$35-$80 (58-133%) |
| 1TB → 2TB NVMe | $120-$180 | $25-$40 | $180-$250 | +$35-$90 (29-75%) |
| Add 2TB SATA SSD | $100-$150 | $30-$50 | $150-$200 | +$20-$50 (20-50%) |
| Dual Drive Setup | $180-$280 | $40-$60 | $250-$350 | +$30-$70 (17-39%) |
🔧 Common Storage Upgrade Issues & Solutions
| Issue | Symptoms | Likely Cause | Solution |
|---|---|---|---|
| Drive Not Detected | BIOS doesn't see new SSD | Improper seating, compatibility, BIOS settings | Re-seat drive, check compatibility, update BIOS |
| Boot Failure After Clone | Blue screen or boot loop | Boot sector issues, UEFI/legacy mismatch | Repair boot sector, check BIOS settings |
| Slow Performance | Speed below expectations | PCIe link speed, driver issues, thermal throttling | Update drivers, check link speed, improve cooling |
| Capacity Not Recognized | Only part of capacity available | MBR partition limit, BIOS limitation | Convert to GPT, update BIOS |
📋 Performance Documentation for Resale
- Before/After Benchmarks:
- CrystalDiskMark sequential read/write speeds
- Game load time comparisons (stopwatch or software)
- System boot time measurements
- Application launch speed demonstrations
- Quality Assurance Documentation:
- SSD health reports from CrystalDiskInfo
- Installation quality photos
- Drive specifications and warranty information
- Performance optimization verification
- Value Proposition Documentation:
- Performance improvement percentages
- Capacity increase benefits for gaming
- User experience transformation examples
- Professional installation certification
🔒 Data Security & Disposal Protocol
- Old Drive Handling:
- Perform secure erase before disposal if sensitive data
- Use manufacturer secure erase tools or Parted Magic
- Physical destruction only if drive is faulty
- Document disposal method for business records
- New Drive Security:
- Enable BitLocker encryption for security
- Configure TPM security in BIOS settings
- Set up automatic backups to external drive
- Document security features for buyers
✅ Storage Upgrade Completion Checklist
- ✓ Data successfully backed up before upgrade
- ✓ New storage properly installed and secured
- ✓ Cloning or clean installation completed successfully
- ✓ All data, applications, and games verified functional
- ✓ Performance benchmarks documented
- ✓ Windows and drivers updated to latest versions
- ✓ Security features (BitLocker) configured if desired
- ✓ Old drive securely erased or properly stored
8. Cooling System Maintenance & Thermal Paste Replacement
❄️ Why Thermal Management Defines Long-Term Gigabyte G5 Gaming Performance
Proper cooling system maintenance transforms your Gigabyte G5 from a thermal-throttled portable to a sustained-performance gaming machine, enabling 20-35% better CPU and GPU performance under load while extending component lifespan. Professional thermal maintenance typically adds $60-$120 resale value by demonstrating careful system preservation and optimal gaming performance.
| Thermal Condition | Gaming Performance | Component Longevity | User Experience | Resale Value Impact |
|---|---|---|---|---|
| Optimized Cooling | Maximum sustained FPS | Extended 3-5 year lifespan | Quiet, cool, stable gaming | +$80-$120 |
| Moderate Maintenance | Good performance with occasional throttling | Normal 2-4 year lifespan | Warm during gaming, generally good | Neutral |
| Neglected System | Frequent thermal throttling, 30-50% performance loss | Reduced 1-3 year lifespan | Hot, loud, FPS drops | -$100-$180 |
| Critical Failure | Overheating shutdowns, instability | Immediate risk of component failure | Unusable for demanding games | -$200-$300 |
🔍 Gigabyte G5 Cooling System Specifications
| G5 Model Series | Cooling System Type | Heat Pipe Configuration | Fan Specifications | Thermal Design Power (TDP) |
|---|---|---|---|---|
| G5 GD/G5 KC (2021) | Dual fan, multiple heat pipes | CPU + GPU shared cooling, 4 heat pipes | Two 75mm fans, 4-pin PWM | CPU: 45W, GPU: 80-115W |
| G5 GE/G5 KF (2022-2023) | WINDFORCE Infinity cooling | Larger vapor chamber, 5 heat pipes | Two 84mm fans, 4-pin PWM | CPU: 45-55W, GPU: 105-140W |
| G5 ME/G5 MF (AMD) | Dual fan, multiple heat pipes | CPU + GPU shared cooling, 4 heat pipes | Two 75mm fans, 4-pin PWM | CPU: 45W, GPU: 80-115W |
🌡️ Thermal Performance Assessment & Diagnostic Protocol
- Temperature Monitoring:
- Use HWiNFO64 for real-time monitoring
- Record idle temperatures (40-55°C normal)
- Monitor gaming temperatures during extended sessions
- Check for thermal throttling at 95-100°C (CPU) and 87°C (GPU)
- Fan Performance Testing:
- Test fan ramp-up through Gigabyte Control Center
- Listen for bearing noise or grinding sounds
- Check for consistent airflow from all vents
- Verify automatic fan control responsiveness
- Airflow & Ventilation Inspection:
- Check intake and exhaust vents for dust accumulation
- Inspect heat sink fins for obstruction
- Verify proper contact between heat pipes and components
- Test system under gaming load for 30+ minutes
⚙️ Cooling System Maintenance Complexity Analysis
| Maintenance Task | Time Required | Difficulty Level | Performance Impact | Tools Required |
|---|---|---|---|---|
| External Vent Cleaning | 5-10 minutes | Easy | 5-10% improvement | Compressed air, soft brush |
| Fan & Heat Sink Cleaning | 20-30 minutes | Medium | 15-25% improvement | Phillips #1, compressed air, brush |
| Thermal Paste Replacement | 30-45 minutes | Medium | 20-35% improvement | Thermal paste, isopropyl alcohol, lint-free cloths |
| Complete Cooling System Replacement | 45-60 minutes | Medium-Hard | Restores to factory performance | Full toolkit, replacement parts, thermal materials |
✅ Thermal Material Selection Guide
| Material Type | Performance Level | Application Difficulty | Longevity | Recommended For |
|---|---|---|---|---|
| High-Performance Paste (Thermal Grizzly Kryonaut) | Excellent - 12.5 W/mK | Easy-Medium | 3-5 years | Enthusiasts, maximum gaming performance |
| Premium Paste (Arctic MX-6, Noctua NT-H2) | Very Good - 8-10 W/mK | Easy | 3-5 years | General gaming, excellent value |
| Thermal Pads (Various thicknesses 0.5-2.0mm) | Good - 3-8 W/mK | Medium | 2-4 years | VRM cooling, memory, chipsets |
| Liquid Metal (Conductonaut) | Extreme - 73 W/mK | Expert Only | 1-2 years | Expert overclockers only - risk of short circuits |
🔧 Step-by-Step Thermal Maintenance Procedure
- Cooling System Access:
- Remove bottom cover using proper technique
- Disconnect battery following safety protocol
- Identify cooling system mounting points and cables
- Document screw locations and fan cable routing
- Heat Sink Removal:
- Remove heat sink screws in reverse star pattern (8-12 screws)
- Note screw lengths and positions for reassembly
- Gently twist heat sink to break thermal paste bond
- Lift straight up to avoid damaging components or heat pipes
- Cleaning & Preparation:
- Clean CPU and GPU dies with 99% isopropyl alcohol
- Remove old thermal paste completely from both surfaces
- Clean heat sink surface and fan blades with compressed air
- Inspect heat pipes for damage, corrosion, or flattening
- Thermal Material Application:
- Apply rice-sized amount of thermal paste to CPU die
- Apply slightly larger amount to larger GPU die
- Spread evenly or let pressure distribute naturally
- Install thermal pads on VRMs and surrounding chips
🎨 Professional Thermal Paste Application Techniques
| Application Method | Procedure | Advantages | Disadvantages | Recommended For |
|---|---|---|---|---|
| Pea/Grain Method | Small dot in center, let pressure spread | Simple, consistent, minimal waste | May not cover corners on larger dies | Most CPUs and GPUs, beginners |
| Line Method | Thin line across die center | Good coverage for rectangular GPU dies | Potential for air bubbles if not careful | Modern laptop GPUs |
| Spread Method | Spread evenly with applicator card | Perfect coverage control | Risk of air bubbles, skill required | Experienced technicians |
| X Pattern | X pattern across die | Good corner coverage | Potential for excess paste | Larger desktop CPUs |
🌀 Fan Maintenance & Replacement Guide
| Fan Issue | Symptoms | Diagnostic Steps | Replacement Complexity | Cost Range |
|---|---|---|---|---|
| Bearing Noise | Grinding, whining, rattling sounds | Listen during spin-up, check for physical play | Medium - heat sink removal required | $25-$40 per fan |
| Fan Not Spinning | Overheating, no airflow from vents | Check connector, test with external power | Medium - heat sink removal required | $25-$40 per fan |
| Inconsistent Speed | Erratic RPM, sudden speed changes | Monitor in HWiNFO64, check PWM signal | Medium - heat sink removal required | $25-$40 per fan |
| Reduced Airflow | Higher temperatures, slower response | Clean blades, check for obstruction | Easy-Medium - may not need replacement | $0-$25 (cleaning only) |
🔧 Common Cooling System Issues & Solutions
| Issue | Symptoms | Immediate Actions | Permanent Solutions | Performance Impact |
|---|---|---|---|---|
| Dust Accumulation | Gradual temperature increase, reduced airflow | Compressed air cleaning, improve ventilation | Regular maintenance, workspace cleanliness | 15-25% improvement after cleaning |
| Dried Thermal Paste | Rapid temperature spikes, immediate throttling | Reduce gaming settings, improve ambient cooling | Complete thermal paste replacement | 20-35% improvement after replacement |
| Fan Failure | Overheating shutdowns, no fan noise | Shutdown immediately, external cooling | Fan replacement, connector inspection | Critical - system unusable for gaming until fixed |
| Heat Pipe Failure | Uneven cooling, hot spots | Reduce CPU/GPU power limits | Complete cooling assembly replacement | Restores to factory performance |
📊 Gigabyte G5 Temperature Benchmarks
| Usage Scenario | Normal Temperatures | Concerning Temperatures | Critical Temperatures | Performance Impact |
|---|---|---|---|---|
| Idle/Desktop | 40-55°C | 55-65°C | 65°C+ | None to minor |
| Light Gaming | 65-75°C | 75-85°C | 85°C+ | Minor to moderate throttling |
| Heavy Gaming | 75-85°C | 85-95°C | 95°C+ (CPU throttling) 87°C+ (GPU throttling) |
Moderate to severe throttling |
| Stress Test/Benchmark | 80-90°C | 90-100°C | 100°C+ (thermal shutdown) | Severe throttling or shutdown |
⚡ Thermal Performance Optimization Strategies
- Software Optimization:
- Use Gigabyte Control Center for custom fan curves
- Configure Windows power plans for balanced performance
- Update BIOS for improved thermal management
- Use MSI Afterburner for GPU fan control
- Hardware Improvements:
- Add thermal pads to VRM and power delivery components
- Ensure proper mounting pressure on heat sink
- Improve ventilation with laptop cooling pad
- Consider graphite thermal pads for long-term stability
- Usage Pattern Optimization:
- Avoid blocking intake/exhaust vents during gaming
- Use on hard, flat surfaces for better airflow
- Schedule intensive gaming during cooler ambient temperatures
- Monitor temperatures during different gaming scenarios
💵 Cooling System Maintenance Resale Value Analysis
| Maintenance Scenario | Parts Cost | Labor Value | Value Added | Net ROI |
|---|---|---|---|---|
| Basic Cleaning & Paste | $15-$25 | $30-$50 | $80-$120 | +$35-$85 (233-567%) |
| Fan Replacement | $50-$80 | $30-$50 | $100-$150 | +$20-$70 (40-140%) |
| Complete Cooling System | $80-$120 | $40-$60 | $150-$200 | +$30-$80 (38-100%) |
| Performance Optimization | $20-$40 | $40-$60 | $100-$140 | +$40-$80 (200-400%) |
✅ Thermal Performance Testing & Verification Protocol
| Test Type | Procedure | Expected Results | Acceptance Criteria |
|---|---|---|---|
| Idle Temperature Test | Measure after 15 minutes of light use | 40-55°C depending on ambient | Stable, within 5°C of ambient expectations |
| Gaming Load Test | Run demanding game for 30 minutes | 75-85°C maximum, no throttling | Sustained performance, no thermal throttling |
| Fan Ramp Test | Monitor fan speed during load increase | Smooth ramp-up, appropriate noise levels | No bearing noise, consistent airflow |
| Long-term Stability | Run extended gaming session (2+ hours) | Stable temperatures, consistent performance | No overheating shutdowns or instability |
📅 Preventive Maintenance Schedule
- Monthly: External vent cleaning with compressed air
- Every 6 Months: Internal inspection for dust accumulation
- Every 12-18 Months: Thermal paste replacement
- Every 2-3 Years: Complete cooling system inspection and maintenance
- As Needed: Fan replacement when bearing noise develops
✅ Cooling System Maintenance Completion Checklist
- ✓ Idle temperatures within expected range (40-55°C)
- ✓ Gaming temperatures stable without throttling (under 95°C)
- ✓ Fan operation smooth and quiet at all speeds
- ✓ Airflow consistent from all vents
- ✓ Thermal paste properly applied with full coverage
- ✓ All thermal pads correctly sized and positioned
- ✓ Heat sink mounting pressure even and secure
- ✓ Performance benchmarks show improvement
9. Keyboard & Top Case Disassembly: Advanced Component Access
⌨️ Why Professional Keyboard & Top Case Removal Enables Comprehensive Repairs
Keyboard and top case disassembly provides complete access to motherboard-level components for advanced repairs like USB port replacement, speaker issues, and touchpad problems. Professional execution preserves the premium gaming laptop aesthetic that justifies $60-$120 resale value premiums by preventing cosmetic damage during complex disassembly.
| Disassembly Level | Components Accessed | Repair Complexity | Risk Level | Resale Value Impact |
|---|---|---|---|---|
| Bottom Cover Only | RAM, Storage, Battery, Cooling | Easy-Medium | Low | Standard upgrades |
| Keyboard Removal | Keyboard, Touchpad, Speakers | Medium | Medium | +$40-$80 |
| Full Top Case | Motherboard, Ports, Internal Connectors | High | High | +$60-$120 |
| Complete Teardown | All Components, Display Assembly | Expert | Very High | +$80-$150 (professional only) |
🔍 Gigabyte G5 Keyboard & Top Case Specifications
| G5 Model Series | Keyboard Type | Backlight | Touchpad Type | Disassembly Complexity |
|---|---|---|---|---|
| G5 GD/G5 KC (2021) | Standard laptop keyboard | Single-zone RGB | Clickpad with integrated buttons | Medium-High |
| G5 GE/G5 KF (2022-2023) | Gaming-oriented keyboard | Per-key RGB (some models) | Precision touchpad | High |
| G5 ME/G5 MF (AMD) | Standard laptop keyboard | Single-zone RGB | Clickpad with integrated buttons | Medium-High |
🔍 Pre-Disassembly Assessment & Decision Matrix
- Symptom Analysis:
- Identify specific issues requiring top case access
- Test all keyboard keys and touchpad functions
- Check USB ports, audio jacks, and other I/O
- Document exact symptoms for targeted repair
- Necessity Evaluation:
- Determine if issue can be resolved without full disassembly
- Consider alternative repair methods
- Evaluate risk vs. benefit of complete teardown
- Plan for potential additional repairs while accessed
- Documentation Protocol:
- Take comprehensive photos before starting
- Document screw locations and cable routing
- Note any existing damage or wear patterns
- Create step-by-step reference guide
⚙️ Keyboard & Top Case Disassembly Complexity
| Disassembly Step | Time Required | Difficulty Level | Risk Factors | Critical Tools |
|---|---|---|---|---|
| Bottom Cover Removal | 5-10 minutes | Easy | Stripped screws, broken clips | Phillips #1, plastic spudgers |
| Battery & Component Removal | 10-15 minutes | Easy-Medium | ESD damage, connector issues | Plastic tools, anti-static gear |
| Keyboard Bezel Removal | 15-25 minutes | Medium | Broken clips, cosmetic damage | Thin pry tools, guitar picks |
| Keyboard Assembly Access | 20-30 minutes | Medium-High | Ribbon cable damage, frame stress | Multiple pry tools, patience |
| Full Top Case Removal | 30-45 minutes | High | Multiple connectors, alignment issues | Full toolkit, documentation system |
🔧 Step-by-Step Keyboard Removal Procedure
- Complete Base Disassembly:
- Remove bottom cover following established protocol
- Disconnect battery and all accessible components
- Remove RAM, storage drives, and Wi-Fi card
- Document all connections with photos
- Keyboard Bezel Removal:
- Identify bezel retention clips around perimeter
- Start from top edge near display hinges
- Use plastic spudgers at 30-degree angles
- Work systematically around all edges
- Keyboard Assembly Access:
- Locate keyboard mounting screws under bezel
- Remove screws in sequence, noting lengths
- Carefully lift keyboard assembly from top edge
- Disconnect ribbon cable before full removal
- Ribbon Cable Handling:
- Identify ZIF (Zero Insertion Force) connector type
- Lift locking flap gently with plastic tool
- Slide cable out straight, never pull at angle
- Store keyboard in safe, static-free location
🔌 Professional Ribbon Cable Handling Protocol
| Cable Type | Identification | Removal Method | Installation Method | Risk Factors |
|---|---|---|---|---|
| ZIF Connector | Liftable plastic flap | Lift flap, slide cable out straight | Insert cable, press flap down firmly | Broken flaps, torn cables |
| Latch-Type | Flip-up latch mechanism | Flip latch up, pull cable straight out | Insert cable, flip latch down | Broken latches, bent pins |
| Push-Pull | No visible latch | Pull straight out firmly | Push straight in until click | Internal damage, poor connection |
| Board-to-Board | Direct connection between boards | Rock gently side-to-side while pulling up | Align pins carefully, press straight down | Bent pins, misalignment |
🔧 Top Case Removal Procedure
- Motherboard Preparation:
- Disconnect all remaining motherboard cables
- Remove motherboard mounting screws (8-12 screws)
- Note screw lengths and positions meticulously
- Lift motherboard straight up to avoid damage
- Internal Component Identification:
- Identify speakers and their mounting points
- Locate touchpad assembly and ribbon cables
- Check for additional hidden screws or clips
- Document component locations for reassembly
- Top Case Separation:
- Work around perimeter releasing remaining clips
- Use plastic tools only to prevent cosmetic damage
- Lift top case carefully once all clips are released
- Set aside on soft, clean surface
🔧 Common Components Accessed Through Top Case Removal
| Component | Access Level Required | Common Issues | Replacement Complexity | Resale Impact if Repaired |
|---|---|---|---|---|
| USB Ports | Full Top Case | Loose connection, physical damage | High (soldering required) | +$40-$70 |
| Audio Jack | Full Top Case | No sound, static, loose connection | High (soldering required) | +$30-$50 |
| Touchpad | Keyboard Removal | Non-responsive, erratic movement | Medium-High | +$50-$80 |
| Speakers | Keyboard Removal | No sound, distortion, rattling | Medium | +$30-$60 |
| Power Button | Full Top Case | Intermittent, non-functional | High | +$40-$70 |
🔌 Professional Cable Management & Routing
| Cable Type | Routing Path | Connection Points | Risk Factors | Best Practices |
|---|---|---|---|---|
| Keyboard Ribbon | Under motherboard to connector | Central motherboard ZIF connector | Pinching, sharp bends | Follow original routing exactly |
| Touchpad Cable | Along bottom edge to connector | Side motherboard ZIF connector | Twisting, connector damage | Ensure flat, untwisted installation |
| Speaker Wires | Along sides to audio board | Left/right audio connectors | Pinching, wire fatigue | Secure with original adhesive |
| LED Cables | Various paths to control board | Multiple small connectors | Fragile wires, small connectors | Handle with extreme care |
🚫 Common Keyboard & Top Case Disassembly Mistakes
| Mistake | Consequence | Prevention | Repair Cost |
|---|---|---|---|
| Using Metal Tools | Scratches, gouges, visible damage | Plastic tools only for prying | $80-$150 for top case replacement |
| Forcing Clips | Broken plastic, misalignment | Gentle pressure, proper technique | $60-$120 for bezel replacement |
| Ribbon Cable Damage | Non-functional keyboard/touchpad | Proper ZIF connector handling | $40-$80 for cable replacement |
| Poor Documentation | Reassembly issues, leftover parts | Comprehensive photos and notes | $50-$100 for professional reassembly |
🔄 Professional Reassembly Protocol
- Component Verification:
- Verify all components are clean and undamaged
- Check ribbon cables for any signs of wear or damage
- Ensure all connectors are functional and clean
- Test components before reassembly if possible
- Reverse Sequence Assembly:
- Begin with top case and internal components
- Install speakers, touchpad, and other peripherals
- Route all cables following original paths
- Verify all connections before proceeding
- Final Integration:
- Install motherboard with proper screw sequence
- Connect all internal cables securely
- Install keyboard assembly with care
- Replace bezel and verify proper clip engagement
✅ Post-Reassembly Testing & Verification
| Test Type | Procedure | Expected Results | Acceptance Criteria |
|---|---|---|---|
| Keyboard Function Test | Test every key using on-screen keyboard | All keys register correctly | 100% key functionality |
| Touchpad Test | Test movement, clicking, gestures | Smooth, accurate cursor control | Full touchpad functionality |
| I/O Port Test | Test all USB ports, audio jacks | All ports function properly | No connection issues |
| Speaker Test | Play audio through all speakers | Clear sound from all speakers | No distortion or rattling |
💵 Keyboard & Top Case Repair Resale Value Analysis
| Repair Scenario | Parts Cost | Labor Value | Value Added | Net ROI |
|---|---|---|---|---|
| Keyboard Replacement | $50-$80 | $40-$60 | $100-$150 | +$10-$40 (20-80%) |
| Touchpad Replacement | $40-$70 | $40-$60 | $90-$130 | +$10-$30 (25-75%) |
| USB Port Repair | $10-$20 | $50-$80 | $80-$120 | +$20-$40 (200-400%) |
| Complete Top Case Refresh | $100-$160 | $80-$120 | $180-$280 | +$0-$40 (0-25%) |
✅ Safety Checkpoints During Disassembly
- Before Starting:
- Battery completely disconnected and verified
- ESD protection properly implemented
- All necessary tools organized and accessible
- Documentation system ready
- During Disassembly:
- No excessive force applied to any components
- Plastic tools only for prying and clip release
- Systematic approach to complex assemblies
- Frequent documentation photos
- After Disassembly:
- All components stored safely and organized
- Work area clean and ready for repairs
- All screws and small parts accounted for
- Repair plan clearly established
✅ Keyboard & Top Case Disassembly Completion Checklist
- ✓ All components safely removed and organized
- ✓ No broken clips or cosmetic damage
- ✓ All ribbon cables properly disconnected and stored
- ✓ Comprehensive documentation completed
- ✓ Work area organized for planned repairs
- ✓ All screws accounted for and properly stored
- ✓ ESD protection maintained throughout
- ✓ Repair objectives clearly identified and planned
10. Maximizing Resale Value After Professional Upgrades
💰 Why Professional Documentation & Strategic Marketing Maximizes Your Return
Professional upgrades can increase your Gigabyte G5's resale value by $200-$500+, but only if properly documented and marketed to the right buyers. Strategic presentation and platform selection can mean the difference between a quick sale and maximum profit, with documented professional work justifying 25-40% price premiums over comparable unupgraded systems.
| Upgrade Category | Typical Investment | Value Added | ROI Percentage | Buyer Appeal |
|---|---|---|---|---|
| Storage Upgrades | $80-$200 | $120-$280 | 150-250% | Very High (immediate benefit) |
| Memory Upgrades | $60-$150 | $100-$200 | 167-233% | High (performance visible) |
| Cooling Maintenance | $20-$60 | $80-$140 | 400-700% | Medium (trust building) |
| Battery Replacement | $80-$140 | $100-$180 | 125-200% | Very High (portability restored) |
| Complete Refresh | $240-$550 | $400-$800 | 167-233% | Premium (like-new condition) |
📋 Professional Documentation Framework
| Documentation Element | Value Added | Implementation | Buyer Confidence Impact | Platform Optimization |
|---|---|---|---|---|
| Before/After Benchmarks | +$40-$80 | CrystalDiskMark, 3DMark, Cinebench screenshots | High - proves performance claims | All platforms, especially eBay |
| Professional Photos | +$30-$60 | High-quality images of upgrades, clean internals | Medium-High - demonstrates care | All platforms, critical for Facebook |
| Component Receipts | +$20-$40 | Scanned receipts with part numbers and dates | Medium - proves quality parts | eBay, specialty forums |
| Testing Certifications | +$50-$100 | Stability test results, temperature logs | Very High - proves reliability | Premium platforms, enthusiast buyers |
| Warranty Documentation | +$30-$70 | Written warranty, contact information | High - reduces buyer anxiety | All platforms, builds trust |
💲 Strategic Pricing & Market Positioning
- Market Research & Competitive Analysis:
- Research similar Gigabyte G5 models on multiple platforms
- Note pricing for stock vs. upgraded systems
- Identify unique selling propositions of your upgraded system
- Position between stock systems and new equivalent laptops
- Value-Based Pricing Formula:
- Base market value for your G5 model and condition
- Add documented upgrade costs at 60-80% recovery rate
- Add professional labor value at $40-$60/hour
- Include 10-20% premium for documented quality and warranty
- Psychological Pricing Strategies:
- Use $X,499 instead of $X,500 for perceived value
- Highlight specific benefits rather than just specifications
- Create bundled pricing for accessories to increase overall value
- Offer limited-time discounts to create urgency
🎯 Platform-Specific Optimization Strategies
| Platform | Pricing Strategy | Documentation Focus | Keyword Optimization | Buyer Communication |
|---|---|---|---|---|
| eBay | Premium pricing with best offer | Maximum documentation, professional photos | "Professionally Upgraded", "Gaming Ready", "Like New" | Detailed, professional, emphasize warranty |
| SellLaptopBack | Quick sale pricing | Basic specs, honest condition | Accurate description, no embellishment | Minimal - they assess themselves |
| SellLaptopBack | Fair market value | Clear photos, accurate specs | Model number, basic specifications | Professional, accurate descriptions |
| Facebook Marketplace | Competitive local pricing | Visual appeal, local pickup benefits | "Local Pickup", "Cash Discount", "Test Before Buy" | Friendly, responsive, emphasize local advantage |
| Specialized Forums | Enthusiast premium pricing | Technical details, upgrade documentation | Specific component names, technical terms | Technical, detailed, community-focused |
📸 Professional Photography Protocol
| Photo Type | Purpose | Setup Requirements | Value Impact | Platform Priority |
|---|---|---|---|---|
| Hero Shot | Main listing image, maximum appeal | Clean background, good lighting, gaming aesthetic | High - first impression critical | All platforms - especially eBay/Facebook |
| Upgrade Documentation | Prove professional workmanship | Clear shots of new components, clean internals | Very High - justifies premium | eBay, forums, Facebook |
| Benchmark Proof | Validate performance claims | Screenshots with visible system information | High - builds technical credibility | eBay, specialty forums |
| Condition Documentation | Honest representation builds trust | Clear photos of any wear or imperfections | Medium - prevents returns, builds trust | All platforms - especially eBay |
| Accessory Shots | Increase perceived value | Clean presentation of included accessories | Medium - complete package appeal | Facebook, eBay, local platforms |
📈 Professional Listing Optimization Framework
- Title Optimization Formula:
- Start with "Professionally Upgraded Gigabyte G5"
- Include key specs: "RTX 4060 - 32GB RAM - 2TB SSD"
- Add performance descriptors: "Gaming Ready - Like New"
- Include unique selling points: "New Battery - Fresh Thermal Paste"
- Description Structure:
- Opening paragraph: Value proposition and key benefits
- Detailed specifications with upgrade highlights
- Professional upgrade documentation section
- Performance testing and verification results
- Warranty and support information
- Clear terms and contact information
- Keyword Strategy:
- Primary: "Gigabyte G5", "Gaming Laptop", "RTX [model]"
- Secondary: "Upgraded", "Professional", "Like New"
- Tertiary: Specific game performance terms
- Long-tail: "Gigabyte G5 RTX 4060 32GB RAM 2TB SSD"
💬 Professional Buyer Communication Protocol
| Buyer Question Type | Professional Response Template | Value Reinforcement | Conversion Impact |
|---|---|---|---|
| Price Negotiation | "The price reflects $X in professional upgrades and comprehensive testing. I'm confident you'll find it's excellent value compared to new systems." | Justifies premium with documented value | High - converts price shoppers to value buyers |
| Performance Questions | "Here are benchmark results showing [specific performance]. The upgrades ensure smooth gaming in [popular titles] at [settings]." | Provides concrete performance data | Very High - addresses core concerns |
| Condition Concerns | "I've documented the condition thoroughly in the listing. The system has been professionally maintained and includes a [timeframe] warranty." | Builds trust through transparency | High - reduces buyer anxiety |
| Comparison Questions | "Unlike stock systems, this G5 includes [key upgrades] that provide [specific benefits]. The professional work ensures reliability." | Differentiates from competition | Medium-High - highlights unique value |
🏛️ Government & Education Selling Channels
Specialized Marketing for Institutional Buyers
- Government Surplus Channels:
- Research GSA auctions and government surplus programs
- Emphasize reliability and professional maintenance
- Highlight security features and clean installation
- Provide detailed maintenance documentation
- Educational Institution Marketing:
- Contact university IT departments directly
- Position as cost-effective lab or faculty machines
- Emphasize gaming capability for design/engineering programs
- Offer bulk pricing for multiple units
- .edu and .gov Specific Value Propositions:
- Professional documentation suitable for institutional records
- Emphasis on reliability and reduced downtime
- Clean, professional presentation for budget approval
- Warranty and support documentation
⚡ Instant Quote Service Strategy
| Service | Best Use Case | Pricing Strategy | Documentation Required | Expected Return |
|---|---|---|---|---|
| SellLaptopBack | Quick sale, minimal effort | Accept reasonable offers quickly | Basic specs, honest condition | 70-85% of retail value |
| SellLaptopBack | Convenient mail-in service | Compare with other services | Clear photos, accurate description | 65-80% of retail value |
| Gazelle/EcoATM | Immediate cash, lowest effort | Absolute minimum acceptable price | Minimal - they assess themselves | 50-70% of retail value |
| Local Buyers | Cash transactions, no shipping | Competitive local pricing | Visual appeal, local testing | 80-95% of retail value |
🛡️ Professional Warranty & Support Framework
| Warranty Level | Coverage | Value Added | Implementation | Risk Management |
|---|---|---|---|---|
| 30-Day Basic | Hardware defects from upgrades | +$20-$40 | Written agreement, contact information | Low risk, builds confidence |
| 90-Day Standard | All components, labor included | +$40-$70 | Formal document, clear terms | Medium risk, higher value |
| 6-Month Premium | Comprehensive system warranty | +$60-$100 | Professional document, registered | Higher risk, premium positioning |
| Component-Only | Manufacturer warranties only | +$10-$30 | Provide component receipts | Minimal risk, basic assurance |
📅 Seasonal & Market Timing Strategy
| Time Period | Market Conditions | Pricing Strategy | Marketing Angle | Expected Results |
|---|---|---|---|---|
| Back-to-School (Aug-Sept) | High demand from students | Premium pricing, emphasize value | "Perfect for college gaming", "Campus ready" | Quick sale, good prices |
| Holiday Season (Nov-Dec) | Gift shopping demand | Competitive pricing, bundle offers | "Great holiday gift", "Ready for new games" | Good prices, multiple offers |
| Tax Return Season (Feb-Apr) | Increased disposable income | Strong pricing, emphasize premium features | "Treat yourself", "Upgrade with tax return" | Premium prices possible |
| Summer Months (Jun-Jul) | Slower market, more competition | Aggressive pricing, quick sale focus | "Summer gaming ready", "Price reduced" | Quicker sales, lower prices |
🛡️ Resale Risk Management Protocol
| Risk Type | Prevention Strategy | Mitigation Plan | Documentation Required |
|---|---|---|---|
| Payment Fraud | Use platform payment systems only | Platform protection programs, documentation | Payment records, communication logs |
| Return Fraud | Detailed photos, serial number documentation | Platform dispute process, evidence collection | Before photos, serial numbers, condition proof |
| Shipping Damage | Professional packaging, insurance, signature required | Carrier claims process, proper documentation | Packaging photos, insurance records |
| Local Meeting Risks | Public locations, daytime meetings, bring assistant | Safety first, walk away if uncomfortable | Meeting location records, contact information |
📊 Expected Success Metrics
| Performance Metric | Realistic Target | Excellent Result | Measurement Method |
|---|---|---|---|
| Total ROI | 150-250% | 300-500% | (Sale Price - Parts Cost) / Parts Cost |
| Time to Sale | 7-14 days | 3-7 days | Listing creation to sale completion |
| Price Premium | 20-30% over stock | 35-50% over stock | Compared to similar unupgraded systems |
| Buyer Satisfaction | 95% positive feedback | 98%+ positive feedback | Platform ratings and reviews |
✅ Resale Preparation Completion Checklist
- ✓ All upgrades professionally documented with photos
- ✓ Performance benchmarks completed and saved
- ✓ System thoroughly tested and verified stable
- ✓ Professional cleaning and cosmetic preparation completed
- ✓ Market research conducted and pricing strategy established
- ✓ Platform-specific listing optimization completed
- ✓ Professional photography portfolio created
- ✓ Warranty and support documentation prepared
- ✓ Risk management protocols in place
- ✓ Fallback options (SellLaptopBack, etc.) researched and ready
🎯 Your Gigabyte G5 Resale Strategy Complete
You've successfully transformed a used Gigabyte G5 into a premium, professionally upgraded gaming laptop with documented performance improvements and comprehensive quality assurance. By implementing these strategic resale techniques, you're positioned to achieve maximum return on your investment while providing exceptional value to your buyer.
Need to Sell Your Gigabyte Laptop? Get Instant Cash!
If your Gigabyte G5 (or other Gigabyte gaming laptop) has performance issues or you're upgrading to a newer model, we offer competitive cash payouts for your device. We buy broken, used, and refurbished Gigabyte gaming laptops—including all G5 configurations—with free insured shipping and hassle-free evaluations.
Sell Popular Gigabyte Models Now: