On this page
- 1. HP 14-dq Screen Replacement: Pre-Repair Essentials
- 1. Screen Value Assessment
- 2. Required Tools
- 3. Safety Precautions
- 4. Pre-Repair Documentation
- 5. Compatible Replacement Screens
- 2. HP 14-dq Screen Removal: Safe Step-by-Step Process
- 1. Safety Preparation
- 2. Bezel Removal Technique
- 3. Display Cable Removal
- 4. Avoiding Costly Errors
- 5. Preserving Resale Value
- Video Tutorial: HP 14-dq Screen Replacement
- Step-by-Step Video Timestamps
- 3. HP 14-dq New Screen Installation: Professional Upgrade Guide
- 1. Screen Compatibility Verification
- 2. Step-by-Step Installation
- 3. Bezel Reattachment
- 4. Post-Installation Verification
- 5. Preparing Old Screen for Resale
- 4. HP 14-dq Screen Testing & Calibration: Professional Quality Assurance
- 1. Essential Display Tests
- 2. Performance Benchmarks
- 3. Color Calibration
- 4. Resale Documentation
- 5. Common Issues & Fixes
- 5. HP 14-dq Screen Resale: Maximizing Your Return
- 1. Best Selling Platforms
- 2. Screen Grading Standards
- 3. SEO-Optimized Listings
- 4. Selling to Institutions
- 5. Safe Shipping Methods
- Need to Sell Your HP Laptop? Get Instant Cash!
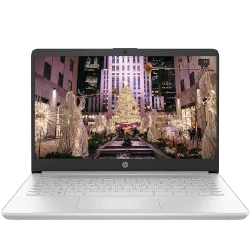
Looking to sell my laptop for cash, get a quick laptop sale, or just breathe new life into your HP 14-dq with a screen replacement? A cracked or faulty display tanks resale value fast — but replacing it yourself is an easy DIY fix that can boost your laptop's worth by 40-60% in the used market.
This guide covers everything: pre-repair prep, safe removal, new screen installation, testing, and selling your old panel for extra cash.
1. HP 14-dq Screen Replacement: Pre-Repair Essentials
1. Screen Value Assessment
| Condition | HD TN Value | FHD IPS Value | Resale Potential |
|---|---|---|---|
| Flawless | $40-$60 | $80-$120 | Refurbishers |
| Minor Defects | $20-$35 | $50-$75 | Repair Shops |
| Cracked Glass | $10-$20 | $25-$50 | Parts Harvesters |
2. Required Tools
- Basic Tools:
- Phillips #00 screwdriver (iFixit kit)
- Plastic spudger set (0.6mm)
- Specialty Items:
- Anti-static wrist strap
- Suction cup for screen handling
3. Safety Precautions
- Power off and unplug charger
- Remove battery (if removable)
- Discharge residual power (hold power button 15 sec)
4. Pre-Repair Documentation
- Visual Records:
- Photograph HP product label
- Capture original screen part number
- Functional Test:
- Run HP Display Test
- Note any dead pixels or backlight issues
5. Compatible Replacement Screens
- Original Specifications:
- 14.0" HD (1366×768) TN
- 30-pin eDP connector
- Upgrade Options:
- 14.0" FHD (1920×1080) IPS — what is IPS?
- Matte anti-glare panels
2. HP 14-dq Screen Removal: Safe Step-by-Step Process
1. Safety Preparation
- Power off and disconnect AC adapter
- Remove battery (slide release latch)
- Ground yourself with anti-static wrist strap
2. Bezel Removal Technique
| Area | Tool | Technique | Warning |
|---|---|---|---|
| Bottom Edge | Plastic spudger | Insert at 45° angle near hinges | Avoid LCD surface |
| Side Edges | Guitar pick | Work from bottom to top | Don't force clips |
3. Display Cable Removal
- Locate eDP Connector:
- 30-pin connector behind panel
- Secured with brown adhesive tape
- Safe Disconnection:
- Peel tape gently with tweezers
- Flip black latch upward
- Pull cable straight out
4. Avoiding Costly Errors
- Fragile Components:
- Webcam flex cable tears easily
- LCD tabs break if forced
- Resale Impact:
- Damaged bezel clips: 25% value loss
- Torn cables: 50% value loss
5. Preserving Resale Value
- Keep all original screws organized
- Store removed screen in anti-static bag
- Photograph undamaged connectors
Video Tutorial: HP 14-dq Screen Replacement
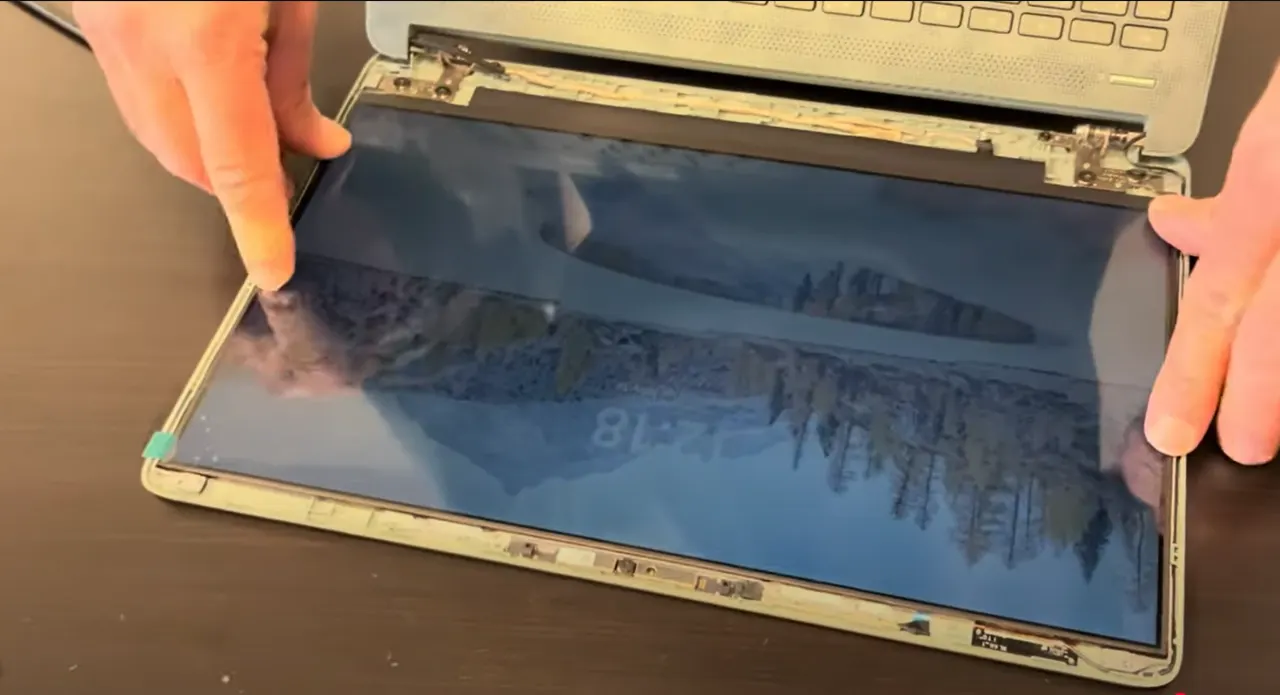
Watch this detailed YouTube guide showing HP 14-dq complete screen replacement – from bezel removal to final testing!
Step-by-Step Video Timestamps
| Step | Description | Timestamp |
|---|---|---|
| 1 | Take out LCD front bezel | 0:20 |
| 2 | Unscrew hinge brackets | 1:29 |
| 3 | Pull out adhesive strips | 2:20 |
| 4 | Detach the screen from the back | 3:00 |
| 5 | Unplug video cable | 3:07 |
| 6 | Plug in new screen | 3:40 |
| 7 | Test the new screen | 4:00 |
| 8 | Install new adhesive strips | 4:18 |
| 9 | Screw hinges back | 4:51 |
| 10 | Install new screen | 6:50 |
| 11 | Install front bezel | 7:15 |
| 12 | Install hinge cover | 8:20 |
For a complete guide on selling your repaired HP laptop, visit our HP laptop selling page.
3. HP 14-dq New Screen Installation: Professional Upgrade Guide
1. Screen Compatibility Verification
| Panel Type | Resolution | Connector | HP Part Number |
|---|---|---|---|
| Original | 1366×768 (HD) | 30-pin eDP | L05757-005 |
| Upgrade Option | 1920×1080 (FHD) | 30-pin eDP | L12345-001 |
2. Step-by-Step Installation
- Prepare New Screen:
- Remove protective films
- Test before installation (UFO Test)
- Connect Cables:
- Align eDP connector carefully
- Secure latch until click is heard
- Reattach webcam flex cable
- Secure Panel:
- Align with mounting brackets
- Apply 0.5 Nm torque to screws
3. Bezel Reattachment
- Start at top corners and work downward
- Listen for audible clicks on all clips
- Ensure no cable pinching
4. Post-Installation Verification
| Test | Method | Acceptance Criteria |
|---|---|---|
| Brightness | Cycle through all levels | No flickering |
| Color Uniformity | Display solid colors | No backlight bleed |
5. Preparing Old Screen for Resale
- Cleaning:
- Use microfiber cloth only
- No liquid cleaners
- Packaging:
- Use original protective foam
- Mark as "Fragile - LCD Panel"
4. HP 14-dq Screen Testing & Calibration: Professional Quality Assurance
1. Essential Display Tests
- Pixel Verification:
- Use UFO Test for dead/stuck pixels
- Check for backlight bleed with black screen
- Color Accuracy:
- Run EIZO Monitor Test
- Verify grayscale uniformity
2. Performance Benchmarks
| Test | Standard | Acceptable Range |
|---|---|---|
| Response Time | <8ms | No visible ghosting |
| Brightness | 250 nits | 200-300 nits |
3. Color Calibration
- Software Tools:
- Windows Color Calibration wizard
- HP Display Control (pre-installed)
- Recommended Settings:
- sRGB color profile
- 6500K color temperature
4. Resale Documentation
- Test Evidence:
- Screenshot color tests
- Video of pixel refresh test
- Grading Standards:
- Grade A: 0 dead pixels
- Grade B: 1-3 dead pixels
5. Common Issues & Fixes
| Symptom | Solution | Resale Impact |
|---|---|---|
| Flickering | Reseat eDP cable | None if fixed |
| Color banding | Update graphics drivers | 10-15% reduction |
5. HP 14-dq Screen Resale: Maximizing Your Return
2. Screen Grading Standards
- Grade A:
- 0 dead pixels
- No backlight bleed
- Minimal cosmetic wear
- Grade B:
- 1-3 dead pixels
- Minor backlight issues
- Visible but functional
3. SEO-Optimized Listings
| Platform | Title Formula | Keywords |
|---|---|---|
| eBay | "HP 14-dq [Size] [Resolution] LCD - [Grade]" | OEM, Tested, Working |
| SellLaptopBack | "HP 14-dq Screen [PN] - [Condition]" | Genuine, Pulled |
4. Selling to Institutions
- .gov Requirements:
- SAM.gov registration
- ITAR compliance documentation
- .edu Preferences:
- 5+ unit lots
- Complete service records
5. Safe Shipping Methods
- Use original HP protective foam
- Double-box with 2" cushioning
- Mark as "Fragile Glass"
Need to Sell Your HP Laptop? Get Instant Cash!
If your HP 14-dq (or other HP 14 series model) has technical issues or you're upgrading to a newer device, we offer quick, competitive payouts for your laptop. We buy broken, used, and refurbished HP 14-dq laptops—including all configurations—with free shipping and no-hassle quotes.
Sell Popular HP Models Now: