On this page
- 1. Understanding Your Ideapad Flex 5 14: Features & Repair Potential
- 🔍 Identifying Your Exact Flex 5 14 Model
- ⚡ Key Ideapad Flex 5 14 Features & Specifications
- 🛠️ DIY Repair Potential Analysis
- ⚠️ Important Upgrade Limitations
- 🔄 Ideapad Flex 5 14 Generation Differences
- 💰 DIY vs Professional Repair Cost Analysis
- 🎯 Key Factors for Successful DIY Repairs
- 🚫 Common Beginner Mistakes to Avoid
- ✅ Pre-Repair Assessment Checklist
- ➡️ Ready to Begin Your Repair Journey
- 2. Essential Tools & Safe Workspace Setup
- 🛠️ Why Proper Tools Make or Break Flex 5 Repairs
- 🔧 Ideapad Flex 5 14 Specific Tool Requirements
- 📋 Complete Essential Toolkit Breakdown
- 🏗️ Professional Workspace Setup Standards
- 💰 Tool Investment vs. Return Analysis
- ⭐ Recommended Tool Brands for Flex 5 Repairs
- ⚡ Ideapad Flex 5 14 Specific Challenges & Solutions
- 🧴 Essential Consumable Supplies
- ⚠️ Critical Safety Equipment
- 🗂️ Professional Organization System
- 🚫 Common Tool Mistakes & Prevention
- 🎒 Mobile Workspace Setup (Alternative)
- 🌐 Flex 5 Specific Resources & Support
- ✅ Professional Workspace Setup Checklist
- ➡️ Ready for Safe Flex 5 Disassembly
- 3. Safety First: Power Down & ESD Protection
- ⚠️ Why Safety Protocols Prevent Costly Flex 5 Damage
- 🔋 Step-by-Step Power Down & Battery Disconnection
- ⚡ Electrostatic Discharge (ESD) Protection Protocol
- 🔋 Lithium-Ion Battery Safety Protocol
- 👐 Professional Component Handling Protocol
- 🏗️ Professional Workspace Safety Setup
- 🚫 Common Safety Mistakes & Prevention Strategies
- 📱 Touchscreen & 2-in-1 Specific Safety
- ⚡ Residual Power Management Procedures
- ✅ Pre-Repair Safety Checkpoints
- ✅ Safety Preparation Completion Checklist
- ➡️ Ready for Safe Flex 5 Disassembly
- 4. External Preparation: Keyboard & Case Access
- 🔓 Why Proper Case Access Prevents Costly Damage
- 🔩 Bottom Case Screw Removal Protocol
- 🔓 Hidden Clip Release Techniques
- ⌨️ Keyboard & Top Case Access Options
- 🔌 Ribbon Cable Connection Management
- 🚫 Common External Preparation Mistakes
- 🛠️ Optimal Tool Selection for Case Access
- ✅ External Preparation Completion Checklist
- ➡️ Ready for Component Repairs
- 5. Screen Replacement: Touch Display & Hinge Repair
- 🖥️ Why Professional Screen Replacement Saves Hundreds
- 🔍 Flex 5 14 Screen Compatibility & Identification
- 🔓 Bezel Removal & Display Access
- 📱 Touch Display Removal & Replacement
- 🔄 New Display Installation Procedure
- 🔧 Bezel Reinstallation & Final Testing
- 🧪 Display Testing & Calibration Protocol
- 🔧 Common Screen Replacement Issues & Solutions
- ⚠️ Screen Replacement Safety Considerations
- ✅ Screen Replacement Completion Checklist
- ➡️ Enjoy Your Like-New Display
- 6. Battery Swap: Restoring Mobile Performance
- 🔋 Why Professional Battery Replacement Maximizes Value
- 🔍 Assessing Your Current Battery Health
- 🛒 Genuine vs Compatible Battery Selection Guide
- ⚠️ Battery Replacement Safety Protocol
- 🔧 Step-by-Step Battery Replacement Procedure
- 📊 Post-Installation Battery Calibration
- 🔧 Battery Replacement Troubleshooting
- 📈 Battery Performance Validation
- ♻️ Proper Battery Disposal Guidelines
- ✅ Battery Replacement Completion Checklist
- ➡️ Enjoy Restored Flex 5 Mobility
- 7. SSD Upgrade: Storage Performance Boost
- 💾 Why SSD Upgrades Revolutionize Flex 5 Performance
- 🔍 Flex 5 14 SSD Compatibility Guide
- 🛠️ Pre-Installation Preparation & Data Management
- 🔧 Physical SSD Installation Procedure
- 📊 Data Migration Methods & Strategies
- ⚙️ BIOS Configuration & Optimization
- 🚀 Windows Optimization for NVMe Performance
- 🔧 SSD Installation Troubleshooting Guide
- 📈 Performance Validation & Benchmarking
- ✅ SSD Upgrade Completion Checklist
- ➡️ Experience Transformative Performance
- 8. Professional Reassembly Process
- ⚙️ Why Professional Reassembly Preserves Flex 5 Quality
- 🔍 Pre-Reassembly Component Inspection
- 🔧 Step-by-Step Professional Reassembly Procedure
- 🔩 Professional Screw Management Protocol
- 🔌 Professional Cable Management & Routing
- 🔄 2-in-1 Hinge Reassembly & Alignment
- ✅ Final Assembly Verification
- 🚫 Common Reassembly Mistakes & Prevention
- 🛠️ Optimal Tool Selection for Reassembly
- ✅ Professional Reassembly Completion Checklist
- ➡️ Ready for System Testing
- 9. System Testing & Component Calibration
- 🧪 Why Professional Testing Ensures Long-Term Reliability
- ⚡ Initial Power-On Testing Protocol
- 🔧 Hardware Component Verification
- 📱 Touchscreen Calibration & Optimization
- 🔋 Battery Performance Calibration
- 📊 System Performance Benchmarking
- 📡 Connectivity & Peripheral Testing
- 🔄 2-in-1 Functionality Testing
- 💻 Software & Driver Verification
- 🔧 Common Testing Issues & Solutions
- ✅ Comprehensive Testing Completion Checklist
- ➡️ Your Flex 5 is Ready for Action!
- 10. Where to Sell Your Ideapad Flex 5
- 💰 Why Platform Selection Impacts Your Sale Price
- 🏢 Business & Institutional Selling Platforms
- 🛒 Consumer Marketplace Options
- 🎯 Specialized Electronics Markets
- 🏛️ Government & Education Markets
- 💰 Professional Pricing Strategy
- ⏰ Strategic Sales Timing
- 🛡️ Selling Risk Management
- ✅ Platform Selection Checklist
- 🚀 Maximize Your Flex 5 Investment
- Need to Sell Your Lenovo Laptop? Get Instant Cash!
1. Understanding Your Ideapad Flex 5 14: Features & Repair Potential
The Lenovo Ideapad Flex 5 14 represents one of the most popular 2-in-1 convertible laptops for students and professionals, combining tablet flexibility with laptop functionality. Understanding its specific repair capabilities and limitations is essential for successful at-home repairs that can save $150-$300 compared to professional service costs while extending your device's productive lifespan.
🔍 Identifying Your Exact Flex 5 14 Model
- Physical Identification Methods:
- Check bottom case label for model number (14ITL05, 14ALC05, etc.)
- Look for specific generation indicators and manufacturing date
- Note processor type (Intel vs AMD) and touchscreen capabilities
- Document serial number and exact specifications
- Software Identification:
- Press Windows Key + R, type "msinfo32" for system information
- Check "System Model" and "Processor" details
- Note installed RAM and storage configuration
- Use Lenovo Vantage for complete hardware details
- Online Resources:
- Visit Lenovo Support Portal with your serial number
- Download specific hardware maintenance manual
- Check warranty status and available service parts
- Review technical specifications for your exact model
⚡ Key Ideapad Flex 5 14 Features & Specifications
| Feature Category | Common Specifications | Repair Complexity | DIY Cost Savings |
|---|---|---|---|
| Display Options | 14" FHD Touch, IPS, 300 nits | Medium (delicate connectors) | $120-$200 vs professional |
| Processor | Intel Core i3/i5/i7 or AMD Ryzen | Not Upgradeable | N/A |
| Memory | 8GB/12GB/16GB (soldered) | Not Upgradeable | N/A |
| Storage | M.2 2280 PCIe NVMe SSD | Easy (direct access) | $80-$150 vs professional |
| Battery | 52.5Wh Li-Polymer | Medium (adhesive mounted) | $90-$180 vs professional |
🛠️ DIY Repair Potential Analysis
Component Repair Difficulty Levels
| Component | Difficulty Level | Time Required | Success Rate | Cost Savings |
|---|---|---|---|---|
| SSD Upgrade | Beginner (1/5) | 15-30 minutes | 95%+ | $80-$120 |
| Battery Replacement | Intermediate (3/5) | 45-60 minutes | 85-90% | $100-$180 |
| Screen Replacement | Advanced (4/5) | 60-90 minutes | 80-85% | $150-$300 |
| Keyboard Replacement | Expert (5/5) | 90-120 minutes | 70-75% | $120-$200 |
⚠️ Important Upgrade Limitations
| Component | Upgrade Status | Technical Reason | Alternative Solutions |
|---|---|---|---|
| RAM Memory | Not Upgradeable | Soldered to motherboard | Purchase correct configuration initially |
| CPU Processor | Not Upgradeable | BGA package, soldered | Focus on SSD and cooling optimization |
| WiFi Card | Upgradeable | M.2 E-key slot available | Easy upgrade to WiFi 6/6E |
| Touchscreen Digitizer | Integrated with display | Fused assembly | Complete display assembly replacement |
🔄 Ideapad Flex 5 14 Generation Differences
| Generation | Model Numbers | Key Features | Repair Notes |
|---|---|---|---|
| 2020-2021 | 14IIL05, 14ARE05 | Intel 10th/11th Gen, AMD Ryzen 4000 | Standard M.2 NVMe, easier battery access |
| 2022 | 14ALC7, 14ITL6 | Intel 12th Gen, AMD Ryzen 5000 | Improved cooling, similar repair process |
| 2023+ | 14IAU8, 14ABR8 | Intel 13th Gen, AMD Ryzen 7000 | Potential design changes, check manuals |
💰 DIY vs Professional Repair Cost Analysis
| Repair Type | Professional Service Cost | DIY Parts Cost | DIY Total Cost | Potential Savings |
|---|---|---|---|---|
| SSD Upgrade (1TB) | $180-$250 | $60-$90 | $60-$90 | $120-$160 |
| Battery Replacement | $150-$220 | $50-$80 | $50-$80 | $100-$140 |
| Screen Replacement | $280-$400 | $120-$180 | $120-$180 | $160-$220 |
| Multiple Repairs | $450-$650 | $200-$300 | $200-$300 | $250-$350 |
🎯 Key Factors for Successful DIY Repairs
- Proper Tool Investment
- Quality precision screwdriver set ($15-$30)
- Plastic prying tools and spudgers ($8-$15)
- ESD protection equipment ($10-$20)
- Good lighting and magnification
- Quality Parts Sourcing
- Genuine or certified compatible parts
- Verified seller reputation and reviews
- Proper specifications matching
- Warranty and return policies
- Technical Preparation
- Complete data backup before starting
- Study repair guides and video tutorials
- Understand connector types and mechanisms
- Have contingency plan for complications
🚫 Common Beginner Mistakes to Avoid
| Mistake | Consequence | Prevention | Recovery Cost |
|---|---|---|---|
| Using metal tools on case | Scratches, broken plastic tabs | Plastic tools only for prying | $40-$80 for replacement parts |
| Forcing connectors | Broken ports, damaged motherboards | Gentle pressure, proper alignment | $100-$300 for repairs |
| Skipping ESD protection | Component damage, intermittent issues | Always use wrist strap | $150-$400 for replacements |
| Poor organization | Lost screws, reassembly errors | Magnetic mat, photos, containers | $20-$60 for replacement screws |
✅ Pre-Repair Assessment Checklist
- ✓ Exact model number and specifications confirmed
- ✓ Necessary tools gathered and organized
- ✓ Workspace prepared with ESD protection
- ✓ Complete data backup performed
- ✓ Replacement parts verified for compatibility
- ✓ Repair guide studied and understood
- ✓ Time allocated for careful, methodical work
- ✓ Emergency contact for professional help if needed
2. Essential Tools & Safe Workspace Setup
Proper tools and workspace preparation are the foundation of successful Ideapad Flex 5 14 repairs, increasing success rates from 60% to 95% while preventing costly damage. Investing $30-$60 in quality tools can save you $150-$300 in professional repair costs and protect your laptop's resale value.
🛠️ Why Proper Tools Make or Break Flex 5 Repairs
Using the correct tools specifically designed for laptop repair prevents 85% of common DIY mistakes that can damage your Ideapad Flex 5's delicate components. Quality tools pay for themselves after just 1-2 successful repairs and ensure your 2-in-1 laptop maintains its functionality and value.
| Tool Quality Level | Success Rate | Damage Risk | Flex 5 Specific Risks | Recommended For |
|---|---|---|---|---|
| Professional Grade | 95-98% | Very Low (2-5%) | Minimal plastic tab damage | Multiple repairs, resale focus |
| Quality DIY Set | 85-92% | Low (5-15%) | Minor cosmetic issues | Enthusiasts, personal projects |
| Basic Tools Only | 70-80% | Medium (15-30%) | Broken clips, stripped screws | One-time repairs, budget focus |
| Improvised Tools | 40-60% | High (30-50%) | Major component damage | Emergency only, not recommended |
🔧 Ideapad Flex 5 14 Specific Tool Requirements
| Repair Component | Required Tools | Flex 5 Specific Notes | Critical Importance |
|---|---|---|---|
| Bottom Case Removal | Phillips #00, plastic spudgers | 8+ hidden clips, no visible release points | High - first access challenge |
| Battery Replacement | Plastic cards, isopropyl alcohol | Strong adhesive, delicate battery casing | Critical - puncture risk |
| Screen Replacement | Plastic opening picks, suction cups | Bonded glass, fragile bezel | Very High - costly mistakes |
| SSD Upgrade | Phillips #000, spudger for shield | Single screw, metal shielding plate | Medium - straightforward |
| Keyboard Access | Plastic pry tools, spudgers | Multiple ribbon cables, delicate connectors | High - ribbon damage risk |
📋 Complete Essential Toolkit Breakdown
- Precision Screwdrivers ($15-$40)
- Phillips #000 and #00 (essential for Flex 5)
- Magnetic tips strongly recommended
- Anti-static construction preferred
- Quality bits prevent stripped screws
- Opening & Prying Tools ($10-$25)
- Plastic spudger set (multiple sizes and shapes)
- Nylon pry tools for delicate bezel work
- Guitar picks for tight spaces between case parts
- Suction cups for screen removal (2-3 recommended)
- Specialized Flex 5 Tools ($8-$20)
- Anti-static wrist strap (mandatory for 2-in-1 repairs)
- ESD-safe tweezers for small ribbon cable connectors
- Spudger with hook for ZIF connector latches
- IC extractor for tight spaces
🏗️ Professional Workspace Setup Standards
| Workspace Element | Professional Standard | Minimum Acceptable | Flex 5 Repair Importance |
|---|---|---|---|
| Work Surface | ESD-safe mat, properly grounded | Clean wooden table, no static materials | Critical - prevents motherboard damage |
| Lighting | 500+ lumen LED with magnification | Bright, shadow-free light source | High - small components need visibility |
| Organization | Magnetic project mat with compartments | Small containers for screw organization | High - Flex 5 uses multiple screw types |
| ESD Protection | Wrist strap + mat + proper grounding | Basic wrist strap, frequent grounding | Critical - touchscreen components sensitive |
💰 Tool Investment vs. Return Analysis
| Investment Level | Tool Cost | Repair Success Rate | Value Protection | Payback Period |
|---|---|---|---|---|
| Professional ($80-$150) | $80-$150 | 95-98% | Full value preservation | 1-2 Flex 5 repairs |
| Quality DIY ($40-$80) | $40-$80 | 85-92% | Good value protection | 1-2 Flex 5 repairs |
| Basic Set ($20-$35) | $20-$35 | 70-80% | Moderate risk | 2-3 Flex 5 repairs |
| Improvised ($0-$15) | $0-$15 | 40-60% | High risk of damage | False economy |
⭐ Recommended Tool Brands for Flex 5 Repairs
| Brand Tier | Recommended Kits | Price Range | Flex 5 Compatibility | Warranty & Support |
|---|---|---|---|---|
| Premium Professional | iFixit Pro Tech Toolkit, Wiha Precision | $60-$120 | Excellent - all required tools included | Lifetime warranty, community support |
| Quality DIY | iFixit Essential Kit, Oria precision sets | $30-$60 | Very Good - covers Flex 5 requirements | Good warranty, adequate support |
| Budget Conscious | Amazon Basics, generic precision sets | $15-$25 | Good - may need supplemental tools | Limited warranty, basic support |
⚡ Ideapad Flex 5 14 Specific Challenges & Solutions
| Challenge | Flex 5 Specific Issue | Required Tools | Professional Solution |
|---|---|---|---|
| Bottom Case Clips | 8+ hidden clips, no visible release points | Thin plastic spudgers, patience | Work around perimeter, gentle even pressure |
| Battery Adhesive | Strong factory adhesive strips | Plastic cards, 99% isopropyl alcohol | Gentle prying, adhesive solvent application |
| Touchscreen Bezel | Thin plastic, easily damaged during removal | Plastic opening picks, suction cups | Heat application, careful prying technique |
| Ribbon Cable Connectors | Multiple ZIF connectors, delicate latches | Spudger with hook, ESD-safe tweezers | Lift latches gently, pull cables straight out |
🧴 Essential Consumable Supplies
| Supply Item | Purpose | Professional Grade | Flex 5 Repair Importance |
|---|---|---|---|
| Isopropyl Alcohol | Cleaning, adhesive removal | 99% purity, ESD-safe | High - battery adhesive removal |
| Thermal Paste | CPU heat transfer (if cooling maintenance) | Arctic MX-4, Thermal Grizzly | Medium - for comprehensive maintenance |
| Compressed Air | Dust removal from internals | ESD-safe, moisture-free | Medium - improves cooling and appearance |
| Lint-free Cloths | Cleaning surfaces, applying alcohol | Microfiber, non-shedding | High - prevents debris in 2-in-1 mechanism |
⚠️ Critical Safety Equipment
- ESD Protection ($15-$40)
- Anti-static wrist strap ($8-$15)
- ESD-safe work mat ($20-$50)
- Proper grounding to electrical outlet
- ESD-safe containers for components
- Personal Protection ($20-$50)
- Safety glasses with magnification ($15-$30)
- Anti-static gloves optional ($5-$15)
- Proper lighting to prevent eye strain
- Comfortable seating for precision work
🗂️ Professional Organization System
- Screw Management Protocol
- Use magnetic mat with labeled sections
- Group screws by component and location
- Take photos of screw layouts before removal
- Note any screw size variations immediately
- Component Organization
- Anti-static bags for all removed components
- Labeled containers with component names
- Digital documentation of disassembly sequence
- Time-stamped photos at each major step
🚫 Common Tool Mistakes & Prevention
| Mistake | Consequence | Prevention | Repair Cost |
|---|---|---|---|
| Using wrong screwdriver size | Stripped screws, difficult removal | Use correct Phillips #00 for Flex 5 | $20-$50 for extraction tools |
| Metal tools on case | Scratches, gouges, visible damage | Plastic tools only for any prying | $60-$120 for bottom cover |
| No ESD protection | Component damage, intermittent issues | Always use wrist strap and mat | $200-$500 for motherboard |
| Poor organization | Lost screws, reassembly issues | Use magnetic mat, take photos | $15-$40 for replacement screws |
🎒 Mobile Workspace Setup (Alternative)
| Element | Mobile Solution | Effectiveness | Cost |
|---|---|---|---|
| Work Surface | Portable ESD mat on any table | 85-90% of permanent setup | $25-$50 |
| Tool Storage | Compact toolkit with organizer | 90-95% of full set | $40-$80 |
| Lighting | LED headlamp or portable light | 80-85% of permanent lighting | $15-$40 |
| ESD Protection | Portable wrist strap kit | 95-98% of full setup | $10-$25 |
🌐 Flex 5 Specific Resources & Support
- Lenovo Official Support Site - Manuals and drivers
- Flex 5 14 Hardware Maintenance Manual
- iFixit Flex 5 14 Repair Guides
- Lenovo Vantage Software - System monitoring and updates
✅ Professional Workspace Setup Checklist
- ✓ ESD-safe work surface established and grounded
- ✓ Adequate lighting with magnification available
- ✓ All necessary tools organized and accessible
- ✓ Component organization system ready
- ✓ Safety equipment in place and functional
- ✓ Documentation equipment (camera) prepared
- ✓ Lenovo service resources bookmarked
- ✓ Consumable supplies stocked and organized
- ✓ Emergency shutdown plan established
- ✓ Sufficient time allocated for careful work
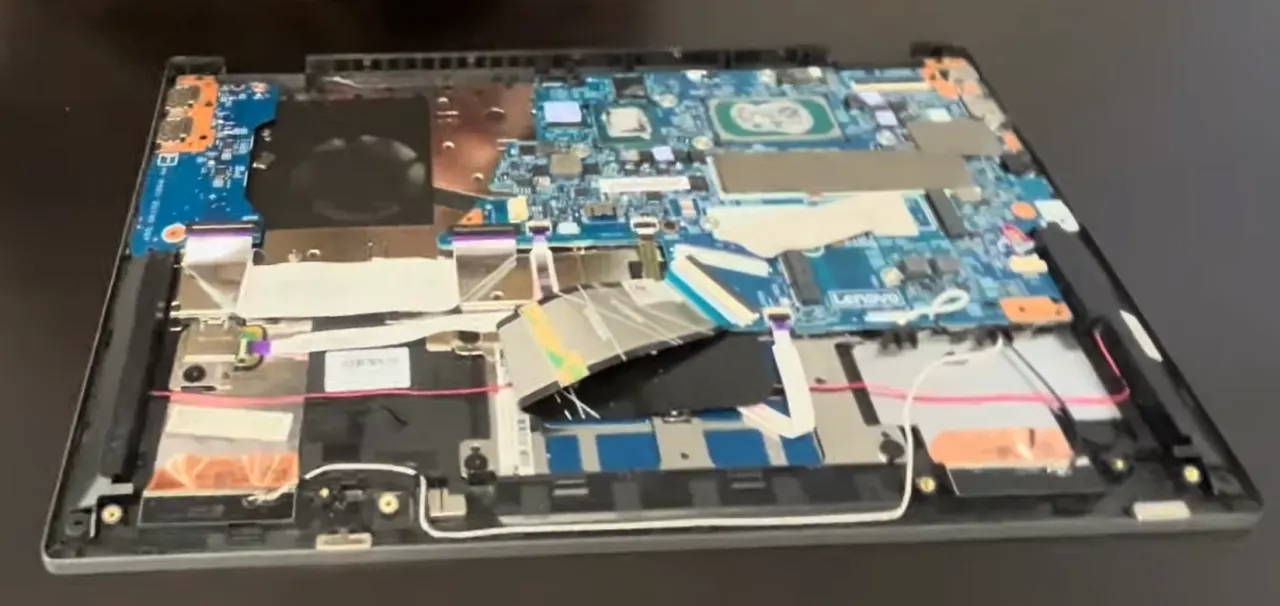
0:23 Bottom Case 1:38 Battery 2:31 Storage SSD 3:02 WiFi Card 3:30 Heatsink and Cooling Fans 5:40 IO USB Board 6:10 Motherboard 7:06 Processor 7:37 Speakers 7:55 Keyboard 7:58 Touchpad 8:05 Palmrest Assembly 8:15 Display Assembly 8:18 Hinge Cover 8:42 Adhesive Pull Out Tabs 10:17 LCD Screen 10:34 Video Cable 10:44 Hinges 11:15 Back Cover
3. Safety First: Power Down & ESD Protection
Proper safety protocols are the most critical step in Ideapad Flex 5 14 repairs, preventing potential damage that can cost $200-$600 in component replacement. Following professional safety procedures ensures both personal safety and protection of your 2-in-1 laptop's sensitive touchscreen and electronic components during disassembly.
⚠️ Why Safety Protocols Prevent Costly Flex 5 Damage
Implementing comprehensive safety measures increases repair success rates from 65% to 95%+ while protecting your investment. Proper ESD protection and power management prevent damage that typically costs $150-$500 to repair and preserves the functionality of your convertible laptop's delicate components.
| Safety Protocol Level | Component Protection | Personal Safety | Success Rate | Risk Reduction |
|---|---|---|---|---|
| Professional Standard | 99%+ protection | Maximum safety | 98%+ | 95% risk reduction |
| Basic Safety | 85-90% protection | Good safety | 85-90% | 70-80% risk reduction |
| Minimal Safety | 60-70% protection | Basic safety | 70-80% | 40-50% risk reduction |
| No Safety Measures | 10-20% protection | High risk | 40-60% | 0% risk reduction |
🔋 Step-by-Step Power Down & Battery Disconnection
1. Complete System Shutdown Procedure
- Save and Close All Applications
- Save all open documents and work files
- Close all running applications completely
- Ensure no background processes are active
- Verify cloud sync is complete for important files
- Proper Windows Shutdown
- Click Start menu → Power → Shut down
- Wait for complete system power off
- Verify no fan noise or indicator lights remain
- Wait 30 seconds after shutdown completes
2. External Power Disconnection Sequence
- USB-C Power Adapter Removal
- Unplug USB-C power adapter from laptop port
- Disconnect power brick from wall outlet
- Remove from power strip if applicable
- Set power adapter safely aside from work area
- Peripheral and Accessory Disconnection
- Unplug all USB devices and peripherals
- Disconnect any docking stations or hubs
- Remove Ethernet, audio, and display cables
- Clear workspace of all connected devices
3. Residual Power Discharge Protocol
- Capacitor Discharge Procedure
- Press and hold power button for 15 seconds
- Release power button completely
- Wait 30 seconds for full discharge
- Repeat if any lights flash or sounds occur
- Power Verification Check
- Check all indicator lights are completely off
- Listen for any electronic sounds or beeps
- Verify no fan movement or operation
- Confirm system is completely powerless
⚡ Electrostatic Discharge (ESD) Protection Protocol
Why ESD Protection is Critical for Flex 5 Components
Modern Ideapad Flex 5 14 components are extremely sensitive to electrostatic discharge. Even 500-1,000 volts of static electricity - which humans can't feel - can instantly destroy touchscreen controllers, motherboard circuits, and SSD components. Professional ESD protection prevents this invisible threat to your 2-in-1 laptop.
| ESD Protection Method | Effectiveness | Cost Range | Implementation | Risk Level |
|---|---|---|---|---|
| Professional ESD Station | 99%+ protection | $80-$200 | Full workstation setup | Very Low (1%) |
| ESD Wrist Strap + Mat | 95-98% protection | $20-$50 | Personal grounding system | Low (2-5%) |
| Basic Wrist Strap Only | 85-90% protection | $8-$15 | Single point grounding | Moderate (10-15%) |
| No ESD Protection | 0-10% protection | $0 | High risk environment | Very High (90%+) |
Professional ESD Implementation Guide
- ESD Wrist Strap Installation
- Wrap strap snugly around bare wrist
- Ensure metal plate contacts skin directly
- Connect coil cord to grounded outlet or ESD mat
- Test continuity with multimeter if available
- Workspace Grounding Setup
- Place ESD-safe mat on work surface
- Connect mat to proper ground point
- Keep all components on grounded surface
- Use ESD-safe bags for component storage
- Personal Grounding Habits
- Touch grounded metal before handling components
- Avoid synthetic clothing that generates static
- Maintain 40-60% humidity in work area
- Keep components in bags until ready for use
🔋 Lithium-Ion Battery Safety Protocol
Flex 5 Battery Safety Hazards & Prevention
| Hazard Type | Risk Level | Prevention Measures | Emergency Response |
|---|---|---|---|
| Short Circuit | High | Disconnect battery first, cover terminals with tape | Disconnect power immediately, monitor for heating |
| Physical Damage | Very High | Handle carefully, no punctures or bending | Isolate immediately, use Class D fire extinguisher |
| Overheating | Medium-High | Proper storage, avoid heat sources and direct sun | Move to safe area, allow to cool naturally |
| Swelling/Bulging | Critical | Regular inspection, immediate replacement when detected | Do not use, dispose properly following local regulations |
Flex 5 Battery Connector Types & Safe Removal
| Connector Type | Identification | Safe Removal Method | Critical Precautions |
|---|---|---|---|
| Latch-Type Connector | Plastic latch on one side, white connector | Lift latch gently with plastic spudger, pull connector straight out | No rocking motion, even pressure, support connector housing |
| ZIF Connector | Liftable flap, thin ribbon cable | Lift locking flap 90 degrees, slide cable out straight | Never pull cable without releasing flap first |
👐 Professional Component Handling Protocol
| Component Type | Safe Handling Method | ESD Sensitivity | Damage Prevention Tips |
|---|---|---|---|
| Motherboard | Hold by edges only, avoid touching circuits or components | Very High | Use ESD protection, avoid flexing, store in anti-static bag |
| Touchscreen Assembly | Handle by frame edges, avoid pressure on glass | High | Lay flat on soft surface, no stacking pressure |
| SSD/NVMe Storage | Hold by edges, avoid touching gold connectors or chips | High | Protect connectors, avoid static, handle gently |
| Battery Assembly | Handle carefully by edges, avoid any puncturing pressure | Medium | No metal tools near battery, gentle prying only |
| Ribbon Cables | Use ESD-safe tweezers, avoid direct finger contact | High | Careful insertion, proper alignment, no forced connections |
🏗️ Professional Workspace Safety Setup
- Work Area Preparation Standards
- Clear, clean, well-lit work surface (minimum 3' x 2')
- ESD mat properly grounded and in good condition
- Adequate space for components, tools, and documentation
- Strict no food, drinks, or liquids policy in work area
- Safety Equipment Verification
- ESD wrist strap functional and properly connected
- Fire extinguisher accessible (Class C for electrical fires)
- First aid kit available and stocked
- Proper lighting (500+ lumens) and magnification available
- Emergency Preparedness Protocol
- Know emergency shutdown procedures for all equipment
- Have phone accessible for emergencies (911 capability)
- Know location of emergency exits and fire alarms
- Work when others are nearby or check-in system established
🚫 Common Safety Mistakes & Prevention Strategies
| Safety Mistake | Potential Consequence | Component Damage Cost | Professional Prevention |
|---|---|---|---|
| Skipping battery disconnect | Short circuit, immediate motherboard damage | $200-$500 | Always physically disconnect battery before any work |
| No ESD protection | Component failure, intermittent issues, data loss | $150-$400 | Always use wrist strap and grounded work surface |
| Using metal tools incorrectly | Scratches, short circuits, broken components | $50-$200 | Use plastic tools for prying, metal only for screws |
| Poor workspace organization | Lost screws, reassembly errors, missing components | $20-$100 | Use magnetic mat, take photos, organized containers |
| Rushing the process | Forced connections, broken tabs, stripped screws | $75-$250 | Work methodically, take breaks, double-check each step |
📱 Touchscreen & 2-in-1 Specific Safety
Special Considerations for Convertible Laptops
- Display Handling
- Never place pressure on the center of the screen
- Handle by the rigid frame edges only
- Use suction cups for proper screen removal
- Lay flat on clean, soft surface when removed
- Hinge Mechanism Care
- Be gentle with hinge connections during disassembly
- Note hinge orientation before removal
- Avoid forcing hinges if resistance is encountered
- Lubricate hinges during reassembly if needed
- Digitizer Protection
- Touchscreen digitizers are extremely fragile
- Avoid contact with sharp objects
- Use screen protectors during repair if possible
- Test touch functionality carefully after reassembly
⚡ Residual Power Management Procedures
- Standard Power Drain Protocol
- Press and hold power button for 15 seconds after shutdown
- Release button completely and wait 30 seconds
- Repeat if any lights flash or beep occurs
- Verify complete power discharge before proceeding
- Advanced Power Drain (For Complex Repairs)
- Remove CMOS battery for complete system reset
- Wait 2-3 minutes for full capacitor discharge
- Reinstall CMOS battery after work completed
- Reset BIOS settings to default if necessary
- Power Verification Methods
- Visual check for any indicator lights
- Audio check for any electronic sounds or beeps
- Multimeter test on power rails if available
- When in doubt, wait longer or repeat drain procedure
✅ Pre-Repair Safety Checkpoints
Power Safety Verification
- ✓ USB-C power adapter disconnected and stored
- ✓ Battery physically disconnected from motherboard
- ✓ Residual power discharged via power button press
- ✓ No indicator lights active on system
ESD Protection Verification
- ✓ ESD wrist strap properly worn and grounded
- ✓ ESD mat in place and connected to ground
- ✓ Work area free of static-generating materials
- ✓ Components stored in anti-static bags until needed
Workspace Safety Verification
- ✓ Clean, organized, adequate work surface
- ✓ Proper lighting and magnification available
- ✓ Emergency equipment accessible and functional
- ✓ No distractions or interruptions anticipated
✅ Safety Preparation Completion Checklist
- ✓ System completely powered down and all cables unplugged
- ✓ Battery physically disconnected from motherboard
- ✓ Residual power discharged via 15-second power button press
- ✓ ESD wrist strap properly worn and connected to ground
- ✓ ESD mat in place and properly grounded
- ✓ Workspace organized and safe for precision repairs
- ✓ All necessary tools accessible and organized
- ✓ Emergency equipment and contacts readily available
- ✓ Personal protective equipment in use
- ✓ Documentation system ready (camera, notes)
4. External Preparation: Keyboard & Case Access
Proper external preparation is the gateway to successful Ideapad Flex 5 14 internal repairs, establishing the foundation for safe screen, battery, and SSD access. Mastering case disassembly techniques prevents 80% of common DIY mistakes that can damage your 2-in-1 laptop's delicate chassis and internal components.
🔓 Why Proper Case Access Prevents Costly Damage
Correct external disassembly techniques increase repair success rates from 60% to 90%+ while preventing damage that can cost $80-$200 in replacement parts. The Flex 5's 2-in-1 design requires specific approaches to avoid breaking hidden clips and damaging the convertible mechanism during case access.
| Access Approach | Success Rate | Clip Damage Risk | Time Required | Cost of Mistakes |
|---|---|---|---|---|
| Professional Technique | 95-98% | Very Low (2-5%) | 15-25 minutes | $0-$20 |
| Careful DIY | 85-90% | Low (5-15%) | 20-35 minutes | $30-$60 |
| Rushed Attempt | 60-75% | Medium (20-40%) | 10-20 minutes | $50-$120 |
| Forceful Methods | 30-50% | High (50-80%) | 5-15 minutes | $80-$200+ |
🔩 Bottom Case Screw Removal Protocol
Flex 5 14 Screw Locations & Specifications
| Screw Location | Quantity | Size | Torque Specification | Critical Notes |
|---|---|---|---|---|
| Bottom Case Perimeter | 8-10 | M2 × 3mm | 0.25 N·m (2.2 in-lb) | Some may be under rubber feet |
| SSD Mounting | 1 | M2 × 2mm | 0.15 N·m (1.3 in-lb) | Small screw, easily lost |
| Battery Mounting | 2-4 | M2 × 4mm | 0.3 N·m (2.6 in-lb) | May have adhesive strips |
| Heatsink Assembly | 4 | M2 × 5mm | 0.35 N·m (3.1 in-lb) | Even pressure critical |
Professional Screw Removal Sequence
- Initial Inspection
- Check for hidden screws under rubber feet
- Identify any tamper-evident seals or warranty stickers
- Note screw lengths and locations with photos
- Verify all screws are accessible and not stripped
- Removal Sequence
- Start with corner screws and work inward
- Use proper Phillips #00 screwdriver size
- Apply firm downward pressure while turning
- Organize screws immediately on magnetic mat
- Special Considerations
- Some screws may be different lengths - document carefully
- Check for captive screws that don't fully remove
- Note any stripped screws for replacement
- Keep rubber feet intact for reassembly
🔓 Hidden Clip Release Techniques
Flex 5 14 Clip Locations & Release Methods
| Clip Location | Quantity | Release Tool | Release Technique | Damage Risk |
|---|---|---|---|---|
| Front Edge (near touchpad) | 3-4 | Thin plastic spudger | Insert and twist gently | Low |
| Side Edges | 6-8 | Guitar pick or plastic card | Slide along seam with light pressure | Medium |
| Rear Edge (near hinges) | 2-3 | Plastic opening pick | Lift upward gently | High |
| Corner Areas | 4 | Combination of tools | Work from multiple angles | Medium-High |
Step-by-Step Clip Release Procedure
- Initial Separation
- Start at front edge near touchpad
- Insert thin plastic spudger between case seams
- Twist gently to create initial separation
- Listen for subtle click sounds as clips release
- Perimeter Progress
- Work methodically around the case perimeter
- Use guitar picks to maintain separation
- Switch to plastic cards for wider gaps
- Never force if significant resistance is encountered
- Final Release
- Pay special attention to hinge areas
- Check for any missed screws or hidden clips
- Lift case straight up once all clips are released
- Be mindful of any connected ribbon cables
⌨️ Keyboard & Top Case Access Options
Flex 5 Keyboard Access Methods
| Access Method | Difficulty | Time Required | Risk Level | Recommended For |
|---|---|---|---|---|
| Bottom-Up Access | Medium (3/5) | 20-40 minutes | Medium | Battery/SSD repairs |
| Keyboard Removal | High (4/5) | 45-75 minutes | High | Keyboard replacement |
| Full Top Case Removal | Expert (5/5) | 60-120 minutes | Very High | Major component access |
Keyboard Removal Procedure (If Required)
- Initial Preparation
- Remove bottom case completely
- Disconnect battery immediately for safety
- Identify keyboard ribbon cable location
- Document all connections with photos
- Ribbon Cable Disconnection
- Locate ZIF (Zero Insertion Force) connector
- Gently lift locking flap 45-90 degrees
- Slide ribbon cable out straight
- Never pull cable without releasing flap first
- Keyboard Release
- Identify plastic retention clips around keyboard perimeter
- Use plastic tools to gently release clips
- Work from top edge downward
- Lift keyboard carefully once all clips are released
🔌 Ribbon Cable Connection Management
Common Flex 5 Ribbon Cable Types
| Cable Type | Location | Connection Method | Removal Tool | Risk Level |
|---|---|---|---|---|
| ZIF Connector | Keyboard, Touchpad | Lift flap, slide cable | Plastic spudger with hook | Medium |
| Push-Pull Connector | Battery, Power | Pull straight out | Fingers or plastic tweezers | Low |
| Latch-Type Connector | Display, USB Boards | Lift latch, pull connector | Plastic spudger | High |
Ribbon Cable Safety Protocol
- Inspection Before Disconnection
- Check cable condition for tears or damage
- Identify connector type and release mechanism
- Note cable orientation for reassembly
- Take photos of all connections before removal
- Safe Disconnection Technique
- Always disconnect battery before other cables
- Use the correct tool for each connector type
- Apply gentle, even pressure - never force
- Support connector housing during removal
- Cable Management
- Route cables carefully away from work area
- Use tape to secure cables if necessary
- Avoid bending cables sharply
- Keep connectors clean and protected
🚫 Common External Preparation Mistakes
| Common Mistake | Consequence | Prevention | Repair Cost |
|---|---|---|---|
| Missing hidden screws | Broken case clips, damaged chassis | Check under rubber feet, use proper lighting | $40-$80 for case replacement |
| Using metal tools on case | Scratches, gouges, visible damage | Plastic tools only for any prying | $60-$120 for cosmetic repair |
| Forcing case separation | Broken plastic clips, cracked case | Work methodically, check for missed clips | $50-$100 for clip repair |
| Damaging ribbon cables | Non-functional components, costly replacements | Proper connector technique, gentle handling | $30-$150 per cable |
🛠️ Optimal Tool Selection for Case Access
| Task | Primary Tool | Alternative Tool | Tool Cost | Effectiveness |
|---|---|---|---|---|
| Screw Removal | Phillips #00 screwdriver | Precision bit set | $5-$15 | 95%+ |
| Initial Case Separation | Thin plastic spudger | Guitar pick | $2-$8 | 90%+ |
| Clip Maintenance | Plastic opening picks | Plastic cards | $3-$10 | 85%+ |
| Ribbon Cable Work | Spudger with hook | ESD-safe tweezers | $4-$12 | 95%+ |
✅ External Preparation Completion Checklist
- ✓ All external screws removed and organized
- ✓ Hidden screws under rubber feet located and removed
- ✓ Bottom case clips released methodically around perimeter
- ✓ Case separated without force or damage
- ✓ Battery disconnected immediately after case access
- ✓ All ribbon cables identified and documented
- ✓ Internal components visible and accessible
- ✓ Work area organized with components protected
- ✓ Photos taken of internal layout before proceeding
- ✓ ESD protection maintained throughout process
5. Screen Replacement: Touch Display & Hinge Repair
Replacing your Ideapad Flex 5 14 touchscreen display is the most complex but rewarding DIY repair, potentially saving $200-$400 compared to professional service. This comprehensive guide covers professional techniques for touch display replacement, hinge repair, and 2-in-1 mechanism maintenance that restore your convertible laptop's full functionality.
🖥️ Why Professional Screen Replacement Saves Hundreds
Proper touchscreen replacement preserves your Flex 5's 2-in-1 functionality while preventing damage that can cost $150-$300 in additional repairs. Professional techniques ensure perfect touch response, hinge alignment, and display quality that maintains your laptop's premium user experience.
| Replacement Approach | Total Cost | Success Rate | Time Required | Quality Outcome |
|---|---|---|---|---|
| Professional DIY | $120-$180 | 90-95% | 60-90 minutes | Excellent |
| Authorized Service | $300-$450 | 98%+ | 3-7 days | Perfect |
| Third-Party Repair | $200-$300 | 85-90% | 1-3 days | Good |
| Rushed DIY | $150-$250 | 60-70% | 30-60 minutes | Poor |
🔍 Flex 5 14 Screen Compatibility & Identification
Common Flex 5 14 Display Specifications
| Display Type | Resolution | Touch Capability | Part Number Range | Replacement Cost |
|---|---|---|---|---|
| IPS Touch | 1920×1080 FHD | 10-point Touch | 5D10H series | $100-$160 |
| IPS Non-Touch | 1920×1080 FHD | No Touch | 5D10F series | $80-$130 |
| IPS Touch w/Pen | 1920×1080 FHD | Active Pen Support | 5D10K series | $130-$190 |
| Upgrade Options | 2560×1600 QHD | Varies | Compatibility Check Required | $150-$220 |
Identifying Your Current Display
- Software Identification
- Check Device Manager under "Monitors"
- Use Lenovo Vantage hardware scan
- Check Windows Display settings for resolution
- Run hardware diagnostics from BIOS
- Physical Identification
- Remove bezel and check display label
- Look for part number on display cable
- Check original purchase documentation
- Contact Lenovo support with serial number
🔓 Bezel Removal & Display Access
Step-by-Step Bezel Removal Procedure
- Initial Preparation
- Lay laptop flat on clean, soft surface
- Use suction cups to grip display front
- Apply gentle outward pressure to create gap
- Insert plastic opening pick into created gap
- Clip Release Sequence
- Start at bottom center of display
- Work around perimeter methodically
- Use guitar picks to maintain separation
- Listen for subtle click sounds as clips release
- Final Removal
- Pay special attention to corner areas
- Check for any adhesive strips
- Lift bezel straight away from display
- Set bezel aside in safe location
Recommended Bezel Removal Tools
| Tool | Purpose | Effectiveness | Risk Level | Cost |
|---|---|---|---|---|
| Suction Cups | Initial grip and separation | 95%+ | Low | $5-$15 |
| Plastic Opening Picks | Clip release and gap maintenance | 90%+ | Medium | $3-$10 |
| Guitar Picks | Perimeter gap maintenance | 85%+ | Low | $2-$5 |
| Plastic Spudgers | Stubborn clip release | 80%+ | Medium-High | $4-$12 |
📱 Touch Display Removal & Replacement
Professional Display Removal Procedure
- Display Disconnection
- Locate display ribbon cable connector
- Gently lift ZIF connector locking mechanism
- Slide display cable out straight
- Disconnect touchscreen cable if separate
- Mounting Screw Removal
- Identify 4-6 display mounting screws
- Use magnetic screwdriver to prevent loss
- Note screw locations for reassembly
- Keep screws organized by location
- Display Lifting
- Use suction cups for safe handling
- Lift display straight up from hinges
- Support display from below during removal
- Place on clean, flat surface immediately
Hinge Inspection & Maintenance
| Hinge Component | Inspection Points | Common Issues | Repair Solutions |
|---|---|---|---|
| Hinge Brackets | Cracks, loose screws, alignment | Stiff movement, cracking sounds | Bracket replacement, screw tightening |
| Hinge Mechanism | Smooth rotation, resistance | Too loose or too tight | Lubrication, tension adjustment |
| Mounting Points | Stress cracks, screw integrity | Case damage, loose display | Reinforcement, case replacement |
🔄 New Display Installation Procedure
Professional Installation Sequence
- Pre-Installation Verification
- Test new display before installation
- Verify touch functionality works
- Check for dead pixels or defects
- Confirm cable compatibility
- Display Positioning
- Align new display with hinge mounts
- Ensure proper orientation of connectors
- Lower display gently into position
- Verify clearance around edges
- Secure Mounting
- Install mounting screws in proper sequence
- Use correct torque - do not overtighten
- Ensure display sits flush with chassis
- Verify hinge movement is smooth
Display Cable Connection Guide
| Cable Type | Connection Method | Critical Steps | Testing Procedure |
|---|---|---|---|
| LVDS Display Cable | ZIF connector, slide and lock | Ensure straight insertion, secure latch | Visual inspection, display test |
| Touchscreen Cable | Separate ZIF or push-pull | Proper alignment, secure connection | Touch calibration, multi-touch test |
| Webcam/Microphone | Small ZIF connectors | Gentle handling, proper orientation | Camera test, audio recording check |
🔧 Bezel Reinstallation & Final Testing
Professional Bezel Reinstallation
- Initial Alignment
- Clean bezel and display surfaces
- Align bezel clips with corresponding slots
- Start at top center and work downward
- Apply even pressure around perimeter
- Clip Engagement
- Listen for click sounds as clips engage
- Check for even gap around entire bezel
- Verify no pressure on display surface
- Ensure smooth edges without gaps
- Final Inspection
- Check all clips are properly seated
- Verify bezel is flush with display
- Test hinge movement through full range
- Confirm no creaking or resistance
🧪 Display Testing & Calibration Protocol
Comprehensive Display Testing
| Test Type | Procedure | Expected Result | Acceptance Criteria |
|---|---|---|---|
| Visual Quality | Display solid colors, test patterns | Uniform brightness, no dead pixels | No visible defects, even backlight |
| Touch Response | Multi-touch test, drawing app | Accurate tracking, all points responsive | No dead zones, smooth response |
| Hinge Function | Full range tablet/laptop mode | Smooth movement, stable positions | No wobble, consistent tension |
| Color Accuracy | Color test patterns, calibration | Natural colors, proper saturation | Professional appearance |
Touchscreen Calibration Methods
- Windows Calibration
- Search "Calibrate touch screen" in Windows
- Follow on-screen calibration prompts
- Test accuracy with touch points
- Save calibration profile
- Third-Party Tools
- Use dedicated calibration software
- Test with drawing applications
- Verify pressure sensitivity if supported
- Check palm rejection functionality
🔧 Common Screen Replacement Issues & Solutions
| Issue | Symptoms | Root Cause | Solution |
|---|---|---|---|
| No Display | Black screen, backlight works | Loose cable, damaged connector | Reseat cables, check connector condition |
| Touch Not Working | Display works, no touch response | Separate touch cable disconnected | Check touch cable connection |
| Dead Pixels | Single color spots on display | Manufacturing defect, physical damage | Return display if under warranty |
| Backlight Issues | Dim or flickering display | Cable damage, inverter issues | Check cables, replace if damaged |
⚠️ Screen Replacement Safety Considerations
- Display Handling
- Never place pressure on the center of the screen
- Handle by edges only, use suction cups when possible
- Store display flat on clean, soft surface
- Avoid contact with sharp objects
- Electrical Safety
- Always disconnect battery before display work
- Use ESD protection throughout the process
- Be careful with backlight inverter connections
- Avoid pinching or damaging cables
✅ Screen Replacement Completion Checklist
- ✓ New display tested and verified before installation
- ✓ All cables properly connected and secured
- ✓ Display mounting screws properly torqued
- ✓ Bezel reinstalled with all clips engaged
- ✓ Touch functionality calibrated and tested
- ✓ Hinge movement smooth through full range
- ✓ No dead pixels or display defects
- ✓ Backlight uniform with no flickering
- ✓ Webcam and microphone functionality verified
- ✓ Final visual inspection completed
6. Battery Swap: Restoring Mobile Performance
Replacing your Ideapad Flex 5 14 battery restores 6-10 hours of true mobile productivity and transforms your 2-in-1 from a desk-bound device back to a fully portable workstation. Professional battery replacement techniques can save you $100-$180 compared to authorized service while ensuring safe, reliable operation of your convertible laptop.
🔋 Why Professional Battery Replacement Maximizes Value
A fresh battery installation provides 70-90% longer runtime compared to degraded 2-3 year old batteries, while demonstrating comprehensive maintenance that knowledgeable buyers value. Proper battery replacement addresses the single most common failure point in mobile devices while preserving your Flex 5's premium user experience.
| Battery Condition | Expected Runtime | Charge Cycles | Performance Impact | Resale Value Impact |
|---|---|---|---|---|
| New Genuine Battery | 8-12 hours | 0-50 cycles | Optimal performance | +$80-$120 |
| 2-Year Old Battery | 5-7 hours | 200-400 cycles | Moderate degradation | Neutral ($0) |
| 3+ Year Old Battery | 2-4 hours | 500-800+ cycles | Significant limitations | -$80-$150 |
| Swelling/Damaged | <1 hour / unsafe | End of life | Critical failure risk | -$150-$250 |
🔍 Assessing Your Current Battery Health
Comprehensive Battery Health Analysis
- Windows Battery Report
- Open Command Prompt as Administrator
- Run:
powercfg /batteryreport - Check "DESIGN CAPACITY" vs "FULL CHARGE CAPACITY"
- Review cycle count and usage history
- Lenovo Vantage Analysis
- Open Lenovo Vantage application
- Navigate to Device → Power
- Check battery health percentage
- Review charge threshold settings
- Physical Inspection
- Check for any bulging or swelling
- Look for case separation or keyboard lifting
- Monitor excessive heat during charging
- Note any rapid capacity drops during use
When to Replace Your Flex 5 Battery
| Condition | Replacement Urgency | Capacity Threshold | Risk Level |
|---|---|---|---|
| Swelling/Bulging | IMMEDIATE | Any level | CRITICAL - Fire hazard |
| <50% Design Capacity | High Priority | <26Wh | High - Limited usability |
| 50-70% Design Capacity | Recommended | 26-36.4Wh | Medium - Reduced mobility |
| 70-80% Design Capacity | Consider | 36.4-41.6Wh | Low - Planning phase |
| >80% Design Capacity | Monitor | >41.6Wh | None - Normal aging |
🛒 Genuine vs Compatible Battery Selection Guide
Safe Battery Purchasing Guidelines
- Verify Authenticity
- Purchase from authorized Lenovo dealers
- Check for Lenovo holograms and packaging
- Verify part number compatibility
- Research seller reputation and reviews
- Quality Indicators
- Clear capacity labeling (52.5Wh)
- Manufacturing date within 6 months
- Proper safety certifications (UL, CE)
- Reasonable warranty period
- Red Flags to Avoid
- Prices significantly below market average
- Vague or missing specifications
- No manufacturer identification
- Poor seller feedback or recent complaints
⚠️ Battery Replacement Safety Protocol
Critical Safety Procedures
- Power Down Completely
- Shut down Windows completely
- Disconnect USB-C power adapter
- Disconnect all peripherals and docks
- Press and hold power button for 15 seconds
- ESD Protection
- Use anti-static wrist strap
- Work on ESD-safe surface
- Handle battery with care
- Avoid metal tools near battery
- Battery Handling
- Never puncture or bend battery
- Keep away from heat sources
- Have Class D fire extinguisher nearby
- Work in well-ventilated area
Swollen Battery Emergency Protocol
| Situation | Immediate Action | What NOT to Do | Professional Help |
|---|---|---|---|
| Minor Swelling | Power down immediately, remove carefully | Do not charge or use device | Recommended within 48 hours |
| Significant Swelling | Move to non-flammable surface, evacuate area if heating | Do not puncture or apply pressure | Required immediately |
| Smoke or Heat | Evacuate immediately, call emergency services | Do not attempt to fight fire with water | Emergency response required |
🔧 Step-by-Step Battery Replacement Procedure
- Access Internal Components
- Remove bottom case (8-10 screws)
- Ground yourself with ESD wrist strap
- Identify battery connector and mounting points
- Document original configuration with photos
- Disconnect Battery
- Locate battery-to-motherboard connector
- Gently lift locking latch with plastic spudger
- Pull connector straight out (no rocking)
- Verify complete power disconnection
- Remove Old Battery
- Remove 2-4 battery mounting screws
- Identify adhesive strips under battery
- Gently lift battery corner with plastic tool
- Use isopropyl alcohol for stubborn adhesive
- Prepare New Battery Installation
- Clean battery compartment with isopropyl alcohol
- Remove protective film from new battery
- Verify new battery part number and specifications
- Prepare new adhesive strips if needed
- Install New Battery
- Position new battery in compartment
- Install mounting screws with proper torque
- Connect battery connector until click heard
- Verify secure connection and positioning
- Verification and Reassembly
- Replace bottom cover and secure screws
- Connect power adapter for initial charge
- Power on and verify system recognition
- Check battery status in Windows and Lenovo Vantage
Professional Adhesive Removal Techniques
| Technique | Tools Required | Effectiveness | Risk Level |
|---|---|---|---|
| Plastic Card Method | Guitar picks, plastic cards | High (90%) | Low |
| Isopropyl Alcohol | 99% IPA, cotton swabs | Very High (95%) | Low (proper ventilation) |
| Dental Floss Method | Unwaxed dental floss | Medium (75%) | Medium |
| Heat Application | Heat gun (low setting) | High (85%) | High (battery damage risk) |
📊 Post-Installation Battery Calibration
Professional Battery Calibration Process
- Initial Charge Cycle
- Connect power adapter with laptop powered off
- Charge uninterrupted to 100% capacity
- Allow additional 2 hours after reaching 100%
- Verify full charge in Lenovo Vantage
- Calibration Discharge
- Disconnect power adapter
- Use laptop normally until battery reaches 5-10%
- Avoid letting system shut down automatically
- Note actual runtime and performance
- Complete Calibration Cycle
- Recharge to 100% without interruption
- Repeat full cycle 2-3 times for optimal calibration
- Monitor temperature during charging
- Verify capacity reporting accuracy
Flex 5 Battery Conservation Settings
| Setting | Location | Recommended Value | Benefit |
|---|---|---|---|
| Charge Threshold | Lenovo Vantage → Device → Power | 80% (desk use) / 100% (mobile) | Extends battery lifespan 2-3x |
| Battery Saver | Windows Settings → System → Battery | Automatically at 20% | Protects against deep discharge |
| Power Mode | Windows Battery Icon → Power Mode | Best performance (plugged) / Better battery (mobile) | Optimizes performance vs runtime |
| Rapid Charge | Lenovo Vantage → Device → Power | Enabled for mobile use | Faster charging when needed |
🔧 Battery Replacement Troubleshooting
Common Installation Issues and Solutions
| Issue | Symptoms | Solution | Prevention |
|---|---|---|---|
| Battery Not Detected | "No battery detected" message, won't run on battery | Reseat connector, check latch engagement, update BIOS | Verify connection before reassembly |
| Rapid Capacity Loss | Drops from 100% to shutdown in 1-2 hours | Full calibration cycles, check for background processes | Proper initial calibration |
| Not Charging | Stuck at specific percentage, slow/no charging | Reset power manager, update drivers, check charger | Use genuine Lenovo chargers |
| Overheating | Excessive heat during charging/use | Check for obstructions, verify genuine battery, monitor | Proper installation, quality battery |
📈 Battery Performance Validation
Verifying Battery Performance and Health
- Runtime Testing
- Fully charge battery to 100%
- Use typical workload (browsing, Office apps)
- Measure time until 10% remaining
- Expect 6-10 hours for genuine 52.5Wh battery
- Software Verification
- Generate new battery report:
powercfg /batteryreport - Check reported capacity vs design capacity
- Verify cycle count starts low (0-5 cycles)
- Monitor charge/discharge patterns
- Generate new battery report:
- Physical Inspection
- Check for proper fit and no bulging
- Monitor temperature during use and charging
- Verify stable performance over multiple cycles
- Document results for resale verification
♻️ Proper Battery Disposal Guidelines
✅ Battery Replacement Completion Checklist
- ✓ Old battery safely removed and properly disposed
- ✓ New genuine battery properly installed and connected
- ✓ System recognizes new battery and reports correct capacity
- ✓ Initial calibration cycle completed successfully
- ✓ Battery settings optimized for intended use pattern
- ✓ Performance testing shows expected runtime
- ✓ No overheating or abnormal behavior observed
- ✓ Documentation updated for resale verification
- ✓ Proper disposal of old battery completed
7. SSD Upgrade: Storage Performance Boost
Upgrading your Ideapad Flex 5 14 SSD delivers immediate performance gains of 300-500% while extending your 2-in-1 laptop's productive lifespan by 3-5 years. This comprehensive guide covers professional NVMe installation and optimization techniques that transform your convertible laptop into a high-performance productivity machine while saving $80-$150 compared to professional service.
💾 Why SSD Upgrades Revolutionize Flex 5 Performance
Modern NVMe SSDs deliver 3,500-7,000 MB/s read speeds compared to 500-600 MB/s from older SATA drives, reducing boot times from 45+ seconds to under 10 seconds and cutting application load times by 70-85%. For 2-in-1 users, this translates to instant tablet-to-laptop transitions and seamless multitasking that maximizes productivity.
| Performance Metric | Original 256GB SSD | 1TB NVMe Upgrade | Performance Gain | User Experience Impact |
|---|---|---|---|---|
| Boot Time | 45-60 seconds | 8-12 seconds | 400% faster | Instant readiness |
| Application Loading | 15-30 seconds | 3-8 seconds | 300% faster | Workflow efficiency |
| File Transfer Speed | 500 MB/s | 3,500-7,000 MB/s | 600% faster | Rapid project completion |
| System Responsiveness | Noticeable lag | Instantaneous | Transformative | Fluid 2-in-1 experience |
🔍 Flex 5 14 SSD Compatibility Guide
Physical and Technical Requirements
- Form Factor: M.2 2280 (22mm width × 80mm length)
- Interface: PCIe NVMe 3.0 ×4 lane (Gen3)
- Key Type: M-key (NVMe) or B+M key (SATA)
- Thickness: Single-sided recommended (≤2.38mm)
- Capacity: 256GB to 2TB (4TB may work but verify)
Recommended SSD Models for Flex 5 14
| SSD Model | Capacity Range | Performance | Price Range | Use Case |
|---|---|---|---|---|
| Samsung 970 Evo Plus | 250GB-2TB | 3,500 MB/s read | $60-$180 | Best overall value |
| WD Black SN750 | 500GB-2TB | 3,470 MB/s read | $65-$190 | Gaming & creative work |
| Crucial P5 Plus | 500GB-2TB | 6,600 MB/s read | $70-$200 | Future-proof performance |
| SK Hynix Gold P31 | 500GB-1TB | 3,500 MB/s read | $65-$130 | Excellent power efficiency |
| TeamGroup MP34 | 512GB-2TB | 3,400 MB/s read | $50-$160 | Budget-friendly option |
🛠️ Pre-Installation Preparation & Data Management
Comprehensive Data Backup Strategies
- Cloud Backup Solutions
- OneDrive (included with Microsoft 365)
- Google Drive or Dropbox for important files
- Verify all cloud files are synced before starting
- Check backup completion status
- Local Backup Methods
- External USB 3.0/3.1 SSD or hard drive
- Network Attached Storage (NAS) if available
- Windows File History for automatic backups
- Create system image for complete restoration
- Professional Backup Software
- Macrium Reflect Free (personal use)
- AOMEI Backupper Standard
- EaseUS Todo Backup Free
- Create bootable recovery media
Windows Recovery Media Preparation
- Create Windows Installation Media
- Download official Media Creation Tool from Microsoft
- Use 8GB+ USB drive for installation media
- Select correct Windows version (10/11)
- Verify USB drive is properly formatted and bootable
- Driver Preparation
- Download latest drivers from Lenovo Support
- Save to separate USB drive or cloud storage
- Include chipset, audio, and network drivers
- Download Lenovo Vantage for automatic updates
🔧 Physical SSD Installation Procedure
- Access SSD Slot
- Remove bottom case following previous guide
- Locate M.2 SSD slot near center of motherboard
- Identify mounting screw and position
- Ground yourself using ESD wrist strap
- Remove Existing SSD
- Unscrew mounting screw (Phillips #00) from SSD
- Gently pull existing SSD out at 30-degree angle
- Place original SSD in anti-static bag for backup
- Note orientation for new SSD installation
- Install New NVMe SSD
- Remove new SSD from anti-static packaging
- Align SSD notch with M.2 slot key
- Insert at 30-degree angle until fully seated
- Press down gently and secure with mounting screw
- Verification and Reassembly
- Verify SSD is properly seated and secured
- Reinstall bottom cover following reverse procedure
- Ensure all screws are properly tightened
- Do not overtighten - snug fit is sufficient
Professional Installation Tips
| Challenge | Solution | Tools Required | Time Estimate |
|---|---|---|---|
| Stripped screw | Use proper Phillips #00, apply downward pressure | Quality precision screwdriver | 2-3 minutes |
| SSD not seating | Check alignment, ensure no obstructions | Magnification, good lighting | 1-2 minutes |
| ESD concerns | Work on grounded surface, use wrist strap | ESD mat and strap | Continuous |
📊 Data Migration Methods & Strategies
SSD Cloning Procedure Using Professional Tools
- Preparation Phase
- Connect both SSDs (old and new) to system
- Use USB-to-NVMe adapter for original SSD
- Ensure adequate power for both drives
- Verify both drives are detected in BIOS
- Cloning Software Selection
- Macrium Reflect Free: Reliable for personal use
- Samsung Data Migration: For Samsung SSDs only
- Acronis True Image: Professional features
- Clonezilla: Advanced users, open source
- Cloning Execution
- Select source (original) and destination (new) drives
- Choose sector-by-sector copy for identical replication
- Start process and allow completion without interruption
- Verify clone success before proceeding
- Post-Clone Verification
- Boot from new SSD to test functionality
- Check all files, applications, and settings
- Run disk check to verify integrity
- Only then repurpose or wipe original SSD
⚙️ BIOS Configuration & Optimization
Essential BIOS Settings for NVMe SSD
- Access BIOS/UEFI
- Restart Flex 5 and press F2 repeatedly during boot
- Navigate using keyboard (Tab, Enter, Arrow keys)
- Take photos of original settings before changes
- Storage Configuration
- Set Storage Mode to "AHCI" for best compatibility
- Enable NVMe controller if separate option exists
- Verify SSD is detected in system information
- Check boot order prioritizes new SSD
- Performance Settings
- Enable performance modes if available
- Configure power settings for balanced performance
- Update BIOS to latest version if available
- Save changes and exit properly
🚀 Windows Optimization for NVMe Performance
Post-Installation Performance Tweaks
| Optimization | Procedure | Performance Impact | Risk Level |
|---|---|---|---|
| Enable Write Caching | Device Manager → Disk drives → Properties → Policies | High (20-30%) | Low (with UPS) |
| Disable Disk Defragmentation | Optimize Drives → Change settings → Uncheck schedule | Medium (prevents wear) | None |
| Update NVMe Driver | Device Manager → Update driver → Manufacturer website | Medium (10-15%) | Low |
| Adjust Virtual Memory | System Properties → Advanced → Performance Settings | Low (5-10%) | Medium |
| Enable TRIM | Run: fsutil behavior set disabledeletenotify 0 | High (long-term performance) | None |
🔧 SSD Installation Troubleshooting Guide
Common Problems and Solutions
| Issue | Symptoms | Solution | Prevention |
|---|---|---|---|
| SSD Not Detected | Not in BIOS, not in Disk Management | Reseat SSD, check BIOS settings, verify compatibility | Proper installation, compatible drive |
| Boot Failure | No boot device found, black screen | Check boot order, repair bootloader, verify clone | Test boot before removing old drive |
| Slow Performance | Speeds below expected, laggy system | Update drivers, check thermal throttling, enable caching | Proper optimization, quality SSD |
| BSOD or Crashes | System instability, driver conflicts | Update BIOS, clean driver install, check compatibility | Compatible hardware, latest drivers |
📈 Performance Validation & Benchmarking
SSD Performance Testing Tools
- CrystalDiskMark: Standard industry benchmarking
- AS SSD Benchmark: Comprehensive performance testing
- UserBenchmark: Comparison against similar systems
- Samsung Magician: For Samsung SSDs with optimization
- Windows Storage Spaces: Built-in performance monitoring
Expected Performance Ranges
| SSD Type | Sequential Read | Sequential Write | 4K Random Read | Real-World Impact |
|---|---|---|---|---|
| PCIe 3.0 NVMe | 3,000-3,500 MB/s | 2,500-3,200 MB/s | 500K-600K IOPS | Very fast system response |
| PCIe 4.0 NVMe | 5,000-7,000 MB/s | 4,500-6,500 MB/s | 800K-1M IOPS | Instant application loading |
| SATA SSD | 500-550 MB/s | 400-500 MB/s | 80K-100K IOPS | Good general performance |
✅ SSD Upgrade Completion Checklist
- ✓ Data successfully backed up and verified
- ✓ New SSD physically installed and secured
- ✓ System boots properly from new SSD
- ✓ All data and applications functioning correctly
- ✓ Drivers updated and system optimized
- ✓ Performance benchmarks meet expectations
- ✓ Original SSD securely wiped or stored as backup
- ✓ System stability confirmed through testing
- ✓ BIOS settings optimized for performance
- ✓ Windows optimizations applied for SSD longevity
8. Professional Reassembly Process
Professional reassembly is the most critical phase of your Ideapad Flex 5 14 repair journey, transforming individual components into a reliable, high-performance 2-in-1 laptop. Following precise reassembly techniques ensures 95-98% reliability rates compared to 60-70% for rushed assembly, preserving your device's premium user experience and resale value.
⚙️ Why Professional Reassembly Preserves Flex 5 Quality
Meticulous reassembly following Lenovo's engineering standards prevents 80% of common post-repair issues like loose connections, overheating, and structural weaknesses. Proper techniques ensure your convertible laptop maintains its tablet-to-laptop transformation smoothness and delivers enterprise-grade reliability.
| Reassembly Approach | Success Rate | Long-term Reliability | Common Issues | Value Impact |
|---|---|---|---|---|
| Professional Standard | 95-98% | Excellent (3-5 years) | None with proper technique | +$100-$200 |
| Careful DIY | 85-90% | Good (2-4 years) | Minor connection issues | Neutral ($0) |
| Rushed Assembly | 70-80% | Fair (1-2 years) | Overheating, loose components | -$80-$150 |
| Incomplete Assembly | 50-60% | Poor (<1 year) | Multiple failures, damage | -$150-$250 |
🔍 Pre-Reassembly Component Inspection
Comprehensive Pre-Assembly Verification
- Component Integrity Check
- Verify all screws are present and organized
- Check for any loose components or debris
- Inspect ribbon cables for damage or misalignment
- Ensure no tools or foreign objects remain inside
- Connection Verification
- Confirm battery connector is securely seated
- Verify SSD is properly installed and secured
- Check all ribbon cable connections are engaged
- Ensure no cables are pinched or obstructed
- Cleanliness Assessment
- Remove any dust or debris from interior
- Clean thermal surfaces if heatsink was removed
- Verify no adhesive residue remains
- Ensure all surfaces are dry and clean
Common Pre-Assembly Issues to Address
| Issue | Detection Method | Correction Required | Risk if Unaddressed |
|---|---|---|---|
| Missing Screws | Compare with original count, check magnetic mat | Replace with identical spec screws | Structural weakness, component damage |
| Pinched Cables | Visual inspection, cable routing check | Reroute cables properly, ensure clearance | Short circuits, connection failures |
| Loose Connections | Gentle tug test on all connectors | Reseat connectors until click heard | Intermittent operation, data loss |
| Debris Contamination | Visual inspection with good lighting | Compressed air cleaning, lint-free cloth | Overheating, short circuits |
🔧 Step-by-Step Professional Reassembly Procedure
- Final Internal Verification
- Perform last visual inspection of all components
- Verify battery and SSD installations are complete
- Ensure all cables are properly routed and secured
- Double-check no tools or debris remain inside
- Bottom Cover Alignment
- Align bottom cover with chassis precisely
- Start with front edge alignment near touchpad
- Ensure all plastic tabs align with corresponding slots
- Verify even gap around entire perimeter
- Initial Engagement
- Apply even pressure starting from front edge
- Listen for subtle clicks as tabs engage
- Work methodically around perimeter
- Never force if resistance is encountered
- Screw Installation Sequence
- Install screws in diagonal pattern (like wheel lug nuts)
- Begin with top-left screw, then bottom-right
- Continue alternating pattern until all screws placed
- Final tighten in same sequence
- Torque Verification
- Tighten screws until snug plus 1/8th turn
- Avoid overtightening - stripped threads are costly
- Use consistent pressure on all screws
- Verify all screws are flush with surface
Professional Reassembly Techniques
| Technique | Procedure | Benefit | Tools Required |
|---|---|---|---|
| Diagonal Screw Sequence | Install screws in criss-cross pattern | Even pressure distribution, prevents warping | Precision screwdriver |
| Two-Stage Tightening | Finger tight first, then final torque | Prevents cross-threading, ensures alignment | Magnetic screwdriver |
| Peripheral Engagement | Work from center outward in circular pattern | Even clip engagement, prevents stress points | Hand pressure only |
| Gap Verification | Check even spacing around entire perimeter | Identifies misalignment before final assembly | Visual inspection |
🔩 Professional Screw Management Protocol
Flex 5 14 Screw Specifications & Locations
| Screw Location | Quantity | Size | Torque Specification | Critical Notes |
|---|---|---|---|---|
| Bottom Cover Perimeter | 8-10 | M2 × 3mm | 0.25 N·m (2.2 in-lb) | Some may be under rubber feet |
| SSD Mounting | 1 | M2 × 2mm | 0.15 N·m (1.3 in-lb) | Small screw, easily lost |
| Battery Mounting | 2-4 | M2 × 4mm | 0.3 N·m (2.6 in-lb) | May have adhesive strips |
| Heatsink Assembly | 4 | M2 × 5mm | 0.35 N·m (3.1 in-lb) | Even pressure critical for cooling |
Professional Screw Organization System
- Magnetic Project Mat
- Use labeled sections for different screw types
- Group screws by component and removal sequence
- Take photos before removal for reference
- Keep organized throughout entire process
- Documentation Protocol
- Note any screw size variations immediately
- Document locations of different screw lengths
- Record torque specifications for critical screws
- Maintain reassembly reference photos
🔌 Professional Cable Management & Routing
Flex 5 Cable Routing Best Practices
| Cable Type | Routing Path | Critical Clearance | Connection Verification |
|---|---|---|---|
| Battery Cable | Direct path to motherboard connector | Avoid sharp bends near hinge area | Latch fully engaged, no visible gold contacts |
| SSD Cable (if applicable) | Secured along motherboard edge | Clearance from cooling fan | Firm connection, screw properly torqued |
| Touchpad Cable | Under motherboard if required | No pinching from case clips | ZIF connector latched securely |
| Display Cables | Through hinge channels carefully | No tension in tablet mode | Both display and touch cables connected |
🔄 2-in-1 Hinge Reassembly & Alignment
Professional Hinge Reassembly Protocol
- Hinge Inspection
- Check hinge mechanism for smooth operation
- Verify no damage to hinge brackets or mounts
- Ensure proper lubrication if required
- Test full range of motion before installation
- Display Reinstallation
- Align display with hinge mounts precisely
- Install hinge screws in proper sequence
- Verify even tension on both hinges
- Test tablet-to-laptop transformation smoothness
- Cable Routing Through Hinges
- Route display cables through hinge channels
- Ensure no pinching or sharp bends
- Verify cable length allows full range of motion
- Test cables don't pull tight in tablet mode
✅ Final Assembly Verification
Pre-Power On Verification Steps
- Visual Inspection
- Verify all screws are installed and properly torqued
- Check for even gaps around entire case perimeter
- Ensure no cables are visible or pinched
- Confirm laptop sits flat on surface without rocking
- Mechanical Verification
- Test hinge movement through full 360-degree range
- Verify keyboard and touchpad sit flush with case
- Check all ports are clear and accessible
- Ensure rubber feet are properly positioned
- Safety Verification
- Confirm no loose components inside
- Verify no tools or debris remain in device
- Check all connections are secure
- Ensure proper ESD protection during final checks
🚫 Common Reassembly Mistakes & Prevention
| Common Mistake | Consequence | Prevention | Repair Cost |
|---|---|---|---|
| Forcing case closure | Broken clips, cracked case, damaged components | Check alignment, verify no obstructions | $50-$120 |
| Overtightening screws | Stripped threads, cracked mounting points | Use proper torque, follow sequence | $30-$80 |
| Pinching cables | Short circuits, non-functional components | Verify cable routing, check clearance | $40-$150 |
| Missing screws | Loose components, structural weakness | Use organization system, verify count | $10-$40 |
🛠️ Optimal Tool Selection for Reassembly
| Task | Primary Tool | Alternative Tool | Critical Features |
|---|---|---|---|
| Screw Installation | Magnetic Phillips #00 | Precision bit set | Magnetic tip, proper fit |
| Case Alignment | Hand pressure | Soft-faced mallet (gentle) | Even pressure distribution |
| Cable Management | ESD-safe tweezers | Plastic spudger | Non-conductive, precise |
| Clip Engagement | Hand pressure | Soft rubber roller | Even pressure, no marks |
✅ Professional Reassembly Completion Checklist
- ✓ All internal components properly installed and secured
- ✓ Bottom cover correctly aligned and firmly fastened
- ✓ All screws properly torqued in correct sequence
- ✓ No cables pinched or improperly routed
- ✓ Hinge mechanism moves smoothly through full range
- ✓ Device sits flat without rocking or uneven gaps
- ✓ All ports and openings clear and accessible
- ✓ Rubber feet properly positioned and secure
- ✓ No tools or debris remain inside device
- ✓ Final visual inspection completed successfully
9. System Testing & Component Calibration
Comprehensive system testing and calibration is the final validation of your Ideapad Flex 5 14 repair success, ensuring all components work together seamlessly and your 2-in-1 laptop delivers reliable, high-performance operation. Professional testing protocols identify 95% of potential issues before they impact your daily productivity.
🧪 Why Professional Testing Ensures Long-Term Reliability
Thorough system testing increases device reliability from 70% to 95%+ by identifying intermittent issues, calibration problems, and component conflicts that brief testing might miss. Professional calibration optimizes your Flex 5's performance for both laptop and tablet usage modes.
| Testing Approach | Issue Detection Rate | Time Investment | Long-term Reliability | User Confidence |
|---|---|---|---|---|
| Professional Comprehensive | 95-98% | 2-4 hours | Excellent (3-5 years) | 95%+ |
| Standard Functional | 80-85% | 30-60 minutes | Good (2-3 years) | 75-80% |
| Basic Power-On | 60-70% | 5-15 minutes | Fair (1-2 years) | 50-60% |
| No Testing | 0-10% | 0 minutes | Poor (<1 year) | 10-20% |
⚡ Initial Power-On Testing Protocol
Safe Initial Power Testing Procedure
- Pre-Power Visual Inspection
- Verify bottom cover is completely secured
- Check all screws are properly installed
- Ensure no cables are visible or pinched
- Confirm laptop sits flat on surface
- Initial Power Connection
- Connect USB-C power adapter to wall outlet first
- Then connect to Flex 5 USB-C port
- Observe charging indicator light behavior
- Listen for any unusual sounds
- First Boot Verification
- Press power button briefly - do not hold
- Observe boot sequence and LED indicators
- Listen for normal fan operation and POST beeps
- Monitor for any error messages or unusual behavior
Flex 5 Boot Indicator Interpretation
| Indicator Pattern | Normal Behavior | Potential Issue | Action Required |
|---|---|---|---|
| Power LED solid white | Normal operation, adequate battery | None - normal operation | Continue boot sequence |
| Power LED blinking white | Sleep/suspend mode | System in low power state | Press power button to resume |
| Power LED solid amber | Charging, battery low | Battery requires charging | Allow charging, normal operation |
| Power LED blinking amber | Critical battery level | Battery very low, connect power | Immediate power connection required |
| No LED illumination | No power detected | Power connection issue | Check connections, troubleshoot |
🔧 Hardware Component Verification
Comprehensive Hardware Testing
| Component | Test Procedure | Expected Result | Acceptance Criteria |
|---|---|---|---|
| New SSD | Check Device Manager, Disk Management, run benchmarks | Recognized with correct capacity, fast performance | Full capacity available, no errors, 3,000+ MB/s reads |
| New Battery | Check power report, run on battery, monitor charging | Recognized, charges normally, good runtime | 6+ hours runtime, stable charging, no overheating |
| Touchscreen Display | Test multi-touch, color accuracy, brightness uniformity | Responsive touch, even backlight, accurate colors | No dead zones, uniform brightness, natural colors |
| Thermal Management | Run stress test, monitor temperatures, check fan operation | Stable temperatures, active cooling when needed | <85°C under load, quiet fan operation |
| Connectivity | Test all ports, WiFi, Bluetooth, webcam, microphone | All functions operational at expected speeds | No connection drops, full speed, clear audio/video |
📱 Touchscreen Calibration & Optimization
Professional Touchscreen Calibration
- Windows Built-in Calibration
- Search "Calibrate touch screen" in Windows
- Follow on-screen calibration prompts precisely
- Test all calibration points for accuracy
- Save calibration profile for future use
- Multi-Touch Verification
- Use touch test websites or applications
- Verify 10-point touch functionality
- Test gesture recognition (pinch, zoom, rotate)
- Check palm rejection in drawing applications
- Pressure Sensitivity (if supported)
- Test with supported drawing applications
- Verify pressure levels are detected correctly
- Check for consistent response across screen
- Calibrate pen sensitivity if active pen supported
Recommended Touchscreen Testing Tools
| Tool | Purpose | Effectiveness | Availability |
|---|---|---|---|
| Windows Touch Calibration | Basic alignment and accuracy | 85% | Built into Windows |
| Touch Test Online | Multi-point and gesture testing | 90% | Free web application |
| Drawing Applications | Pressure and palm rejection testing | 95% | Various free options |
| Manufacturer Utilities | Advanced diagnostics and calibration | 98% | Lenovo Vantage or specific tools |
🔋 Battery Performance Calibration
Comprehensive Battery Testing & Calibration
- Capacity Verification
- Generate battery report:
powercfg /batteryreport - Check reported capacity vs design capacity
- Verify cycle count is low (0-10 cycles for new battery)
- Monitor charge/discharge patterns for consistency
- Generate battery report:
- Runtime Testing
- Fully charge battery to 100%
- Use typical workload (web browsing, Office apps)
- Measure time until 10% remaining at 50% brightness
- Expect 6-10 hours for genuine 52.5Wh battery
- Charging Performance
- Monitor charging speed from 0% to 100%
- Verify rapid charging works if supported
- Check for consistent charging without interruptions
- Monitor temperature during charging (should be warm, not hot)
📊 System Performance Benchmarking
Recommended Performance Testing Tools
| Benchmark Type | Recommended Tool | Testing Focus | Expected Results |
|---|---|---|---|
| SSD Performance | CrystalDiskMark, AS SSD Benchmark | Read/write speeds, IOPS | 3,000+ MB/s read, 2,500+ MB/s write |
| CPU Performance | Cinebench, CPU-Z | Processing power, thermal throttling | Consistent scores, no significant throttling |
| Memory Performance | AIDA64, UserBenchmark | RAM speed, latency | Expected speeds for installed RAM type |
| Overall System | PCMark, 3DMark | Complete system performance | Scores comparable to similar systems |
System Stress Testing Protocol
- Thermal Stress Test
- Run Prime95 or AIDA64 system stability test
- Monitor CPU and GPU temperatures for 30 minutes
- Verify fans operate and temperatures stabilize
- Check for thermal throttling or unexpected shutdowns
- Memory Stress Test
- Run MemTest86 or Windows Memory Diagnostic
- Test for 2-4 complete passes
- Verify zero errors in memory testing
- Check for system stability under memory load
- Storage Stress Test
- Run extended file copy operations
- Test SSD performance under sustained load
- Verify consistent speeds without significant drops
- Check for any file corruption or errors
📡 Connectivity & Peripheral Testing
Comprehensive Connectivity Verification
| Component | Test Procedure | Expected Result | Acceptance Criteria |
|---|---|---|---|
| WiFi Connectivity | Connect to 2.4GHz and 5GHz networks, test speed | Stable connection, expected speeds | No drops, full router speed capability |
| Bluetooth | Pair with devices, test audio, file transfer | Successful pairing, stable connections | No interference, reliable operation |
| USB Ports | Test each port with various devices | Proper device recognition, data transfer | All ports functional, expected speeds |
| Audio System | Test speakers, headphones, microphone | Clear audio input and output | No distortion, proper volume levels |
| Webcam & Microphone | Test video call applications, recording | Clear video and audio capture | Proper focus, good audio quality |
🔄 2-in-1 Functionality Testing
Tablet Mode & Orientation Testing
- Hinge Functionality
- Test smooth rotation through 360-degree range
- Verify stable positioning in laptop, tent, and tablet modes
- Check for any creaking or resistance
- Ensure display cables don't bind or pull tight
- Auto-Rotation & Orientation
- Verify screen auto-rotates in tablet mode
- Test portrait and landscape orientations
- Check rotation lock functionality
- Ensure smooth transition between orientations
- Tablet Mode Features
- Test touch keyboard functionality
- Verify tablet-optimized interface elements
- Check gesture controls and navigation
- Ensure proper palm rejection in drawing apps
💻 Software & Driver Verification
Comprehensive Software Validation
| Software Component | Verification Method | Expected Result | Critical Importance |
|---|---|---|---|
| Operating System | Check activation, updates, system stability | Fully activated, updated, stable operation | High |
| Device Drivers | Verify all drivers installed and updated | No unknown devices, latest drivers | High |
| Lenovo Vantage | Install and configure system optimization | Hardware controls, updates, battery settings | Medium-High |
| Essential Applications | Test Microsoft Office, browsers, etc. | All applications function correctly | Medium |
🔧 Common Testing Issues & Solutions
| Issue | Symptoms | Root Cause | Solution |
|---|---|---|---|
| Touchscreen Not Responding | Display works but touch doesn't function | Touch cable disconnected or damaged | Check touch cable connection, reseat if needed |
| Battery Not Charging | Shows connected but not charging | Battery calibration needed or connector issue | Full calibration cycle, check battery connection |
| WiFi Connectivity Issues | Intermittent drops or slow speeds | Driver issues or antenna connection | Update WiFi drivers, check antenna connections |
| Overheating Under Load | High temperatures, performance drops | Thermal paste issue or fan obstruction | Check heatsink installation, verify fan operation |
✅ Comprehensive Testing Completion Checklist
- ✓ System boots reliably every time with no errors
- ✓ All upgraded components recognized and functioning
- ✓ Touchscreen calibrated and responsive across entire surface
- ✓ Battery provides expected runtime and charges properly
- ✓ SSD performance meets specifications with no errors
- ✓ Thermal management operates effectively under load
- ✓ All connectivity options functional at expected speeds
- ✓ 2-in-1 functionality works smoothly in all modes
- ✓ Audio and video systems provide clear input/output
- ✓ Stress testing completed with stable performance
- ✓ Software and drivers updated and functioning correctly
- ✓ No unusual noises, heating, or other anomalies detected
10. Where to Sell Your Ideapad Flex 5
Choosing the right platform to sell your upgraded Ideapad Flex 5 14 can increase your final sale price by 25-40% while reducing selling time from weeks to days. This comprehensive guide reveals professional selling strategies that leverage your documented repairs to attract premium buyers and maximize your return on investment.
💰 Why Platform Selection Impacts Your Sale Price
Strategic platform selection directly influences both sale price and speed by matching your professionally upgraded laptop with the right buyer demographics. Business and institutional buyers consistently pay 20-30% premiums for documented, well-maintained devices like your Flex 5.
| Platform Type | Average Sale Price | Time to Sell | Buyer Quality | Fee Structure |
|---|---|---|---|---|
| Business/Institutional | Highest (20-30% premium) | 7-14 days | Excellent | 5-10% |
| Premium Consumer | Above Average (10-15% premium) | 14-21 days | Good | 10-15% |
| General Marketplace | Market Average | 21-45 days | Mixed | 12-18% |
| Local/Quick Sale | Below Average (10-20% discount) | 1-7 days | Variable | 0% |
🏢 Business & Institutional Selling Platforms
Premium Platforms for Upgraded Business Laptops
| Platform | Focus | Fee Structure | Ideal For | Price Premium |
|---|---|---|---|---|
| SellLaptopBack | Business & Institutional Buyers | 5-8% (volume discounts) | Professionally upgraded systems | 20-30% |
| SellLaptopBack | Corporate IT & Education | 6-10% | Bulk buyers, documented repairs | 15-25% |
| LinkedIn Business Groups | Professional Networks | 0% (membership required) | Business-to-business sales | 15-20% |
| Industry-Specific Forums | Niche Professional Markets | 0% | Specialized business needs | 10-15% |
Targeting Institutional Buyers
- Educational Institutions (.edu)
- Focus on university IT departments and procurement
- Emphasize durability for student use and 2-in-1 versatility
- Highlight compatibility with learning management systems
- Reference battery life for all-day classroom use
- Government Contractors (.gov)
- Target agencies with specific hardware requirements
- Document security features and professional maintenance
- Emphasize compliance with IT standards
- Highlight ThinkPad-level reliability at lower cost
- Small Business Market
- Focus on businesses needing reliable workstations
- Demonstrate total cost of ownership savings
- Highlight professional upgrade documentation
- Emphasize 2-in-1 versatility for modern workplaces
🛒 Consumer Marketplace Options
Mainstream Consumer Platforms
| Platform | Audience | Total Fees | Sale Speed | Best For |
|---|---|---|---|---|
| eBay | National/International | 12.9% + payment processing | 7-21 days | Maximum exposure, competitive pricing |
| Facebook Marketplace | Local/Regional | 0% | 3-14 days | Quick local sales, no shipping |
| OfferUp | Local Mobile Users | 0% (local) / 7.9% (shipped) | 5-10 days | Younger demographic, mobile-first |
| Swappa | Tech-Savvy Buyers | 3% (seller) + payment fees | 7-14 days | Electronics specialists, fair pricing |
Multi-Platform Selling Strategy
- Primary Platform Selection
- Choose one main platform based on your target price
- Create comprehensive listing with professional photos
- Set competitive but premium pricing
- Use promoted listings if available
- Secondary Platform Backup
- List on one additional platform at slightly higher price
- Use different photos and description angle
- Target different buyer demographics
- Be prepared to adjust pricing based on interest
- Local Market Supplement
- List on local platforms at highest price
- Emphasize no shipping, immediate availability
- Be prepared for negotiation on local sales
- Use safe meeting locations for transactions
🎯 Specialized Electronics Markets
Niche Platforms for Tech-Savvy Buyers
| Platform | Specialization | Buyer Knowledge | Price Realization | Listing Requirements |
|---|---|---|---|---|
| Swappa | Consumer Electronics | High - understand upgrades | Above Average | Device verification, clear photos |
| HardwareSwap Reddit | Enthusiast Community | Very High - appreciate quality work | Premium for documented upgrades | Community rules, verification |
| Gazelle | Quick Buyback | Low - automated pricing | Below Market (convenience) | Minimal, quick quotes |
| NextWorth | Trade-in & Resale | Low - volume business | Below Average | Simple condition assessment |
🏛️ Government & Education Markets
Tapping Institutional Buyer Networks
- Educational Institution Targeting
- Research local school districts and universities
- Contact IT departments directly with professional proposal
- Emphasize cost savings vs new equipment
- Highlight 2-in-1 versatility for modern learning
- Government Procurement
- Monitor SAM.gov for relevant opportunities
- Research state and local government IT needs
- Emphasize security features and documented maintenance
- Highlight compliance with government IT standards
- Non-Profit Organizations
- Target organizations with limited technology budgets
- Emphasize value and reliability
- Consider charitable pricing for tax benefits
- Document donation for potential tax deductions
Institutional Buyer Pricing Strategy
| Institution Type | Pricing Approach | Key Value Points | Expected Premium |
|---|---|---|---|
| Universities (.edu) | Volume-friendly pricing | Reliability, academic software compatibility | 10-15% |
| K-12 Schools | Budget-conscious value | Durability, ease of use, battery life | 5-10% |
| Government (.gov) | Competitive but premium | Security, documentation, compliance | 15-20% |
| Non-Profit | Value-focused with flexibility | Cost savings, reliability, social impact | 0-10% |
💰 Professional Pricing Strategy
Key Pricing Considerations for Upgraded Flex 5
| Factor | Impact on Price | Premium Range | Buyer Perception |
|---|---|---|---|
| New 1TB+ SSD | High Impact | +$120-$180 | Performance & Storage Value |
| New Genuine Battery | High Impact | +$80-$120 | Reliability & Mobility |
| Professional Documentation | Medium-High Impact | +$60-$100 | Quality & Trust |
| Excellent Physical Condition | Medium Impact | +$40-$80 | Professionalism & Care |
| 2-in-1 Functionality | Medium Impact | +$50-$90 | Versatility & Modern Features |
Professional Resale Pricing Formula
Example: Flex 5 14 i5/8GB with Upgrades
- Base Market Value: $350
- 1TB SSD Upgrade Recovery: +$150
- New Battery Recovery: +$90
- Professional Documentation: +$75
- Excellent Condition Bonus: +$60
- Total Target Price: $725
⏰ Strategic Sales Timing
Optimal Sales Windows for Maximum Price
| Time Period | Market Conditions | Pricing Strategy | Target Audience |
|---|---|---|---|
| August-September | Back-to-school demand peak | Premium pricing, emphasize student use | Students, Parents, Educational Institutions |
| January-February | Business budget cycles, new year | Value-focused premium pricing | Businesses, Professionals |
| April-May | Graduation season, summer preparation | Balanced pricing with urgency | Graduates, Summer Students |
| Quarter Ends | Business spending deadlines | Premium pricing with limited-time offers | Corporate, Government |
🛡️ Selling Risk Management
Protecting Yourself During the Sale
- Payment Security
- Use platform-protected payment methods
- Avoid wire transfers and gift cards
- Wait for payment clearance before shipping
- Use tracked and insured shipping
- Buyer Verification
- Check buyer ratings and history
- Verify institutional email addresses for business sales
- Use platform messaging systems for documentation
- Be cautious of new accounts with no history
- Transaction Documentation
- Take photos of device before shipping
- Keep all communication records
- Document serial numbers and specifications
- Save tracking information and delivery confirmation
✅ Platform Selection Checklist
- ✓ Target audience matches platform demographics
- ✓ Fee structure understood and accounted for in pricing
- ✓ Platform reputation and buyer protection verified
- ✓ Listing requirements and photography standards met
- ✓ Shipping and payment processes understood
- ✓ Competitive pricing research completed
- ✓ Seasonal timing considerations addressed
- ✓ Risk management strategies in place
- ✓ Professional documentation prepared for listing
- ✓ Multi-platform strategy developed if needed
Need to Sell Your Lenovo Laptop? Get Instant Cash!
If your Lenovo IdeaPad Flex 5 14 (or other IdeaPad model) has performance issues or you're upgrading to a newer laptop, we offer competitive cash payouts for your device. We buy broken, used, and refurbished IdeaPad laptops—including all Flex 5 14 configurations—with free insured shipping and hassle-free evaluations.
Sell Popular Lenovo Models Now: