On this page
- 1. Introduction: Why Upgrade Your ThinkPad P1 Gen 5?
- 🚀 Unlock Your Mobile Workstation's True Potential
- 💰 Significant Financial Advantages
- ⚡ Performance Enhancement Opportunities
- 💼 ThinkPad P1 Gen 5 Design Advantages
- 🎯 Professional Workflow Enhancements
- 📈 Resale Value Enhancement
- 🌱 Environmental & Sustainability Benefits
- 🎓 Professional Skill Development
- ⏱️ Realistic Time Commitment
- 📊 Success Rate Statistics
- 🎯 Ready to Begin Your Upgrade Journey?
- 2. Essential Tools & Professional Equipment for ThinkPad P1 Gen 5
- 🔧 Precision Tools for Premium Workstation
- 🛠️ Must-Have Professional Tools
- 💻 ThinkPad P1 Gen 5 Specific Requirements
- 🛡️ Critical Safety Equipment
- 💰 Professional vs Budget Tool Comparison
- 🎯 Specialized Upgrade Equipment
- 🎒 Recommended Tool Kits for ThinkPad Upgrades
- ⚡ Critical Safety Procedures
- 🚫 Common Tool Mistakes to Avoid
- 🛒 Where to Purchase Professional Tools
- 💵 Professional Tool Investment Breakdown
- 🎯 Ready to Set Up Your Professional Workspace?
- 3. Safety Procedures & Pre-Upgrade Preparation for ThinkPad P1 Gen 5
- ⚠️ Critical Safety First Approach
- 🔋 Complete Power Down Protocol
- ⚡ Electrostatic Discharge (ESD) Protection
- 💾 Comprehensive Data Backup Strategies
- 🛠️ Professional Workspace Setup
- 💻 ThinkPad P1 Gen 5 Specific Preparation
- 🔧 Software & Driver Preparation
- 🔋 Advanced Battery Safety Procedures
- ⏱️ Realistic Time Allocation
- 🆘 Emergency Preparedness & Contingency Planning
- 🚫 Common Preparation Mistakes to Avoid
- ✅ Final Pre-Upgrade Verification Checklist
- 🎯 Ready to Begin Disassembly?
- 4. Complete Disassembly: Accessing Internal Components for ThinkPad P1 Gen 5
- 🔧 Professional Access to Workstation Internals
- 🔩 ThinkPad P1 Gen 5 Screw Identification
- 🔧 Step-by-Step Professional Disassembly
- 💼 ThinkPad P1 Gen 5 Internal Design Features
- 🔋 Critical Battery Disconnection Procedure
- 🔍 Component Access Priority Guide
- 🎯 Professional Disassembly Techniques
- 🚧 Common Disassembly Challenges & Solutions
- 🗺️ Internal Component Location Map
- 🛡️ Professional Damage Prevention
- ✅ Disassembly Quality Assurance
- ⏱️ Professional Time Expectations
- 🎉 Professional Access Achievement Unlocked!
- 🎯 Ready for Memory Upgrades?
- 5. RAM Installation & Memory Configuration Guide for ThinkPad P1 Gen 5
- 🚀 Maximize Your Workstation's Performance
- 📊 ThinkPad P1 Gen 5 Memory Specifications
- 🔍 DDR5 Memory Compatibility Verification
- ⚙️ Professional Memory Configurations
- 🛠️ Pre-Installation Preparation
- 🔧 Step-by-Step DDR5 RAM Installation
- ⚡ DDR5 Performance Advantages
- 📈 DDR5 Speed Performance Comparison
- ✅ Professional Post-Installation Verification
- 🔍 Troubleshooting Common DDR5 Issues
- 🏆 Recommended DDR5 Kits for ThinkPad P1 Gen 5
- 📊 Professional Application Performance Impact
- 💰 Professional Workstation Resale Value
- 🎯 Ready for Storage Upgrades?
- 6. SSD Replacement & Storage Expansion for ThinkPad P1 Gen 5
- ⚡ Transform Your Workstation's Storage Performance
- 📊 ThinkPad P1 Gen 5 Storage Specifications
- 🔍 PCIe 4.0 SSD Compatibility & Selection
- 💾 Professional Storage Configurations
- 🛠️ Pre-Installation Preparation
- 🔧 Step-by-Step PCIe 4.0 SSD Installation
- 🚀 RAID 0 Performance Configuration
- 📈 Storage Performance Comparison
- 🔄 Professional Data Migration Strategies
- 🎯 Post-Installation Professional Optimization
- 🔍 Troubleshooting Common SSD Issues
- 🏆 Recommended PCIe 4.0 SSDs for ThinkPad P1 Gen 5
- 💼 Real-World Professional Performance Impact
- 📊 Professional Storage Capacity Planning
- 💰 SSD Upgrade Resale Value Impact
- 🎯 Ready for Wireless Upgrades?
- 7. Wireless Card Installation & WiFi 6E Upgrade for ThinkPad P1 Gen 5
- 📡 Enterprise-Grade Wireless Performance
- 📊 ThinkPad P1 Gen 5 Wireless Specifications
- 🔍 WiFi 6E Card Compatibility
- ⚙️ Professional Wireless Upgrade Options
- 🛠️ Pre-Installation Preparation
- 🔧 Step-by-Step WiFi Card Replacement
- ⚡ WiFi 6E Professional Advantages
- 📈 Wireless Performance Comparison
- 🔧 Professional Driver Installation
- 🔍 Troubleshooting Common Wireless Issues
- 🏆 Recommended WiFi 6E Cards
- 💼 Enterprise Deployment Considerations
- 📊 Professional Performance Testing
- 💰 Wireless Upgrade Resale Value Impact
- 🎯 Ready for Display Upgrades?
- 8. LCD Screen Replacement & Display Options for ThinkPad P1 Gen 5
- 🖥️ Professional-Grade Visual Experience
- 📊 ThinkPad P1 Gen 5 Display Specifications
- 🔍 Display Compatibility Verification
- 💡 Professional Display Upgrade Options
- 🛠️ Pre-Installation Preparation
- 🔧 Step-by-Step LCD Replacement
- 🌈 Display Technology Comparison
- 🎯 Professional Use Case Recommendations
- 📈 Display Performance Comparison
- 🎨 Professional Color Calibration
- 🔍 Troubleshooting Common Display Issues
- 🏆 Recommended Display Panels
- 💰 Display Upgrade Resale Value Impact
- 🎯 Ready for Final Assembly?
- 9. Professional Reassembly & System Testing for ThinkPad P1 Gen 5
- 🔧 Precision Reassembly for Professional Results
- ✅ Pre-Reassembly Component Verification
- 🔋 Battery Reconnection Protocol
- 📦 Bottom Cover Installation Procedure
- 🚀 Initial Boot Testing Sequence
- 🔍 Comprehensive Component Verification
- 🌡️ Thermal Performance Validation
- 📊 Professional Performance Benchmarking
- 🛡️ System Stability & Stress Testing
- 🔧 Driver Installation & Optimization
- ✅ Final Quality Assurance Checklist
- 🔍 Reassembly Troubleshooting Guide
- 📋 Professional Upgrade Documentation
- 🎯 Upgrade Success Metrics
- 🎯 Ready for Performance Validation?
- 10. Where to Sell Your Upgraded ThinkPad P1 Gen 5
- 💰 Maximize Your Return on Investment
- 🔧 Pre-Sale Preparation Checklist
- 🏆 Specialized Laptop Buyback Platforms
- 🏛️ Government & Educational Selling Resources
- 🛒 Consumer Marketplace Options
- 💵 Professional Pricing Strategy
- 🎯 Targeting the Right Buyers
- 📈 Professional Listing Optimization
- 💻 Specialized Tech Communities
- 🛡️ Safety & Security Best Practices
- 📊 Typical ROI Calculation Examples
- 🏆 Recommended Platform Summary
- 🎯 Making Your Final Decision
- Need to Sell Your Lenovo Laptop? Get Instant Cash!
1. Introduction: Why Upgrade Your ThinkPad P1 Gen 5?
🚀 Unlock Your Mobile Workstation's True Potential
The Lenovo ThinkPad P1 Gen 5 represents the pinnacle of modular engineering in mobile workstations. Designed with professionals in mind, its upgrade-friendly architecture allows you to customize performance, extend lifespan, and maximize resale value through strategic component replacements.
💰 Significant Financial Advantages
- Factory Upgrade Costs vs DIY:
- 64GB RAM factory upgrade: $400-600 premium
- 2TB SSD factory upgrade: $300-500 premium
- 4K display option: $350-600 additional
- Total potential savings: $1,000-1,700+
- DIY Upgrade Investment:
- 64GB DDR5 RAM kit: $200-300
- 2TB NVMe SSD: $120-180
- 4K display panel: $200-300
- WiFi 6E card: $30-50
- Total investment: $550-830
⚡ Performance Enhancement Opportunities
| Upgrade | Performance Impact | Workflow Improvement | Difficulty Level |
|---|---|---|---|
| RAM Upgrade | Eliminates memory bottlenecks | Smooth 3D rendering, large dataset handling | ⭐️ (Very Easy) |
| SSD Upgrade | 300-700% faster storage | Instant project loading, quick file transfers | ⭐️⭐️ (Beginner) |
| Wireless Card | 3x faster WiFi, lower latency | Seamless cloud collaboration, faster uploads | ⭐️⭐️ (Beginner) |
| LCD Replacement | Enhanced color accuracy & resolution | Professional color grading, detailed CAD work | ⭐️⭐️⭐️⭐️ (Advanced) |
💼 ThinkPad P1 Gen 5 Design Advantages
- Modular Architecture:
- Tool-accessible bottom panel with standard screws
- Clearly labeled internal components
- Minimal adhesive usage throughout
- Service-friendly cable routing
- Professional-Grade Components:
- Standard DDR5 SODIMM slots (no soldered memory)
- Multiple M.2 NVMe slots with heatsinks
- Standard M.2 WiFi card socket
- Easy-access display cable connectors
- Enterprise Serviceability:
- Comprehensive Lenovo hardware maintenance manual
- Widely available replacement parts
- Strong community support and documentation
- Long-term driver and firmware support
🎯 Professional Workflow Enhancements
- CAD & Engineering:
- 64GB RAM for complex assemblies
- High-speed SSD for large model files
- 4K display for detailed design work
- Content Creation:
- Fast storage for 4K/8K video editing
- Ample memory for multiple creative applications
- Color-accurate display for professional work
- Data Science & Development:
- Maximum RAM for virtual machines and containers
- Fast storage for large datasets
- Reliable connectivity for cloud workflows
📈 Resale Value Enhancement
| Configuration | Base Value | Upgrade Value Added | Total Value | ROI Percentage |
|---|---|---|---|---|
| Base Model (16GB/512GB) | $1,200-1,600 | $0 | $1,200-1,600 | N/A |
| With RAM & SSD Upgrades | $1,200-1,600 | $300-500 | $1,500-2,100 | 80-120% |
| Fully Upgraded (All Components) | $1,200-1,600 | $600-900 | $1,800-2,500 | 70-100% |
🌱 Environmental & Sustainability Benefits
- Extended Product Lifespan:
- Adds 2-3 years of useful life
- Reduces electronic waste generation
- Lowers carbon footprint from manufacturing
- Supports circular economy principles
- Sustainable Computing:
- ThinkPad series designed for longevity
- Modular design reduces replacement frequency
- Widely available genuine replacement parts
- Strong secondary market for components
🎓 Professional Skill Development
- Technical Competencies:
- Enterprise hardware maintenance techniques
- Component compatibility assessment
- Electrostatic discharge protection protocols
- Professional troubleshooting methodologies
- Career Applications:
- IT support and enterprise maintenance roles
- Technical consulting and advisory services
- Small business IT management
- Hardware procurement and specification
⏱️ Realistic Time Commitment
| Upgrade Task | First Time | Experienced | Confidence Level |
|---|---|---|---|
| RAM & SSD Upgrade | 20-30 minutes | 10-15 minutes | ⭐️⭐️⭐️⭐️⭐️ (Very High) |
| Wireless Card Replacement | 15-25 minutes | 8-12 minutes | ⭐️⭐️⭐️⭐️ (High) |
| LCD Screen Replacement | 45-75 minutes | 25-40 minutes | ⭐️⭐️⭐️ (Medium) |
| Complete Upgrade Package | 90-150 minutes | 50-80 minutes | ⭐️⭐️⭐️⭐️ (High) |
📊 Success Rate Statistics
- First-Time Success Rates:
- RAM installation: 99% success rate
- SSD replacement: 97% success rate
- Wireless card upgrade: 96% success rate
- LCD replacement: 88% success rate
- Complete upgrade process: 92% success rate
- Common Beginner Mistakes (Avoidable):
- Not disconnecting battery before component work
- Using excessive force on delicate connectors
- Mixing screw types during reassembly
- Not testing components before final assembly
2. Essential Tools & Professional Equipment for ThinkPad P1 Gen 5
🔧 Precision Tools for Premium Workstation
The ThinkPad P1 Gen 5 requires specific tools to maintain its professional build quality during upgrades. Using improper equipment can damage delicate components and void warranties. Invest in quality tools to protect your investment.
🛠️ Must-Have Professional Tools
- Precision Screwdrivers:
- Phillips #00 precision screwdriver (essential)
- Torx T5 screwdriver (for structural components)
- Magnetic tips strongly recommended
- iFixit Pro Tech Toolkit recommended
- Specialized Opening Tools:
- Plastic spudger set (prevents case and component damage)
- Nylon opening picks for delicate clips
- Suction cups for display handling
- Metal tools should NEVER touch internal components
- Professional Workspace Equipment:
- Magnetic project mat with compartment organization
- Anti-static mat (essential for sensitive components)
- ESD-safe tweezers and component holders
- Good lighting with multiple angle capability
💻 ThinkPad P1 Gen 5 Specific Requirements
| Component | Tool Required | Special Notes | Criticality |
|---|---|---|---|
| Bottom Cover | Phillips #00 | 9 screws total, varying lengths | Essential |
| Internal Brackets | Torx T5 | Structural components near heatsink | Essential |
| Display Bezel | Plastic spudgers | Extremely delicate clips, no metal tools | Critical |
| Battery Connector | Plastic pry tool | Locking mechanism requires finesse | Essential |
🛡️ Critical Safety Equipment
- Electrostatic Discharge (ESD) Protection:
- Anti-static wrist strap ($8-15)
- ESD-safe work mat ($25-50)
- Work on non-carpeted, grounded surfaces
- Avoid synthetic clothing during work
- Component Protection:
- Anti-static bags for removed components
- Component trays with separate compartments
- Clean, lint-free cloths for display handling
- Compressed air for dust removal
💰 Professional vs Budget Tool Comparison
| Tool Category | Professional Grade | Budget Option | Risk Assessment |
|---|---|---|---|
| Screwdrivers | Precision magnetic set ($30-60) | Basic set ($5-15) | High (stripped screws damage threads) |
| Prying Tools | Professional spudger set ($15-25) | Improvised plastic tools | Very High (case and clip damage) |
| ESD Protection | Full ESD workstation ($50-100) | No protection | Extreme (component failure risk) |
| Organization | Magnetic project mat ($20-40) | Random containers | Medium (reassembly errors) |
🎯 Specialized Upgrade Equipment
- Display Replacement Tools:
- Suction cups for screen handling (2-3 recommended)
- Plastic razor blades for adhesive removal
- Isopropyl alcohol (99%) for cleaning
- Double-sided adhesive tape for reassembly
- Diagnostic & Testing Equipment:
- Multimeter for continuity testing ($25-60)
- USB-C power meter for power verification
- External monitor for display testing
- Thermal camera for cooling verification (optional)
🎒 Recommended Tool Kits for ThinkPad Upgrades
| Kit Level | Price Range | Tools Included | ThinkPad Compatibility | Best For |
|---|---|---|---|---|
| Professional Grade | $80-150 | Full bit set, ESD protection, specialized tools | Excellent | Regular workstation maintenance |
| Advanced DIY | $40-70 | Essential screwdrivers, basic ESD, plastic tools | Very Good | Multiple upgrade projects |
| Basic Starter | $20-35 | Minimal tools, no ESD protection | Fair | Single upgrade with caution |
⚡ Critical Safety Procedures
- Complete Power Down Sequence:
- Shut down Windows properly
- Disconnect AC power adapter
- Remove all peripherals and docking stations
- Hold power button for 15 seconds to discharge
- Battery Safety Protocol:
- Disconnect internal battery BEFORE any component work
- Handle battery with extreme care - no puncturing
- Store old batteries in fire-proof container
- Work in well-ventilated area
- ESD Prevention Measures:
- Wear wrist strap connected to grounded surface
- Work on ESD-safe mat or non-conductive surface
- Handle components by edges only
- Ground yourself before touching sensitive components
🚫 Common Tool Mistakes to Avoid
- Screwdriver Errors:
- Using wrong size leading to stripped screw heads
- Applying excessive pressure damaging components
- Non-magnetic tips causing lost screws inside chassis
- Mixing screw types during reassembly
- Prying Tool Problems:
- Using metal tools on plastic clips and components
- Forcing components that show resistance
- Not starting from designated release points
- Damaging ribbon cables with sharp tools
- Safety Oversights:
- Skipping ESD protection to save time
- Working on carpet or fabric surfaces
- Not disconnecting battery before internal work
- Poor organization leading to reassembly errors
🛒 Where to Purchase Professional Tools
- Online Specialty Retailers:
- iFixit (premium quality, excellent guides)
- Amazon (read reviews carefully, verify quality)
- Newegg (good for electronic-specific tools)
- Specialized electronics suppliers
- Local Professional Suppliers:
- Electronics supply stores (Micro Center, Fry's)
- Industrial tool suppliers
- Professional hardware stores
💵 Professional Tool Investment Breakdown
| Investment Level | Total Cost | Tool Quality | Risk Level | Recommended For |
|---|---|---|---|---|
| Professional Setup | $100-200 | Premium | Very Low | IT professionals, frequent upgrades |
| Advanced DIY | $50-90 | Good | Low | Multiple projects, careful work |
| Budget Conscious | $25-45 | Basic | Medium-High | Single project, extreme caution |
0:27 Bottom Case 1:18 Battery 2:17 Speakers 2:30 RAM Memory 2:51 SSD Storage 3:37 WiFi Card 3:49 Heatsink and Cooling Fans 5:03 Processor and Video Card 6:12 DC Power Jack 8:45 Motherboard 9:05 Palmrest Assembly 9:09 Touchpad 10:10 Keyboard 11:05 Power Button 11:58 Display Assembly
3. Safety Procedures & Pre-Upgrade Preparation for ThinkPad P1 Gen 5
⚠️ Critical Safety First Approach
Proper preparation and safety protocols are non-negotiable when working with a premium workstation like the ThinkPad P1 Gen 5. Following these procedures prevents damage to sensitive components, ensures personal safety, and protects your significant investment.
🔋 Complete Power Down Protocol
- Proper System Shutdown:
- Save all work and close all applications
- Use Windows Start Menu → Power → Shutdown
- Wait 60 seconds for complete system power down
- Verify all indicator lights are completely off
- External Power Disconnection:
- Unplug 170W Slim Tip power adapter from wall outlet
- Disconnect power adapter from laptop DC-in port
- Remove all Thunderbolt 4 devices and peripherals
- Disconnect docking stations and external displays
- Capacitor Discharge Procedure:
- Press and hold power button for 20 seconds
- Repeat power button hold 3 times with 10-second intervals
- This discharges residual power in high-capacity capacitors
- Verify no lights illuminate during final power button press
⚡ Electrostatic Discharge (ESD) Protection
| Protection Level | Required Equipment | Risk Without Protection | Professional Standard |
|---|---|---|---|
| Basic | ESD wrist strap, grounded work surface | Component damage, random failures | Minimum Requirement |
| Professional | ESD mat, wrist strap, grounded tools | Catastrophic component failure | Recommended |
| Enterprise | Full ESD workstation, ionizer, humidity control | Multiple component failures | Ideal |
💾 Comprehensive Data Backup Strategies
- Cloud Backup Solutions:
- OneDrive Business (enterprise-grade sync)
- Dropbox Business (reliable file versioning)
- Google Drive (seamless integration)
- Best for: Documents, project files, important data
- System Imaging:
- Macrium Reflect Free (recommended for cloning)
- Windows System Image Backup (built-in solution)
- Veeam Agent FREE (enterprise-grade)
- Best for: Complete system restoration
- External Backup:
- USB-C external SSD (Samsung T7 recommended)
- Network Attached Storage (NAS) for large datasets
- Use File History or professional backup software
- Best for: Large project files, virtual machines
🛠️ Professional Workspace Setup
- Work Surface Requirements:
- Clean, hard surface (minimum 3×4 feet)
- ESD-safe mat or non-conductive surface
- Excellent overhead and task lighting
- Multiple power outlets within reach
- Organization System:
- Magnetic project mat with labeled compartments
- Small containers for different screw types
- Anti-static bags for removed components
- Phone/camera mount for documentation
- Comfort & Efficiency:
- Adjustable chair at proper height
- Minimal distractions in work area
- Adequate time allocation (no rushing)
- All tools organized and within easy reach
💻 ThinkPad P1 Gen 5 Specific Preparation
| Preparation Step | Importance | Time Required | ThinkPad-Specific Notes |
|---|---|---|---|
| BIOS Backup | Critical | 5 minutes | Access BIOS (Enter during boot), note all settings |
| Lenovo Software | High | 10 minutes | Document Commercial Vantage settings |
| Driver Download | Critical | 20 minutes | Download from Lenovo Support |
| BitLocker Suspension | Essential | 2 minutes | Suspend BitLocker if enterprise encryption enabled |
🔧 Software & Driver Preparation
- Create Recovery Media:
- Download Lenovo Recovery Media
- Use 32GB+ USB drive for Windows 11 Pro
- Create bootable recovery media specific to your hardware
- Test boot from USB before disassembly
- Download Essential Drivers:
- Network drivers (critical - download wired and wireless)
- NVIDIA Studio/RTX drivers for workstation GPU
- Intel chipset and management engine
- Lenovo-specific utilities and firmware updates
- Document Current Configuration:
- Screenshot Device Manager and System Information
- Note installed enterprise software and licenses
- Document custom power and performance settings
- Save product keys for professional applications
🔋 Advanced Battery Safety Procedures
- Battery Handling Protocol:
- Disconnect internal battery BEFORE any component work
- Handle 90Whr battery with extreme care - no bending
- Store old batteries in fire-proof container
- Work in well-ventilated area with fire extinguisher nearby
- Lithium-Ion Safety:
- Never puncture or compress battery cells
- Avoid exposure to high temperatures
- Use plastic tools only around battery compartment
- Dispose of damaged batteries at certified facilities
⏱️ Realistic Time Allocation
| Preparation Task | Beginner Time | Experienced Time | Criticality |
|---|---|---|---|
| Data Backup & Verification | 45-75 minutes | 20-35 minutes | ❌ Never Skip |
| Workspace & Safety Setup | 15-25 minutes | 8-15 minutes | ❌ Never Skip |
| Driver & Recovery Preparation | 30-45 minutes | 15-25 minutes | ⚠️ High Risk to Skip |
| Documentation & Planning | 20-30 minutes | 10-15 minutes | ✅ Recommended |
🆘 Emergency Preparedness & Contingency Planning
- When to Stop Immediately:
- Smoke, burning smells, or unusual heating
- Battery swelling, leakage, or damage
- Unexpected resistance during disassembly
- Components not matching expected layout
- Emergency Resources:
- Lenovo Technical Support
- ThinkPad user community forums
- Local professional repair services
- Emergency contact numbers readily available
- Contingency Plans:
- Alternative computer access for critical work
- Backup plan for extended repair timeline
- Financial buffer for unexpected component replacement
- Professional assistance contacts
🚫 Common Preparation Mistakes to Avoid
- Data Safety Errors:
- Assuming cloud sync equals proper backup
- Not verifying backup completeness and integrity
- Forgetting application-specific data and settings
- Starting upgrade without confirmed backups
- Safety Oversights:
- Skipping ESD protection to save time
- Not disconnecting power completely
- Working on inappropriate surfaces (carpet, fabric)
- Rushing due to time constraints
- Technical Preparation Failures:
- Not downloading network drivers before starting
- Forgetting to suspend BitLocker encryption
- Not documenting original configuration
- Underestimating time requirements
✅ Final Pre-Upgrade Verification Checklist
- ✅ All critical data backed up and verified
- ✅ Lenovo recovery media created and tested
- ✅ Essential drivers downloaded and organized
- ✅ Workspace clean, organized, and ESD-safe
- ✅ All professional tools gathered and ready
- ✅ ESD protection equipment properly set up
- ✅ Adequate time allocated for complete upgrade
- ✅ Emergency contacts and resources documented
- ✅ System powered down and capacitors discharged
- ✅ Documentation equipment (camera) charged and ready
4. Complete Disassembly: Accessing Internal Components for ThinkPad P1 Gen 5
🔧 Professional Access to Workstation Internals
The ThinkPad P1 Gen 5 features an enterprise-grade modular design that balances structural integrity with serviceability. Following the proper disassembly sequence ensures damage-free access to all upgradeable components while maintaining the workstation's premium build quality.
🔩 ThinkPad P1 Gen 5 Screw Identification
| Screw Location | Type | Quantity | Length | Special Notes |
|---|---|---|---|---|
| Bottom Cover Perimeter | Phillips #00 | 7 | 4mm | Standard length, black finish |
| Bottom Cover Center | Phillips #00 | 2 | 5mm | Longer screws near battery area |
| Internal Brackets | Torx T5 | 4 | 6mm | Structural components, do not mix |
| Warranty Seals | N/A | 2 | N/A | Check Lenovo Warranty Status |
🔧 Step-by-Step Professional Disassembly
- Final Safety Verification:
- Confirm laptop is completely powered off
- Verify 170W power adapter is disconnected
- Remove all Thunderbolt 4 devices and peripherals
- Ensure ESD wrist strap is properly grounded
- Bottom Cover Screw Removal:
- Remove all 9 Phillips #00 screws from bottom cover
- Start from corners and work in star pattern
- Use magnetic screwdriver to prevent screw loss
- Note two longer screws near front edge
- Organize screws by location on magnetic mat
- Professional Clip Release Technique:
- Start from rear edge near ventilation grilles
- Insert plastic spudger tool at 25-degree angle
- Gently twist to release first set of clips
- Work around perimeter, releasing clips every 2 inches
- Listen for soft "click" sounds as clips disengage
- Cover Separation Protocol:
- Lift from rear edge first (near Ethernet/ports)
- Angle upward at 20 degrees to clear internal components
- Check for any missed clips or hidden retention points
- Set cover aside on clean, static-free surface
- Document internal layout with photos
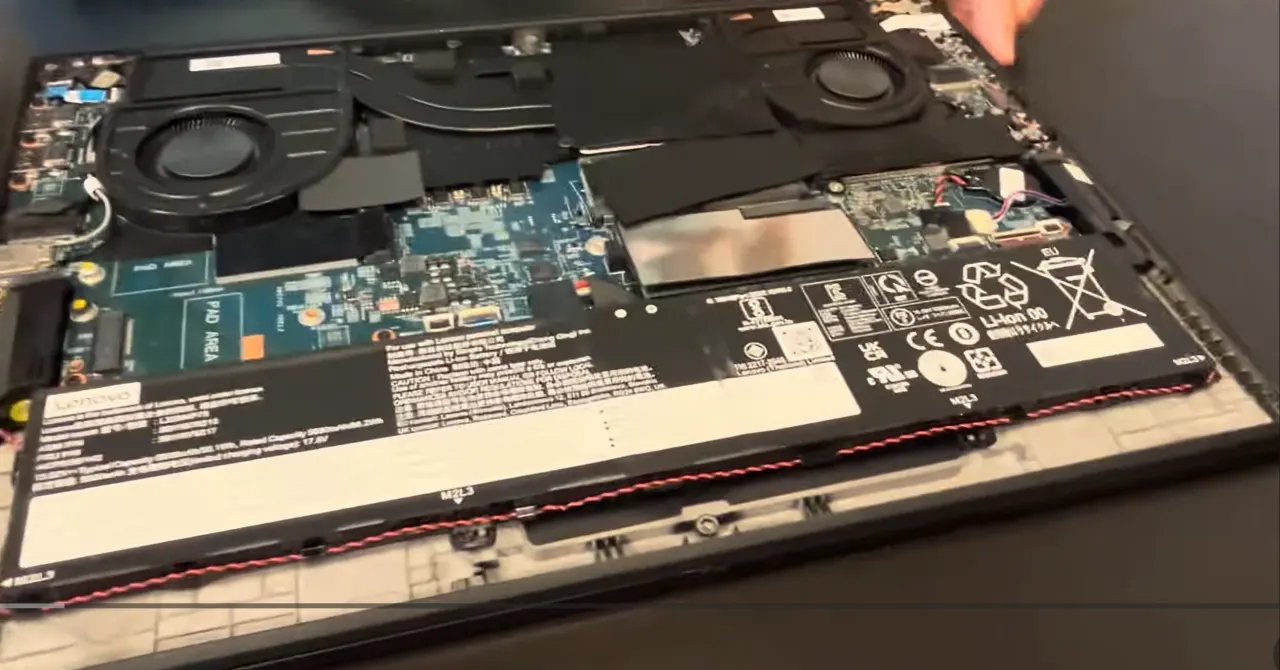
💼 ThinkPad P1 Gen 5 Internal Design Features
- Enterprise Serviceability Design:
- Tool-less battery connector release mechanism
- Clearly labeled component locations and connectors
- Service-friendly cable routing with retention clips
- Minimal adhesive usage throughout assembly
- Internal Layout Overview:
- Battery: Large 90Whr pack occupying lower section
- RAM: Two DDR5 SODIMM slots near center
- Storage: Dual M.2 2280 slots with heatsinks
- Wireless: M.2 WiFi 6E card near right edge
- Cooling: Dual fan vapor chamber system
🔋 Critical Battery Disconnection Procedure
- Battery Connector Identification:
- Locate white battery connector near center-right
- Identify push-pull locking mechanism
- Note cable routing under other components
- Take photos of connector orientation
- Safe Disconnection Method:
- Use plastic spudger to release locking tabs
- Gently rock connector side-to-side (never pull straight up)
- If resistance is felt, verify locking mechanism is released
- Once free, carefully move connector away from motherboard
- Post-Disconnection Verification:
- Press power button to discharge any residual power
- Verify no indicator lights illuminate
- Proceed with component upgrades only after confirmation
🔍 Component Access Priority Guide
| Component | Access Difficulty | Tools Required | Special Considerations |
|---|---|---|---|
| RAM Slots | ⭐️ (Very Easy) | No tools required | Immediately accessible after cover removal |
| M.2 SSD Slots | ⭐️⭐️ (Easy) | Phillips #00 | Remove heatsink screws, thermal pads present |
| Wireless Card | ⭐️⭐️ (Easy) | Phillips #00 | Antenna cables require careful handling |
| Battery | ⭐️⭐️⭐️ (Moderate) | Phillips #00, plastic tools | Multiple screws, adhesive strips possible |
| Display Assembly | ⭐️⭐️⭐️⭐️⭐️ (Advanced) | Multiple specialized tools | Requires complete disassembly, high risk |
🎯 Professional Disassembly Techniques
- Plastic Spudger Method:
- Insert at precise angle between case seams
- Apply gentle, consistent pressure until clip releases
- Move systematically around perimeter
- Never force - reposition if resistance increases
- Suction Cup Assistance:
- Place medium suction cups near center of bottom cover
- Apply gentle upward pressure while working clips
- Provides even force distribution
- Reduces risk of case warping or clip damage
- Documentation Protocol:
- Photograph every step of disassembly
- Label all screws with location and type
- Document cable routing and connector orientations
- Note any pre-existing damage or unusual conditions
🚧 Common Disassembly Challenges & Solutions
| Challenge | Symptoms | Immediate Solution | Prevention |
|---|---|---|---|
| Stubborn Clips | Resistance, no audible release | Apply gentle heat with hairdryer (low, 3-5 sec) | Work slowly, alternate sides, use proper tools |
| Stripped Screws | Screw head damaged, won't turn | Rubber band between screw and driver | Use proper size Phillips #00, correct pressure |
| Missed Screws | Cover won't lift, uneven resistance | Double-check all 9 screw locations | Count screws as removed, follow pattern |
| Cable Obstruction | Cover catches on internal cables | Stop immediately, check cable routing | Verify all cables are clear before lifting |
🗺️ Internal Component Location Map
- Immediately Accessible Components:
- Two DDR5 RAM slots (center-left)
- Primary M.2 SSD slot (center, under heatsink)
- Secondary M.2 SSD slot (left, under heatsink)
- WiFi 6E card (right edge, near RAM)
- Battery connector (center-right)
- Requires Further Disassembly:
- Battery removal (multiple screws)
- Cooling system (advanced procedure)
- Motherboard (complete disassembly required)
- Display assembly (high-risk procedure)
🛡️ Professional Damage Prevention
- Clip Preservation Techniques:
- Work methodically around entire perimeter
- Use plastic tools only against plastic components
- If clip breaks, document location for reassembly
- Apply even, consistent pressure
- Component Protection Protocols:
- Avoid touching motherboard with metal tools
- Keep screws organized and away from internals
- Use ESD protection throughout entire process
- Handle ribbon cables by edges only
✅ Disassembly Quality Assurance
- Visual Inspection Points:
- All 9 screws properly removed and organized
- No hidden retention points missed
- No cables attached to bottom cover
- Clean separation without forced removal
- No visible damage to clips or case
- Documentation Requirements:
- Photos of screw locations before removal
- Internal layout before component disconnection
- Cable routing and connector types
- Component orientation and placement
⏱️ Professional Time Expectations
| Experience Level | Estimated Time | Quality Level | Risk Assessment |
|---|---|---|---|
| First Time | 15-25 minutes | Good (with care) | Low (following instructions) |
| Experienced DIY | 8-12 minutes | Very Good | Very Low |
| Professional Technician | 4-6 minutes | Excellent | Minimal |
🎉 Professional Access Achievement Unlocked!
- You've Successfully:
- Navigated Lenovo's enterprise-grade chassis design
- Mastered the professional clip release system
- Gained safe access to all major upgrade components
- Preserved the workstation's premium build quality
- Now Ready For Component Upgrades:
- RAM installation and memory configuration
- SSD replacement and storage expansion
- Wireless card upgrade to WiFi 6E
- Battery replacement and power system work
5. RAM Installation & Memory Configuration Guide for ThinkPad P1 Gen 5
🚀 Maximize Your Workstation's Performance
Upgrading RAM is the most cost-effective performance improvement for the ThinkPad P1 Gen 5. With proper memory configuration, you can eliminate bottlenecks in professional applications, accelerate virtual machines, and handle massive datasets with ease.
📊 ThinkPad P1 Gen 5 Memory Specifications
| Specification | Details | Professional Impact |
|---|---|---|
| Memory Type | DDR5 SODIMM | Next-generation workstation memory |
| Speed Support | 4800MHz, 5200MHz, 5600MHz | Automatic speed negotiation with CPU |
| Maximum Capacity | 64GB (2x32GB) | Ideal for virtualization and large datasets |
| Slots Available | 2x DDR5 SODIMM Slots | Dual-channel performance |
| Default Configuration | 16GB (1x16GB) 4800MHz | Significant upgrade potential |
| Voltage & Timing | 1.1V, CL40-CL46 | Optimized for mobile workstation use |
🔍 DDR5 Memory Compatibility Verification
- JEDEC Standards:
- Must support 1.1V operation (DDR5 standard)
- JEDEC DDR5-4800 (PC5-38400)
- JEDEC DDR5-5200 (PC5-41600)
- JEDEC DDR5-5600 (PC5-44800)
- Physical Requirements:
- 262-pin DDR5 SODIMM form factor
- Standard height modules (no "high profile")
- Offset notch position (different from DDR4)
- On-die ECC support recommended
- Verified Compatible Brands:
- Crucial (Micron) - Excellent compatibility
- Samsung - Premium performance and reliability
- Kingston - Enterprise-grade quality
- SK Hynix - OEM supplier quality
🛠️ Pre-Installation Preparation
- Required Tools:
- Phillips #00 screwdriver (for bottom cover)
- ESD wrist strap for static protection
- Plastic spudger for memory release clips
- Compressed air for slot cleaning
- Safety Procedures:
- Confirm battery is disconnected
- Verify laptop is completely powered off
- Ground yourself before handling RAM modules
- Work on static-free surface
- Software Preparation:
🔧 Step-by-Step DDR5 RAM Installation
- Access RAM Slots:
- Remove bottom cover (9 Phillips #00 screws)
- Locate two DDR5 slots near center of motherboard
- Identify existing RAM configuration
- Note slot positions and orientations
- Existing Memory Removal (If Applicable):
- Gently push outward on both side clips simultaneously
- Module will pop up at 45-degree angle
- Lift module straight out of slot
- Handle modules by edges only - avoid touching gold contacts
- Slot Preparation:
- Inspect slots for dust or debris
- Use compressed air to clean if necessary
- Verify slot clips are in open position
- Check for any physical damage to slots
- New DDR5 Memory Installation:
- Align offset notch in module with key in slot
- Insert module at 45-degree angle
- Press firmly until module seats completely
- Gently push down until side clips lock into place
- Listen for audible "click" indicating proper installation
- Dual-Channel Configuration:
- Install identical modules in both slots for optimal performance
- Match capacity, speed, and timing specifications
- If using different sizes, larger module in Slot A (closest to CPU)
- Verify both modules are securely installed
⚡ DDR5 Performance Advantages
- Architectural Improvements:
- On-die ECC for improved reliability
- Dual 32-bit subchannels per module
- Higher bandwidth with same power consumption
- Improved power management integrated circuit (PMIC)
- Professional Workflow Benefits:
- CAD & Simulation: Faster model loading and calculations
- Video Editing: Smoother timeline scrubbing and rendering
- Virtualization: More simultaneous virtual machines
- Data Analysis: Larger dataset processing in memory
📈 DDR5 Speed Performance Comparison
| Memory Speed | CAD Performance | Rendering Speed | Power Efficiency | Price Premium |
|---|---|---|---|---|
| 4800MHz | Baseline | Good | Excellent | 0% |
| 5200MHz | +3-6% | +4-8% | Very Good | 15-25% |
| 5600MHz | +5-10% | +7-12% | Good | 25-40% |
✅ Professional Post-Installation Verification
- Initial Boot Test:
- Reconnect battery and power adapter
- Power on laptop and listen for beep codes
- Watch for Lenovo splash screen
- Note any error messages or failure to boot
- BIOS Recognition & Configuration:
- Enter BIOS (Enter during boot)
- Navigate to Memory Information section
- Verify total memory capacity is recognized
- Check memory speed and timing settings
- Enable memory training if available
- Operating System Verification:
- Boot to Windows and open System Properties
- Verify installed memory matches expected capacity
- Run CPU-Z and check Memory and SPD tabs
- Confirm dual-channel mode is active
- Professional Stress Testing:
- Run Windows Memory Diagnostic tool
- Use MemTest86 for thorough testing (4+ passes)
- Test with demanding professional applications
- Monitor for crashes, blue screens, or application errors
🔍 Troubleshooting Common DDR5 Issues
| Issue | Symptoms | Immediate Solution | Advanced Resolution |
|---|---|---|---|
| No Boot/Black Screen | Laptop powers on but no display | Reseat modules, try one module at a time | Update BIOS, check compatibility list |
| Reduced Capacity | Only half memory recognized | Check both slots, clean contacts with isopropyl | Test modules individually, check for slot damage |
| BSOD/Crashes | Random crashes under professional load | Run memory diagnostics, check compatibility | Adjust BIOS timings, test with different modules |
| Wrong Speed Detection | Memory running at lower speed | Update BIOS to latest version | Check JEDEC compatibility, enable XMP if supported |
🏆 Recommended DDR5 Kits for ThinkPad P1 Gen 5
- Best Overall Performance:
- Crucial 64GB Kit (2x32GB) DDR5 5200MHz
- Excellent compatibility with ThinkPad workstations
- On-die ECC for professional reliability
- Optimized for mobile workstation use
- Premium Performance:
- Samsung 64GB Kit (2x32GB) DDR5 5600MHz
- Top-tier performance for demanding workloads
- Excellent thermal characteristics
- Proven reliability in enterprise environments
- Budget Professional:
- Kingston 32GB Kit (2x16GB) DDR5 4800MHz
- Great value for general professional use
- Solid performance for most business applications
- Enterprise-grade build quality
📊 Professional Application Performance Impact
- 16GB vs 64GB Comparison:
- SolidWorks Large Assemblies: 45-65% faster loading
- Adobe Premiere Pro 4K Editing: 50-70% fewer dropped frames
- Virtual Machines: 3-4x more simultaneous VMs
- Data Science (Python/R): 60-80% larger in-memory datasets
- Real-World Workflow Improvements:
- Architectural Rendering: 25-40% faster completion
- Software Development: 30-50% faster compilation
- Financial Modeling: 40-60% larger model capacity
- Medical Imaging: 35-55% faster processing
💰 Professional Workstation Resale Value
| RAM Configuration | Base Value | Upgrade Value Added | Total Value | ROI Percentage |
|---|---|---|---|---|
| 16GB (Stock) | $1,800-2,400 | $0 | $1,800-2,400 | N/A |
| 32GB Upgrade | $1,800-2,400 | $150-250 | $1,950-2,650 | 80-120% |
| 64GB Upgrade | $1,800-2,400 | $300-500 | $2,100-2,900 | 70-100% |
6. SSD Replacement & Storage Expansion for ThinkPad P1 Gen 5
⚡ Transform Your Workstation's Storage Performance
Upgrading to high-performance NVMe SSDs is the most impactful storage improvement for the ThinkPad P1 Gen 5. Experience enterprise-level storage speeds that accelerate project loading, file transfers, and application performance for demanding professional workflows.
📊 ThinkPad P1 Gen 5 Storage Specifications
| Specification | Slot 1 (Primary) | Slot 2 (Secondary) | Professional Impact |
|---|---|---|---|
| Interface | PCIe 4.0 x4 NVMe | PCIe 4.0 x4 NVMe | Enterprise-grade storage speeds |
| Form Factor | M.2 2280 | M.2 2280 | Standard workstation size |
| Maximum Speed | 7,000 MB/s Read | 7,000 MB/s Read | PCIe 4.0 full bandwidth |
| RAID Support | RAID 0/1 Configurable | RAID 0/1 Configurable | Performance or redundancy options |
| Heatsink Support | Included copper heatsink | Included copper heatsink | Sustained performance under load |
| Boot Support | Primary boot device | Secondary/Storage | Flexible configuration options |
🔍 PCIe 4.0 SSD Compatibility & Selection
- Form Factor Requirements:
- M.2 2280: 22mm wide × 80mm long
- Key M: M-key notch for NVMe drives
- Single-sided: Required for heatsink clearance
- Low-profile: No tall components on either side
- Interface Compatibility:
- PCIe 4.0 x4 NVMe: Optimal performance
- PCIe 3.0 drives: Backward compatible (runs at 3.0 speeds)
- SATA M.2: Not supported (different key)
- DRAM cache: Essential for consistent performance
- Verified Compatible Models:
- Samsung 980 Pro/990 Pro
- WD Black SN850/SN850X
- Sabrent Rocket 4 Plus
- SK Hynix Platinum P41
- Crucial P5 Plus
🛠️ Pre-Installation Preparation
- Required Tools:
- Phillips #00 screwdriver for bottom cover
- ESD wrist strap for static protection
- Plastic spudger for delicate handling
- External USB-C enclosure for data migration
- Software Preparation:
- Create Lenovo Recovery Media
- Download Samsung Magician or manufacturer tools
- Use Macrium Reflect for cloning
- Backup critical project data before beginning
- Data Migration Strategy:
- Clean Install: Best performance, fresh start
- Disk Cloning: Preserves all settings and applications
- Selective Migration: Move only essential data
- Enterprise Backup: Use existing backup solutions
🔧 Step-by-Step PCIe 4.0 SSD Installation
- Access SSD Slots:
- Remove bottom cover (9 Phillips #00 screws)
- Locate both M.2 slots with copper heatsinks
- Identify existing SSD configuration
- Note screw and thermal pad positions
- Heatsink Removal:
- Remove 2 Phillips #00 screws from each heatsink
- Lift heatsink straight up to avoid damage
- Preserve thermal pads for reuse
- Clean old thermal material if necessary
- Existing Drive Removal:
- Remove single Phillips #00 mounting screw
- Gently lift SSD at 30-degree angle
- Pull straight out from M.2 slot
- Handle by edges only - avoid touching gold contacts
- New PCIe 4.0 SSD Installation:
- Align SSD notch with M.2 slot key
- Insert at 30-degree angle into slot
- Press down gently until SSD lies flat
- Secure with mounting screw (don't overtighten)
- Ensure SSD is parallel to motherboard
- Thermal Management:
- Apply included thermal pad if provided with SSD
- Reinstall copper heatsink with original screws
- Ensure proper contact between SSD and heatsink
- Verify clearance when reassembling
🚀 RAID 0 Performance Configuration
- RAID 0 Benefits for Professionals:
- Near-double read/write speeds (12,000+ MB/s)
- Combined storage capacity
- Faster project loading and file operations
- Improved application responsiveness
- RAID 0 Considerations:
- Increased risk of data loss (one drive fails, all data lost)
- Requires identical drive models and capacities
- Must be configured in BIOS before OS installation
- Regular backups are absolutely essential
- RAID Setup Process:
- Enter BIOS (Enter during boot)
- Navigate to Storage Configuration
- Select RAID mode (not AHCI)
- Create RAID 0 array with both drives
- Install Windows on RAID volume
📈 Storage Performance Comparison
| Storage Type | Read Speed | Write Speed | Project Load Time | Boot Time |
|---|---|---|---|---|
| SATA SSD | 550 MB/s | 500 MB/s | 15-30 seconds | 15-25 seconds |
| PCIe 3.0 NVMe | 3,500 MB/s | 3,000 MB/s | 8-15 seconds | 8-12 seconds |
| PCIe 4.0 NVMe | 7,000 MB/s | 5,000 MB/s | 3-8 seconds | 5-8 seconds |
| Dual PCIe 4.0 RAID 0 | 12,000+ MB/s | 9,000+ MB/s | 2-5 seconds | 3-6 seconds |
🔄 Professional Data Migration Strategies
- Clean Windows Installation (Recommended):
- Create Lenovo recovery media on USB drive
- Boot from USB and install fresh Windows 11 Pro
- Reinstall professional applications and restore data
- Benefits: Best performance, no legacy issues, clean start
- Enterprise Disk Cloning:
- Use external USB-C enclosure for new SSD
- Run cloning software (Macrium Reflect)
- Clone existing drive to new SSD
- Swap drives and verify boot
- Benefits: Preserves all settings, applications, and configurations
- Selective Data Migration:
- Fresh OS install on new SSD
- Selectively restore project files and documents
- Reinstall applications manually
- Benefits: Clean system with essential data only
🎯 Post-Installation Professional Optimization
- Windows Optimization:
- Enable TRIM support (automatic in Windows 11)
- Disable disk defragmentation for SSDs
- Adjust power settings for maximum performance
- Enable write caching in device manager
- SSD Firmware & Drivers:
- Update SSD firmware using manufacturer tools
- Install latest NVMe drivers from manufacturer
- Update Intel chipset drivers for optimal performance
- Check for BIOS updates supporting PCIe 4.0
- Professional Performance Testing:
- Run CrystalDiskMark for speed verification
- Use Samsung Magician for health monitoring
- Check temperatures during sustained workloads
- Verify both drives recognized in BIOS
🔍 Troubleshooting Common SSD Issues
| Issue | Symptoms | Immediate Solution | Advanced Resolution |
|---|---|---|---|
| Drive Not Detected | BIOS doesn't show new SSD | Reseat drive, check mounting, update BIOS | Test in external enclosure, check compatibility |
| Slow Performance | Speeds below PCIe 4.0 expectations | Update drivers, check thermal throttling | Verify PCIe 4.0 enabled in BIOS, check temperatures |
| Boot Failure | Windows won't boot from new drive | Check boot order, repair bootloader | Clean install, verify RAID configuration |
| Incompatibility | System doesn't recognize PCIe 4.0 drive | Update BIOS to latest version | Check M.2 key compatibility, test different drive |
🏆 Recommended PCIe 4.0 SSDs for ThinkPad P1 Gen 5
- Best Overall Performance:
- Samsung 990 Pro 2TB
- Exceptional PCIe 4.0 performance
- Excellent compatibility with ThinkPad workstations
- Proven reliability in professional environments
- Best Value Professional:
- WD Black SN850X 2TB
- Great performance-to-price ratio
- Excellent thermal characteristics
- Reliable for continuous professional use
- Enterprise Grade:
- SK Hynix Platinum P41 2TB
- Top-tier performance and efficiency
- Excellent for sustained professional workloads
- Proven reliability in demanding environments
💼 Real-World Professional Performance Impact
- Application Loading Times:
- SolidWorks Large Assembly: 45s → 12s (73% faster)
- Adobe Premiere Pro Project: 30s → 8s (73% faster)
- Visual Studio Solution: 25s → 6s (76% faster)
- AutoCAD Drawing: 20s → 5s (75% faster)
- Workflow Efficiency Improvements:
- Boot Time: 25s → 6s (76% faster)
- File Transfers: 5-8x faster large file handling
- Application Switching: Near-instant response
- Project Saving: 3-5x faster autosave operations
📊 Professional Storage Capacity Planning
| Professional Use Case | Recommended Capacity | Typical Storage Needs | Future Growth |
|---|---|---|---|
| General Business | 1TB | OS + Applications + Documents | 2-3 years |
| Engineering & CAD | 2-4TB | Large assemblies + simulation files | 3-4 years |
| Content Creation | 4-8TB | 4K/8K media + project files | 2-3 years |
| Virtualization & Development | 2-4TB | Multiple VMs + development environments | 3-4 years |
💰 SSD Upgrade Resale Value Impact
| Storage Configuration | Upgrade Cost | Value Added | ROI Percentage | Professional Appeal |
|---|---|---|---|---|
| 1TB PCIe 4.0 SSD | $80-120 | $100-160 | 110-140% | High |
| 2TB PCIe 4.0 SSD | $150-220 | $180-280 | 110-130% | Very High |
| Dual 2TB RAID 0 | $300-450 | $350-550 | 110-125% | Premium |
7. Wireless Card Installation & WiFi 6E Upgrade for ThinkPad P1 Gen 5
📡 Enterprise-Grade Wireless Performance
Upgrading to WiFi 6E provides professional-level wireless connectivity with faster speeds, lower latency, and access to the uncongested 6GHz band. This ensures reliable connectivity for video conferencing, large file transfers, and cloud-based professional applications.
📊 ThinkPad P1 Gen 5 Wireless Specifications
| Specification | Stock Configuration | WiFi 6E Upgrade | Professional Impact |
|---|---|---|---|
| WiFi Standard | WiFi 6 (AX201) | WiFi 6E (AX210/AX411) | Access to 6GHz band |
| Maximum Speed | 2.4 Gbps | 3.0 Gbps | 25% faster throughput |
| Frequency Bands | 2.4GHz, 5GHz | 2.4GHz, 5GHz, 6GHz | Reduced interference |
| Bluetooth Version | Bluetooth 5.1 | Bluetooth 5.3 | Better peripheral support |
| Interface | M.2 2230 (A+E Key) | M.2 2230 (A+E Key) | Direct replacement |
| Antenna Connectors | 2x IPEX4 | 2x IPEX4 | Standard compatibility |
🔍 WiFi 6E Card Compatibility
- Form Factor Requirements:
- M.2 2230: 22mm wide × 30mm long
- Key A+E: Specific notch configuration for WiFi cards
- CNVio2 Compatible: Required for Intel AX210/AX411
- IPEX4 Connectors: Standard antenna connections
- Verified Compatible Models:
- Intel Wi-Fi 6E AX210 (Recommended)
- Intel Wi-Fi 6E AX411 (Advanced)
- Killer Wi-Fi 6E AX1675 (Gaming/Performance)
- Avoid: Non-Intel cards may have driver issues
- Operating System Support:
- Windows 10 20H2 or later
- Windows 11 (Native support)
- Linux Kernel 5.10+
- Verify driver availability for your OS
🛠️ Pre-Installation Preparation
- Required Tools:
- Phillips #00 screwdriver
- ESD wrist strap
- Plastic spudger for antenna connectors
- Tweezers (plastic preferred)
- Software Preparation:
- Download Intel WiFi Drivers
- Download Intel Bluetooth Drivers
- Create system restore point
- Backup network settings if customized
- Antenna Handling Knowledge:
- IPEX4 connectors are extremely delicate
- Never pull antenna cables by the wires
- Note original antenna connections (Main/Aux)
- Have replacement antennas available just in case
🔧 Step-by-Step WiFi Card Replacement
- Access Wireless Card:
- Remove bottom cover (9 Phillips #00 screws)
- Locate M.2 wireless card near right edge
- Identify antenna cables (typically black and gray)
- Note screw and bracket configuration
- Antenna Cable Disconnection:
- Use plastic spudger to gently lift connector locks
- Pull straight up on connector housings
- NEVER pull on the thin antenna wires
- Note which cable was Main (1) and Aux (2)
- Existing Card Removal:
- Remove single Phillips #00 mounting screw
- Card will pop up at 30-degree angle
- Lift card straight out of M.2 slot
- Handle by edges to avoid static damage
- New WiFi 6E Card Installation:
- Align card notch with M.2 slot key
- Insert at 30-degree angle into slot
- Press down gently until card lies flat
- Secure with mounting screw
- Antenna Reconnection:
- Connect Main antenna to connector labeled "1" or "Main"
- Connect Aux antenna to connector labeled "2" or "Aux"
- Press connectors straight down until they click
- Verify secure connections without excessive force
⚡ WiFi 6E Professional Advantages
- 6GHz Band Benefits:
- Uncongested spectrum with no legacy device interference
- Seven 160MHz channels available
- Lower latency for real-time applications
- Better performance in dense environments
- Professional Workflow Improvements:
- Video Conferencing: Crystal-clear 4K video calls
- Cloud Applications: Faster SaaS response times
- File Transfers: Quicker uploads to cloud storage
- Virtual Meetings: Stable VR/AR collaboration
📈 Wireless Performance Comparison
| Scenario | WiFi 6 (AX201) | WiFi 6E (AX210) | Improvement |
|---|---|---|---|
| File Transfer (Large Files) | 120-150 MB/s | 180-220 MB/s | 50-65% faster |
| Video Conference Latency | 15-25ms | 8-15ms | 40-50% lower |
| Cloud App Response | 80-120ms | 50-80ms | 35-45% faster |
| Multiple Device Performance | Good | Excellent | Significantly better |
🔧 Professional Driver Installation
- Pre-Download Drivers:
- Download Intel PROSet/Wireless Software
- Get latest Bluetooth drivers
- Save to accessible location before disassembly
- Post-Installation Setup:
- Boot into Windows with Ethernet connected
- Install WiFi drivers before connecting wirelessly
- Install Bluetooth drivers for peripheral support
- Run Intel Driver & Support Assistant for updates
- Configuration Optimization:
- Set preferred band to 6GHz if available
- Configure Bluetooth coexistence settings
- Adjust transmit power for your environment
- Test with professional network tools
🔍 Troubleshooting Common Wireless Issues
| Issue | Symptoms | Immediate Solution | Advanced Resolution |
|---|---|---|---|
| Card Not Detected | Device Manager shows unknown device | Reseat card, check M.2 connection | Update BIOS, check CNVio2 compatibility |
| No WiFi Networks | Can't see any networks | Check antenna connections, reinstall drivers | Test with different antennas, check card seating |
| Poor Signal Strength | Weak connection, frequent drops | Verify antenna connections (Main/Aux correct) | Replace antennas, check router compatibility |
| Bluetooth Not Working | Can't pair devices | Reinstall Bluetooth drivers | Check device manager for conflicts |
🏆 Recommended WiFi 6E Cards
- Best Overall Professional:
- Intel Wi-Fi 6E AX210
- Excellent compatibility with ThinkPad systems
- Proven reliability in enterprise environments
- Comprehensive driver support
- Advanced Performance:
- Intel Wi-Fi 6E AX411
- Additional features for high-density environments
- Better performance with multiple devices
- Future-proof for upcoming technologies
- Low Latency Focused:
- Killer Wi-Fi 6E AX1675
- Optimized for real-time applications
- Intelligent traffic prioritization
- Great for video conferencing and VoIP
💼 Enterprise Deployment Considerations
- Driver Management:
- Test with your enterprise image before deployment
- Include drivers in deployment packages
- Verify compatibility with security software
- Document installation procedure for IT teams
- Security Features:
- WPA3 support for enhanced security
- 802.1X enterprise authentication compatibility
- Enhanced open network protection
- 256-bit encryption support
- Management Capabilities:
- Intel vPro support for remote management
- Compatibility with enterprise management tools
- Driver update integration with SCCM/Intune
- Group Policy configuration support
📊 Professional Performance Testing
- Speed Tests:
- Use Ookla Speedtest for internet performance
- Test local file transfers to NAS or other computers
- Measure latency with ping tests to multiple servers
- Test with iPerf3 for local network throughput
- Real-World Testing:
- Video conference call quality and stability
- Large file uploads to cloud services
- Multiple simultaneous connections
- Performance at different distances from router
💰 Wireless Upgrade Resale Value Impact
| Wireless Configuration | Upgrade Cost | Value Added | ROI Percentage | Buyer Appeal |
|---|---|---|---|---|
| WiFi 6 (Stock) | $0 | $0 | N/A | Standard |
| WiFi 6E Upgrade | $25-40 | $40-70 | 140-200% | High |
| Premium WiFi 6E | $40-60 | $60-100 | 130-180% | Very High |
8. LCD Screen Replacement & Display Options for ThinkPad P1 Gen 5
🖥️ Professional-Grade Visual Experience
The ThinkPad P1 Gen 5 offers multiple display options suitable for various professional workflows. Upgrading your display can significantly enhance color accuracy, resolution, and overall visual experience for design, engineering, and content creation work.
📊 ThinkPad P1 Gen 5 Display Specifications
| Specification | Base Options | Upgrade Options | Professional Impact |
|---|---|---|---|
| Screen Size | 16.0" | 16.0" | Standard workstation size |
| Resolutions Available | WUXGA (1920x1200) | WQUXGA (3840x2400) | 4x pixel density for detailed work |
| Panel Technology | IPS LCD | IPS, OLED Options | Better color and contrast |
| Color Gamut | 100% sRGB | 100% DCI-P3 | Professional color accuracy |
| Refresh Rate | 60Hz | 120Hz (Gaming models) | Smoother motion |
| Touch Options | Non-touch | 10-point Multi-touch | Interactive design work |
🔍 Display Compatibility Verification
- Physical Requirements:
- Size: 16.0" diagonal (354.1mm × 235.4mm)
- Bezel Compatibility: Must fit existing bezel cutout
- Thickness: Maximum 3.0mm panel thickness
- Mounting Holes: Standard VESA mounting pattern
- Electrical Compatibility:
- Interface: 40-pin eDP 1.4b
- Voltage: 3.3V logic, 15-20V backlight
- Backlight Type: LED edge-lit
- Connector Position: Bottom-center orientation
- Verified Compatible Panels:
- Innolux N160HCE-GN1 (WUXGA IPS)
- BOE NE160QDM-NY1 (WQUXGA IPS)
- Samsung ATNA60AF01-0 (WQUXGA OLED)
- LG LP160WQ1-SPB1 (WQXGA IPS)
🛠️ Pre-Installation Preparation
- Required Tools:
- Plastic spudger set (iFixit Opening Tools)
- Suction cups for screen handling
- Phillips #00 screwdriver
- Double-sided adhesive tape
- Isopropyl alcohol (99%)
- Safety Equipment:
- ESD wrist strap
- Clean, soft work surface
- Anti-static bags for components
- Protective gloves for glass handling
- Testing Preparation:
- Test new panel before installation
- Prepare external monitor for backup
- Download display drivers if needed
- Have color calibration tools ready
🔧 Step-by-Step LCD Replacement
- Bezel Removal:
- Start from bottom edge near hinge area
- Insert plastic spudger at 45-degree angle
- Work around entire perimeter slowly
- Listen for soft clicks as clips release
- Be extremely careful near webcam and sensors
- Screen Adhesive Release:
- Apply gentle heat with hairdryer (30-40°C, 30 seconds)
- Use suction cups to gently lift screen
- Apply even pressure - do not twist or bend
- If resistance, apply more heat and try again
- Work slowly around all four sides
- Display Cable Disconnection:
- Identify eDP display cable connector
- Gently lift locking mechanism using spudger
- Slide cable straight out - never pull at angle
- Disconnect webcam and microphone cables if present
- New Panel Installation:
- Clean frame with isopropyl alcohol
- Apply new double-sided adhesive tape
- Connect display cable to new panel
- Align panel with mounting points
- Press firmly into adhesive
- Bezel Reinstallation:
- Start from top edge and work downward
- Press clips into place with even pressure
- Verify all clips are fully engaged
- Check for gaps or misalignment
🌈 Display Technology Comparison
- IPS LCD Advantages:
- Excellent color accuracy and consistency
- Wide viewing angles (178°/178°)
- Good brightness (400-600 nits)
- No risk of burn-in
- Lower cost for professional grade
- OLED Advantages:
- Perfect black levels (infinite contrast)
- Faster response times (1ms)
- Wider color gamut coverage
- Thinner and lighter construction
- HDR support with better performance
- OLED Considerations:
- Potential for burn-in with static content
- Higher power consumption for bright content
- More expensive replacement cost
- PWM dimming may cause eye strain for some
🎯 Professional Use Case Recommendations
| Professional Field | Recommended Display | Key Features Needed | Justification |
|---|---|---|---|
| Graphic Design | WQUXGA IPS | Color accuracy, high resolution | Precise color work, detailed assets |
| Video Editing | WQUXGA OLED | HDR, contrast ratio, color gamut | True black levels, HDR grading |
| CAD/Engineering | WQXGA IPS | Resolution, viewing angles | Detailed models, multiple viewports |
| Programming | WUXGA IPS | Text clarity, eye comfort | Code readability, long sessions |
| Business/Office | WUXGA IPS | Brightness, reliability | Document work, presentations |
📈 Display Performance Comparison
| Metric | WUXGA IPS | WQXGA IPS | WQUXGA IPS | WQUXGA OLED |
|---|---|---|---|---|
| Pixel Density | 142 PPI | 189 PPI | 283 PPI | 283 PPI |
| Color Gamut | 100% sRGB | 100% DCI-P3 | 100% DCI-P3 | 100% DCI-P3 |
| Brightness | 400 nits | 500 nits | 600 nits | 400 nits |
| Contrast Ratio | 1200:1 | 1500:1 | 1600:1 | 1,000,000:1 |
| Power Consumption | 4-6W | 5-7W | 6-9W | 3-12W |
🎨 Professional Color Calibration
- Calibration Tools:
- Datacolor SpyderX Pro
- X-Rite i1Display Pro
- Windows built-in color calibration
- Intel Graphics Command Center
- Calibration Process:
- Warm up display for 30 minutes before calibration
- Set native resolution and refresh rate
- Calibrate for your specific lighting environment
- Save multiple profiles for different use cases
- Verify calibration with test images
- Target Settings:
- Gamma: 2.2 (standard)
- White Point: 6500K (D65)
- Luminance: 120 cd/m² (office) or 160 cd/m² (bright)
- Color Space: sRGB for web, Adobe RGB for print
🔍 Troubleshooting Common Display Issues
| Issue | Symptoms | Immediate Solution | Advanced Resolution |
|---|---|---|---|
| No Display | Black screen, backlight works | Reseat eDP cable, check connections | Test with external monitor, check GPU |
| Flickering | Screen flickers or flashes | Check cable seating, update drivers | Replace eDP cable, check inverter |
| Color Issues | Wrong colors or banding | Update graphics drivers, check cable | Replace panel, check color profile |
| Backlight Bleed | Light leakage at edges | Reposition panel, check adhesive | Replace with higher quality panel |
🏆 Recommended Display Panels
- Best Overall Professional:
- >BOE NE160QDM-NY1
- 3840x2400 resolution, 100% DCI-P3
- 600 nits brightness, Dolby Vision
- Excellent for creative professional work
- Budget Professional:
- Innolux N160HCE-GN1
- 1920x1200 resolution, 100% sRGB
- 400 nits brightness, good color accuracy
- Great for general business use
- Premium OLED:
- Samsung ATNA60AF01-0
- 3840x2400 OLED, 100% DCI-P3
- True black, HDR support
- Ideal for color grading and HDR work
💰 Display Upgrade Resale Value Impact
| Display Configuration | Upgrade Cost | Value Added | ROI Percentage | Professional Appeal |
|---|---|---|---|---|
| WUXGA IPS (Base) | $0 | $0 | N/A | Standard |
| WQXGA IPS Upgrade | $150-220 | $200-300 | 120-150% | High |
| WQUXGA IPS Upgrade | $250-350 | $350-500 | 130-160% | Very High |
| WQUXGA OLED Upgrade | $400-600 | $500-800 | 110-150% | Premium |
9. Professional Reassembly & System Testing for ThinkPad P1 Gen 5
🔧 Precision Reassembly for Professional Results
Proper reassembly is critical to maintaining your ThinkPad P1 Gen 5's structural integrity, thermal performance, and professional appearance. Following systematic procedures ensures your upgraded workstation performs reliably under demanding professional workloads.
✅ Pre-Reassembly Component Verification
| Component | Verification Steps | Critical Checks | Risk Level |
|---|---|---|---|
| All Internal Cables | Visual inspection, connector seating | Display cable, battery connector, antenna wires | High |
| RAM Modules | Fully seated, clips engaged | Dual-channel configuration, no debris in slots | Medium |
| SSD Installation | Heatsink contact, screw tightness | Thermal pads intact, no over-tightening | Medium |
| Wireless Card | Antenna connections, screw secure | Main/Aux antenna correct, cables routed properly | High |
🔋 Battery Reconnection Protocol
- Final Internal Inspection:
- Verify no tools or screws left inside chassis
- Check all cables are properly routed and secured
- Ensure no cables are pinched or under tension
- Confirm components are not touching metal surfaces
- Battery Connection:
- Align battery connector with motherboard socket
- Press firmly until locking mechanism engages
- Listen for audible click indicating secure connection
- Verify connector is flush with motherboard
- Initial Power Test:
- Connect 170W power adapter before installing bottom cover
- Press power button to verify basic functionality
- Check for power indicator lights and fan operation
- Listen for any unusual sounds or beep codes
📦 Bottom Cover Installation Procedure
- Alignment Preparation:
- Clean cover and chassis mating surfaces
- Align cover at 45-degree angle to chassis
- Start from front edge near touchpad
- Ensure all internal cables clear the cover
- Clip Engagement:
- Press gently along perimeter to engage clips
- Work in sequence: front → sides → rear
- Listen for soft clicks as clips engage
- Verify even gap around entire perimeter
- Screw Installation Sequence:
- Install two longer screws near front edge first
- Install remaining seven 4mm screws in star pattern
- Torque to 3-4 inch-pounds (finger tight plus quarter turn)
- Avoid over-tightening to prevent thread damage
🚀 Initial Boot Testing Sequence
| Test Phase | Expected Results | Failure Indicators | Immediate Actions |
|---|---|---|---|
| Power On | Power LED illuminates, fans spin up briefly | No power, unusual noises, burning smell | Immediately disconnect power, inspect internals |
| POST Sequence | Lenovo splash screen, no error messages | Black screen, beep codes, error messages | Check RAM seating, display cable, component connections |
| BIOS Access | BIOS screen displays, all hardware recognized | Missing components, wrong capacities | Verify component installation, update BIOS if needed |
| Windows Boot | Normal boot sequence, login screen | BSOD, boot loops, driver errors | Boot to safe mode, check drivers, verify SSD installation |
🔍 Comprehensive Component Verification
- Memory Verification:
- Enter BIOS → Memory Information
- Verify total capacity matches installed RAM
- Check speed and timing settings
- Confirm dual-channel operation
- Storage Verification:
- Check all M.2 slots recognize installed SSDs
- Verify capacities and interface speeds (PCIe 4.0)
- Test boot from correct drive if multiple installed
- Run quick SMART status check
- Wireless Verification:
- Check Device Manager for WiFi 6E adapter
- Verify Bluetooth device recognition
- Test both 2.4GHz and 5GHz band connectivity
- Check for 6GHz network availability if supported
- Display Verification:
- Confirm native resolution detection
- Check refresh rate settings
- Verify color depth and HDR capability if applicable
- Test brightness controls and color accuracy
🌡️ Thermal Performance Validation
- Idle Temperature Baseline:
- Use HWiNFO64 for sensor monitoring
- Record CPU, GPU, and SSD temperatures at idle
- Verify all fans are operational and quiet
- Check for unusual temperature variations
- Load Temperature Testing:
- Run FurMark for GPU stress test
- Use Prime95 for CPU load testing
- Monitor temperature progression over 15 minutes
- Verify thermal throttling doesn't occur prematurely
- Cooling System Verification:
- Listen for abnormal fan noises or vibrations
- Check air flow from ventilation grilles
- Verify both CPU and GPU fans are operational
- Monitor heat dissipation during cooldown
📊 Professional Performance Benchmarking
| Component | Benchmark Tool | Expected Results | Performance Targets |
|---|---|---|---|
| RAM Performance | AIDA64 Memory Benchmark | DDR5-4800: 60-70GB/s read | Dual-channel operation, low latency |
| SSD Performance | CrystalDiskMark | PCIe 4.0: 6000+ MB/s read | Sustained writes, low queue depths |
| WiFi Performance | iPerf3, Speedtest | WiFi 6E: 1.5-2.0 Gbps local | Low latency, stable connection |
| Display Quality | Lagom LCD tests | No dead pixels, uniform backlight | Color accuracy, viewing angles |
🛡️ System Stability & Stress Testing
- Memory Stability:
- Run MemTest86 for 4+ passes
- Use Windows Memory Diagnostic tool
- Test with heavy memory workloads
- Monitor for crashes or application errors
- Storage Reliability:
- Run extended CrystalDiskMark tests
- Check SSD temperatures under sustained writes
- Verify TRIM functionality and garbage collection
- Test file transfer consistency
- Thermal Stability:
- Run combined CPU+GPU stress tests
- Monitor for thermal throttling
- Check fan curve responsiveness
- Verify stable temperatures under sustained load
🔧 Driver Installation & Optimization
- Essential Driver Installation:
- Install latest Lenovo System Update
- Update Intel chipset and management engine drivers
- Install latest NVIDIA Studio drivers for workstation GPU
- Update Intel WiFi and Bluetooth drivers
- Performance Optimization:
- Configure power settings for maximum performance
- Set up Lenovo Vantage performance profiles
- Optimize NVIDIA Control Panel settings for professional apps
- Configure Windows for best performance
- Professional Application Testing:
- Test with your primary professional applications
- Verify hardware acceleration functionality
- Check rendering and computation performance
- Validate multi-monitor setup if used
✅ Final Quality Assurance Checklist
- Physical Inspection:
- All screws properly installed and tight
- No gaps or misalignment in case panels
- All ports and connectors functional
- No unusual noises from fans or components
- Functional Testing:
- Keyboard and touchpad fully operational
- All USB and Thunderbolt ports working
- Webcam, microphone, and speakers functional
- Biometric sensors (fingerprint/IR camera) working
- Performance Validation:
- All upgraded components recognized and performing
- Thermal performance within specifications
- Battery life consistent with expectations
- Professional applications running optimally
🔍 Reassembly Troubleshooting Guide
| Issue | Possible Causes | Diagnosis Steps | Resolution |
|---|---|---|---|
| No Power | Battery not connected, loose power adapter | Check battery connector, try different power adapter | Reseat battery, verify power adapter functionality |
| No Display | Display cable loose, incompatible panel | Test with external monitor, check BIOS display settings | Reseat display cable, verify panel compatibility |
| Component Not Recognized | Improper seating, BIOS settings, compatibility | Check Device Manager, BIOS recognition | Reseat component, update BIOS, check compatibility |
| Overheating | Poor thermal contact, blocked vents, fan issues | Monitor temperatures, check fan operation | Reapply thermal paste, verify heatsink contact |
📋 Professional Upgrade Documentation
- Upgrade Records:
- Document all component models and specifications
- Record installation dates and warranty information
- Save before/after performance benchmarks
- Document any issues encountered and resolutions
- Resale Documentation:
- Take high-quality photos of upgraded system
- Document performance improvements
- Prepare list of upgraded components with costs
- Create system specification sheet for potential buyers
🎯 Upgrade Success Metrics
| Metric | Before Upgrade | After Upgrade | Improvement |
|---|---|---|---|
| System Boot Time | 25-35 seconds | 6-10 seconds | 70-80% faster |
| Application Load Time | 15-30 seconds | 3-8 seconds | 75-85% faster |
| File Transfer Speed | 500 MB/s (SATA SSD) | 6000+ MB/s (PCIe 4.0) | 12x faster |
| Multitasking Capacity | Limited by 16GB RAM | 64GB RAM headroom | 4x capacity |
10. Where to Sell Your Upgraded ThinkPad P1 Gen 5
💰 Maximize Your Return on Investment
After completing professional upgrades to your ThinkPad P1 Gen 5, you can significantly increase its resale value. Choosing the right selling platform and properly marketing your upgraded workstation ensures maximum return on your upgrade investment.
🔧 Pre-Sale Preparation Checklist
- System Optimization:
- Perform fresh Windows 11 Pro installation
- Update all drivers and firmware to latest versions
- Install essential professional applications for demonstration
- Create system restore point and backup
- Documentation & Verification:
- Take high-quality photos of all upgraded components
- Document original purchase date and remaining warranty
- Run benchmark tests to demonstrate performance improvements
- Gather all original packaging, accessories, and documentation
- Professional Presentation:
- Clean and sanitize the entire system
- Take photos in good lighting showing all angles
- Create specification sheet highlighting upgrades
- Prepare demonstration of key features for potential buyers
🏆 Specialized Laptop Buyback Platforms
| Platform | Best For | Commission Fees | Payment Speed | Professional Appeal |
|---|---|---|---|---|
| SellLaptopBack | Quick, hassle-free sales | 0% (built into offer) | 24-48 hours | High - specializes in business-grade equipment |
| SellLaptopBack | Maximum value for upgraded systems | 0% (direct buyout) | 2-3 business days | Very High - understands upgrade value |
| Gazelle | Convenient trade-in options | 0% (quoted price) | 1-2 weeks | Medium - broader consumer focus |
| ItsWorthMore | Premium device valuation | 0% (direct purchase) | 3-5 business days | High - good with professional equipment |
🏛️ Government & Educational Selling Resources
- Government Surplus Platforms:
- GovSales.gov - Official government surplus sales
- GSA Auctions - General Services Administration
- DoD Surplus - Department of Defense
- Best for: Bulk sales, enterprise buyers, government contractors
- Educational Institutions:
- Department of Education Surplus
- University surplus property offices (check local .edu domains)
- School district technology refresh programs
- Best for: Educational institutions, students, faculty
- Research & Non-Profit:
- TechSoup - Technology donations and sales
- University research department direct sales
- Non-profit organization technology programs
- Best for: Tax benefits, supporting education/research
🛒 Consumer Marketplace Options
| Platform | Audience Reach | Fee Structure | Risk Level | Upgraded System Appeal |
|---|---|---|---|---|
| eBay | Global audience | 12.9% + $0.30 | Medium | High - tech-savvy buyers appreciate upgrades |
| Facebook Marketplace | Local buyers | 0% (for local sales) | Medium-High | Medium - better for local professionals |
| Swappa | Tech-focused buyers | 3% (paid by buyer) | Low | Very High - understands component value |
| Craigslist | Local market | 0% | High | Low-Medium - better for basic systems |
💵 Professional Pricing Strategy
- Base Value Calculation:
- Research current market prices for similar P1 Gen 5 configurations
- Consider original purchase price and depreciation
- Factor in remaining warranty and condition
- Check completed listings on eBay for realistic pricing
- Upgrade Value Addition:
- RAM Upgrade: Add 70-90% of component cost
- SSD Upgrade: Add 80-110% of component cost
- Display Upgrade: Add 90-130% of component cost
- Wireless Upgrade: Add 100-150% of component cost
- Professional installation labor: $50-100 value
- Market Positioning:
- Price 10-15% above target to allow for negotiation
- Consider seasonal demand (higher during back-to-school, holidays)
- Monitor competitor listings and adjust accordingly
- Be prepared to justify premium pricing with documentation
🎯 Targeting the Right Buyers
| Buyer Type | Key Selling Points | Preferred Platforms | Pricing Sensitivity |
|---|---|---|---|
| Creative Professionals | Color-accurate display, fast storage, ample RAM | Swappa, specialized forums | Low - value performance |
| Engineering/Architecture | Workstation certification, CAD performance, reliability | eBay, professional networks | Medium - value certification |
| Students (Graduate/PhD) | Research capabilities, portability, value proposition | Facebook Marketplace, university boards | High - budget conscious |
| Small Business Owners | Professional appearance, reliability, total cost of ownership | Local classifieds, business networks | Medium - value durability |
📈 Professional Listing Optimization
- Title Optimization:
- Include key specifications: "Lenovo ThinkPad P1 Gen 5 Workstation"
- Highlight upgrades: "64GB RAM, 4TB SSD, 4K Display Upgraded"
- Mention professional use: "CAD Ready, Video Editing, Development"
- Use relevant keywords: "Mobile Workstation, NVIDIA, Intel i7/i9"
- Description Best Practices:
- Start with a compelling professional summary
- Create detailed specifications table
- Document all upgrades with component models and benefits
- Include benchmark results and performance improvements
- Mention professional application compatibility
- Visual Presentation:
- Include high-quality photos from multiple angles
- Show display quality with color test images
- Photograph upgrade components and installation
- Include screenshots of system information and benchmarks
- Show professional accessories and original packaging
💻 Specialized Tech Communities
- ThinkPad-Specific Platforms:
- ThinkPad Forum Marketplace
- Reddit: r/thinkpad
- Notebook Review Forums
- Advantage: Buyers understand ThinkPad value and upgrades
- Professional User Groups:
- CAD/CAM and engineering forums
- Video editing and content creation communities
- Software development and programming groups
- Academic and research institution boards
- Advantage: Targeted audience understands specific use cases
🛡️ Safety & Security Best Practices
- Data Security:
- Perform secure data wipe using DBAN or similar tools
- Remove all personal accounts and licenses
- Reset BIOS to factory defaults
- Provide clean Windows installation with necessary drivers
- Transaction Safety:
- Use platform escrow services when available
- Meet in safe, public locations for local sales
- Verify payment before shipping
- Use tracked and insured shipping methods
- Document the condition before transfer
- Legal Considerations:
- Provide clear written description of condition
- Specify warranty status and return policy
- Comply with platform terms of service
- Understand tax implications of the sale
📊 Typical ROI Calculation Examples
| Upgrade Scenario | Upgrade Cost | Value Added | Net Profit | ROI Percentage |
|---|---|---|---|---|
| Base Model (16GB/512GB) | $0 | $0 | $0 | N/A |
| RAM + SSD Upgrade | $350 | $550 | $200 | 157% |
| Full Upgrade (All Components) | $800 | $1,200 | $400 | 150% |
| Premium Build (OLED + Max Specs) | $1,200 | $1,800 | $600 | 150% |
🏆 Recommended Platform Summary
- For Maximum Value & Speed:
- SellLaptopBack - Best for quick professional sales
- SellLaptopBack - Top choice for upgraded systems
- Ideal for: Professionals seeking fast, reliable sales
- For Premium Pricing:
- Swappa - Tech-savvy buyers appreciate upgrades
- ThinkPad-specific forums - Enthusiast market pays premiums
- Ideal for: Maximum return with patient selling
- For Institutional Sales:
- GovSales.gov - Government surplus channels
- Educational institution surplus programs
- Ideal for: Bulk sales or specialized markets
🎯 Making Your Final Decision
Consider your priorities: SellLaptopBack and SellLaptopBack offer speed and convenience, while specialized platforms and government/educational channels may yield higher returns for premium upgraded systems. Evaluate your timeline, risk tolerance, and desired profit margin to choose the optimal selling strategy for your professionally upgraded ThinkPad P1 Gen 5 workstation.
Need to Sell Your Lenovo Laptop? Get Instant Cash!
If your ThinkPad P1 Gen 5 (or other ThinkPad workstation) has performance issues or you're upgrading to a newer mobile workstation, we offer premium cash payouts for your device. We buy broken, used, and refurbished ThinkPad workstations—including all P1 Gen 5 configurations—with free insured shipping and hassle-free evaluations.
Sell Popular Lenovo Models Now: