Sep 10, 2025
On this page
- 1. Dell Vostro 5620 Pre-Disassembly: Laptop Assessment & Valuation Guide
- ⚙️ Performance Benchmarking
- 💰 2024 Market Valuation Factors
- 📋 Pre-Repair Documentation
- 🔧 Repair Cost-Benefit Analysis
- ⚠️ Safety Preparation
- 💾 Data Backup Procedure
- 2. Essential Tools for Dell Vostro 5620 Repair & Upgrade
- 🔧 Basic Repair Toolkit
- ⚙️ Specialized Equipment
- 🔩 Dell Vostro Specific Tools
- 🛠️ Household Alternatives
- 🧴 Consumables & Supplies
- ⚠️ Tool Safety & Best Practices
- 🏆 Recommended Tool Kits
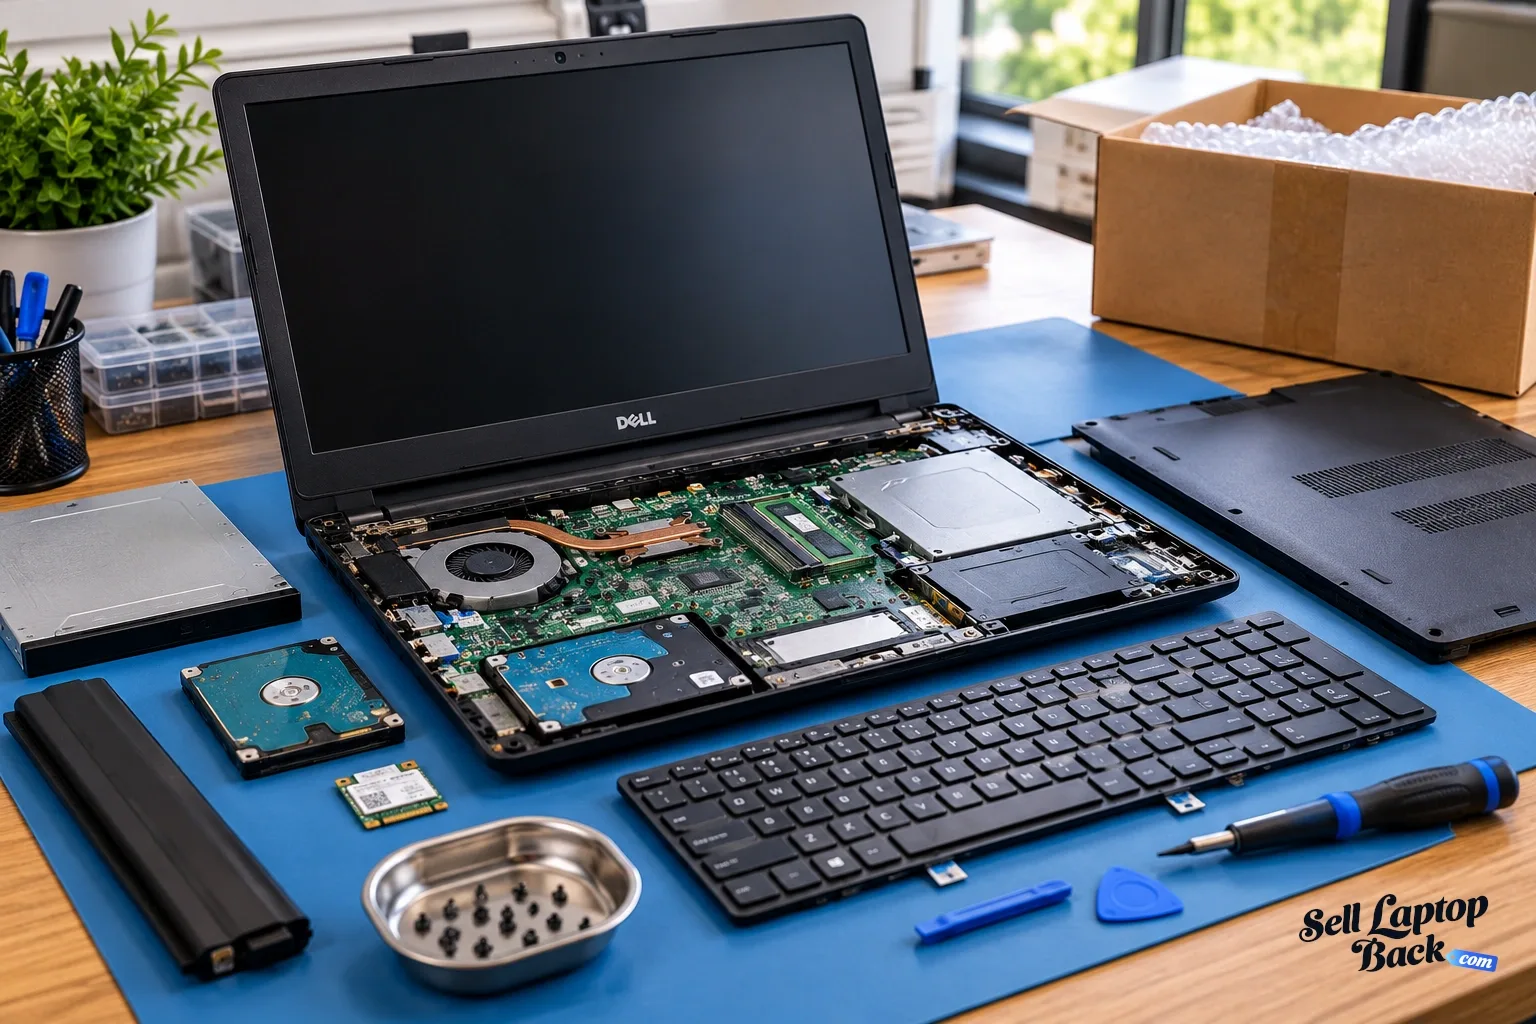
- 3. Dell Vostro 5620 Bottom Panel Removal: Safe Access Guide
- ⚠️ Pre-Removal Safety Checklist
- 🔩 Screw Identification & Mapping
- 🔧 Step-by-Step Removal Process
- 🚧 Common Challenges & Solutions
- 🔍 Internal Component Access
- 🛡️ Damage Prevention Tips
- 🔁 Reassembly Preparation
- 4. Dell Vostro 5620 Battery Replacement: Safe Installation Guide
- 🔋 Battery Specifications & Compatibility
- ⚠️ Critical Safety Precautions
- 🔧 Step-by-Step Removal Process
- 🔄 New Battery Installation
- 📊 Battery Health Management
- ⚙️ New Battery Calibration
- 🛒 Battery Purchasing Guide
- ♻️ Proper Old Battery Disposal
- 💰 Resale Value Impact
- 5. Dell Vostro 5620 RAM Installation & Upgrade Options
- 📊 RAM Specifications & Compatibility
- ⚡ Performance Comparison
- 🔧 Step-by-Step Installation Process
- 🏆 Recommended RAM Kits
- ⚙️ BIOS Configuration
- ✅ Verification & Testing
- 🎯 Real-World Performance Impact
- 💰 Resale Value Impact
- 🔍 Troubleshooting Common Issues
- 6. Dell Vostro 5620 Motherboard Removal & Replacement Guide
- 📊 Motherboard Specifications & Variants
- 🔍 Compatibility Verification
- 🛠️ Pre-Removal Preparation
- 🔧 Step-by-Step Removal Process
- 🔄 Replacement Motherboard Installation
- 🛒 Motherboard Sourcing Options
- ✅ Post-Installation Testing
- 🔍 Common Issues & Solutions
- 💰 Resale Value Considerations
- 7. Dell Vostro 5620 Proper Reassembly Techniques: Professional Results
- 📋 Pre-Reassembly Checklist
- 🔧 Step-by-Step Reassembly Sequence
- 🔩 Proper Screw Management
- 📞 Cable Management Best Practices
- ✅ Quality Control Checks
- 🚫 Common Reassembly Mistakes to Avoid
- 🔍 Final Testing Procedures
- ✨ Professional Finishing Touches
- 8. Dell Vostro 5620 Post-Repair Testing & Diagnostics: Professional Validation
- 🎯 Testing Philosophy & Objectives
- 🔧 Hardware Component Testing
- 💻 Software & Performance Testing
- ⚡ Comprehensive Stress Testing
- 🎮 Real-World Usage Testing
- 🌡️ Thermal Performance Validation
- 🔋 Battery Health & Performance
- 📊 Results Documentation Protocol
- 💰 Resale Preparation Testing
- 9. Maximizing Dell Vostro 5620 Resale Value After Repair: Expert Strategies
- 📈 Current Market Analysis
- 💰 Competitive Pricing Strategy
- ✨ Value Enhancement Techniques
- 🌐 Optimal Sales Platforms
- 📝 Listing Optimization Strategies
- 📊 Professional Documentation Package
- 🛡️ Value-Added Warranty Options
- 🎯 Specific Buyer Targeting
- ⭐ Transaction Excellence
- Need to Sell Your Dell Laptop? Get Instant Cash!
1. Dell Vostro 5620 Pre-Disassembly: Laptop Assessment & Valuation Guide
⚙️ Performance Benchmarking
- System Diagnostics:
- Run Dell SupportAssist diagnostics
- Test CPU with CPU-Z benchmark
- Check storage health with CrystalDiskInfo
- Monitor temperatures with HWiNFO
- Display Quality Check:
- Test for dead pixels with UFO Test
- Check backlight uniformity
- Verify touchpad and keyboard functionality
💰 2024 Market Valuation Factors
| Condition | Specification Impact | Value Range |
|---|---|---|
| Excellent (Like New) | i7, 16GB RAM, 512GB SSD | $450-$550 |
| Good (Minor Wear) | i5, 8GB RAM, 256GB SSD | $300-$400 |
| Fair (Needs Repair) | i3, 4GB RAM, HDD | $150-$250 |
| For Parts/Not Working | Any configuration | $50-$150 |
📋 Pre-Repair Documentation
- Visual Documentation:
- Photograph all sides of the laptop
- Close-ups of any damage or wear
- Screen functionality videos
- Keyboard and touchpad operation
- Performance Records:
- Benchmark scores and results
- Battery health report
- Temperature readings under load
- Current specification listing
🔧 Repair Cost-Benefit Analysis
- High-Value Repairs:
- RAM upgrades (8GB → 16GB: +$75 value)
- HDD to SSD conversion (+$100 value)
- Battery replacement (+$50 value)
- Screen replacement (+$80-120 value)
- Lower-Value Repairs:
- Keyboard replacement (minimal value add)
- Cosmetic repairs (case, bezel)
- Minor port repairs
⚠️ Safety Preparation
- Power down completely and disconnect AC adapter
- Discharge static electricity by touching grounded metal
- Use anti-static mat if available
- Remove all peripherals and cables
- Work in a clean, well-lit area
💾 Data Backup Procedure
- Cloud Backup:
- Use Google Drive or Dropbox
- Backup important documents and files
- External Backup:
- Use external hard drive or USB
- Create system image with Macrium Reflect
- Export browser bookmarks and passwords
2. Essential Tools for Dell Vostro 5620 Repair & Upgrade
🔧 Basic Repair Toolkit
- Screwdrivers:
- #00 Phillips screwdriver (primary chassis screws)
- #0 Phillips screwdriver (larger components)
- Torx T5 screwdriver (display hinges and internal components)
- Magnetic tip recommended for easier handling
- Prying Tools:
- Plastic spudger set (prevents case damage)
- Guitar picks or credit cards for clip release
- Nylon opening tools for delicate components
⚙️ Specialized Equipment
| Tool | Purpose | Budget Option | Professional Option |
|---|---|---|---|
| Anti-static Wrist Strap | ESD protection | $5-10 basic model | $20-30 with mat included |
| Precision Tweezers | Small connector handling | $8-12 basic set | $25-40 anti-magnetic set |
| Spudger & Pry Tool Set | Case opening | $10-15 basic kit | $30-50 comprehensive kit |
| Magnetic Project Mat | Screw organization | $12-18 basic mat | $35-60 with compartments |
🔩 Dell Vostro Specific Tools
- Vostro 5620 Requirements:
- Torx T5 for hinge screws and motherboard mounts
- #00 Phillips for 95% of case screws
- Plastic card for bottom case clips
- Spudger for ribbon cable connectors
- Where to Buy:
- iFixit Tool Kits (comprehensive options)
- Amazon Basic Electronics Tools
- Local hardware stores (emergency purchases)
🛠️ Household Alternatives
- In a Pinch Solutions:
- Butter knife for prying (wrap edge with tape)
- Small flathead screwdriver for Phillips heads
- Business cards for screw organization
- Plastic container for parts organization
- Safety Notes:
- Avoid metal tools on circuitry
- Use minimal force with improvised tools
- When in doubt, wait for proper tools
🧴 Consumables & Supplies
- Thermal Materials:
- Thermal paste (Arctic MX-4 or similar)
- Isopropyl alcohol 90%+ for cleaning
- Lint-free cloths or coffee filters
- Adhesives & Tapes:
- Double-sided tape for reassembly
- Kapton tape for insulation
- Rubber cement for minor repairs
⚠️ Tool Safety & Best Practices
- Always disconnect power before beginning work
- Use anti-static protection for electronic components
- Keep magnets away from storage devices
- Organize screws systematically to avoid confusion
- Use appropriate force - Dell plastics can be brittle
🏆 Recommended Tool Kits
- Beginner Kit ($25-40):
- iFixit Essential Electronics Toolkit
- Covers 95% of Vostro repair needs
- Lifetime warranty on tools
- Professional Kit ($60-100):
- iFixit Pro Tech Toolkit
- Includes specialized tools for all repairs
- Magnetic mat and extended driver bits
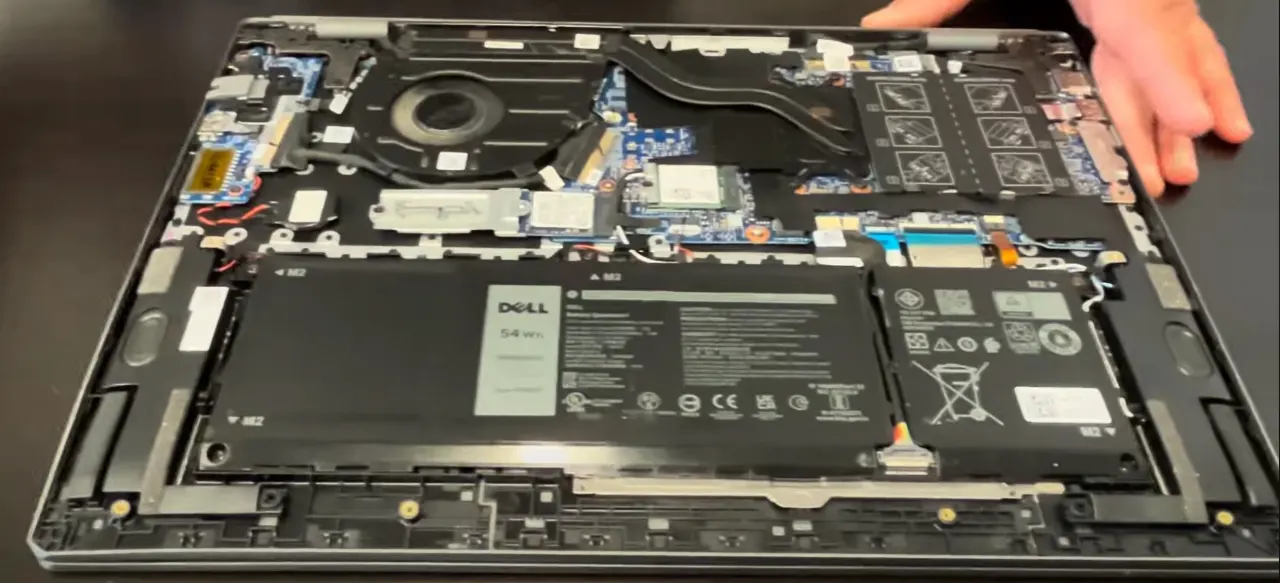
0:18 Bottom Case 1:40 Battery 2:24 RAM Memory 2:38 WiFi Card 3:00 SSD Storage 3:33 Speakers 4:45 Cooling Fan 5:18 Heatsink 5:54 IO USB Board 7:24 Motherboard 9:38 DC Power Jack 9:55 Touchpad 10:37 Palmrest Assembly 10:42 Keyboard 10:55 Display Assembly 11:03 Front Bezel 12:31 Hinges 13:09 Pullout Adhesive Strips 14:18 Video Cable 15:00 LCD Screen 15:11 Lid Back Cover 15:20 Web Camera
3. Dell Vostro 5620 Bottom Panel Removal: Safe Access Guide
⚠️ Pre-Removal Safety Checklist
- Power Down Completely:
- Shut down through Windows menu
- Disconnect AC adapter and all peripherals
- Hold power button for 10 seconds to discharge
- Workspace Setup:
- Use clean, well-lit, static-free surface
- Have containers ready for screw organization
- Use anti-static mat if available
🔩 Screw Identification & Mapping
| Screw Location | Type | Quantity | Length | Notes |
|---|---|---|---|---|
| Corner screws | Phillips #00 | 4 | 4mm | Standard length |
| Center screws | Phillips #00 | 5 | 5mm | Slightly longer |
| Near vents | Phillips #00 | 2 | 4mm | Same as corners |
| Warranty sticker | N/A | 1 | N/A | May void warranty if broken |
🔧 Step-by-Step Removal Process
- Screw Removal:
- Place laptop upside down on soft surface
- Remove all 11 Phillips #00 screws
- Use magnetic screwdriver to prevent dropping screws
- Organize screws by location using magnetic mat or egg carton
- Clip Release:
- Start at front-right corner near status lights
- Insert plastic pry tool at 45-degree angle
- Gently twist to release first clip
- Work around perimeter, releasing clips every 2 inches
- Panel Lifting:
- Lift from front edge first
- Angle upward at 30 degrees to clear rear ports
- Check for any missed clips or connections
- Set panel aside on clean surface
🚧 Common Challenges & Solutions
- Stubborn Clips:
- Use guitar pick for better leverage
- Apply slight upward pressure while prying
- Never force - reposition tool instead
- Stripped Screws:
- Use rubber band between screw and driver
- Try slightly larger Phillips head
- As last resort, use small extraction kit
- Warranty Sticker:
- Check Dell's warranty policy for your region
- Consider heating slightly with hairdryer to preserve sticker
- Document original condition with photos
🔍 Internal Component Access
- Immediately Visible:
- RAM slots (2x SODIMM)
- M.2 SSD slot (2280 size)
- Wi-Fi card (Intel AX201 typically)
- Battery connector
- Requires Further Disassembly:
- Battery replacement
- Motherboard access
- Cooling system
- Display components
🛡️ Damage Prevention Tips
- Clip Preservation:
- Work slowly around perimeter
- Listen for audible "click" when releasing
- If resistance increases, reposition tool
- Component Protection:
- Avoid touching circuitry with tools
- Keep screws away from internal components
- Don't force connectors or cables
- Surface Protection:
- Use microfiber cloth under laptop
- Avoid sliding panel across surfaces
- Keep work area free of debris
🔁 Reassembly Preparation
- Clean panel edges with isopropyl alcohol
- Inspect clips for damage before reassembly
- Test fit panel before installing screws
- Install screws in reverse removal order
- Ensure all clips engage properly before tightening screws
4. Dell Vostro 5620 Battery Replacement: Safe Installation Guide
🔋 Battery Specifications & Compatibility
- Original Specifications:
- 4-cell 54Wh Lithium-Ion battery
- Part number: 8GDRK (Dell 8GDRK)
- Voltage: 11.4V
- Capacity: 4740mAh
- Compatible Replacements:
- Genuine Dell 8GDRK battery
- OEM-compatible replacements
- Higher capacity 6-cell options (if physically fits)
- Check Dell's compatibility guide before purchase
⚠️ Critical Safety Precautions
- Power down completely and disconnect AC adapter
- Remove bottom panel (refer to previous section)
- Ground yourself with anti-static wrist strap
- Work on non-conductive surface
- Have fire extinguisher nearby (Class D for lithium fires)
🔧 Step-by-Step Removal Process
- Disconnect Battery:
- Locate battery connector near center of motherboard
- Gently pull connector straight up (not at angle)
- If stuck, use plastic spudger to release latch
- Remove Mounting Screws:
- Remove 4x Phillips #00 screws securing battery
- Note: Some models may have adhesive strips
- Keep screws organized for reassembly
- Lift Out Battery:
- Lift from connection end first
- If resistance felt, check for missed screws or adhesive
- Place old battery on non-conductive surface
🔄 New Battery Installation
- Prepare New Battery:
- Inspect for physical damage or swelling
- Check connector alignment matches original
- If using higher capacity model, verify physical fit
- Position Battery:
- Align with mounting holes and chassis guides
- Ensure connector faces correct direction
- Lower into place without forcing
- Secure Battery:
- Install 4x mounting screws (snug but not overtightened)
- Connect battery connector until click is heard
- Verify secure connection with gentle tug
📊 Battery Health Management
| Health Status | Capacity Indicator | Recommended Action |
|---|---|---|
| Excellent (90-100%) | Windows reports "Excellent" | Normal usage, maintain 20-80% charge |
| Good (70-89%) | Windows reports "Good" | Monitor degradation, consider calibration |
| Poor (<70%) | Windows suggests replacement | Replace battery soon |
| Critical (<50%) | Significant runtime reduction | Immediate replacement recommended |
⚙️ New Battery Calibration
- Charge to 100% without interruption
- Use on battery until system shuts down (~5%)
- Charge to 100% again without using
- Check Dell Power Manager for accurate readings
🛒 Battery Purchasing Guide
- Genuine Dell Batteries:
- Dell Parts Store (premium price, guaranteed compatibility)
- Authorized Dell retailers
- Includes full warranty
- Quality Third-Party:
- Look for UL certification
- Check customer reviews specifically for Vostro 5620
- Verify return policy before purchase
- Red Flags to Avoid:
- Prices significantly below market average
- No brand identification or certifications
- Vague compatibility claims
♻️ Proper Old Battery Disposal
- Recycling Options:
- Call2Recycle drop-off locations
- Best Buy electronics recycling
- Local hazardous waste facilities
- Safety Precautions:
- Cover battery terminals with tape
- Store in cool, dry place until disposal
- Never dispose in regular trash
💰 Resale Value Impact
- Value Enhancement:
- New genuine Dell battery: +$75-100 value
- Documented replacement: +$50 value
- 90%+ health reading: +$60 value
- Buyer Confidence:
- Students value battery life for classes
- Business users pay premium for reliability
- All buyers appreciate recent battery replacement
5. Dell Vostro 5620 RAM Installation & Upgrade Options
📊 RAM Specifications & Compatibility
- Technical Details:
- DDR4 3200MHz SODIMM (PC4-25600)
- Dual-channel architecture
- Maximum 64GB capacity (2x32GB)
- 1.2V operating voltage
- Non-ECC, unbuffered memory
- Stock Configurations:
- Base: 8GB (1x8GB single channel)
- Mid: 16GB (2x8GB dual channel)
- Premium: 32GB (2x16GB dual channel)
⚡ Performance Comparison
| Configuration | Single-Channel | Dual-Channel | Performance Gain |
|---|---|---|---|
| 8GB (1x8GB) | Yes | No | Baseline |
| 16GB (2x8GB) | No | Yes | 15-20% faster |
| 32GB (2x16GB) | No | Yes | Best for multitasking |
| 64GB (2x32GB) | No | Yes | Professional workloads only |
🔧 Step-by-Step Installation Process
- Preparation:
- Power down and remove bottom panel
- Disconnect battery connector for safety
- Ground yourself to prevent static discharge
- Locate RAM slots near center of motherboard
- Removal (if replacing):
- Push outward on retention clips at both ends
- Module will pop up at 30-degree angle
- Lift straight out without touching gold contacts
- Handle only by edges
- Installation:
- Align notch in module with key in slot
- Insert at 30-degree angle until fully seated
- Press down firmly until clips snap into place
- Listen for audible click confirming proper installation
🏆 Recommended RAM Kits
- Budget Option (16GB):
- Crucial 16GB Kit (2x8GB) DDR4 3200MHz
- Excellent compatibility
- Low-profile design
- Lifetime warranty
- Performance Option (32GB):
- Corsair Vengeance 32GB (2x16GB) DDR4 3200MHz
- Low latency: CL16
- Enhanced heat spreader
- Optimized for gaming
- Professional Option (64GB):
- Kingston Fury 64GB (2x32GB) DDR4 3200MHz
- Ideal for content creation
- Plug and play compatibility
- 100% tested
⚙️ BIOS Configuration
- Press F2 during boot to enter BIOS
- Navigate to "Memory" or "Performance" tab
- Verify detected capacity and speed
- Enable XMP profile if available (for rated speeds)
- Save changes and exit
✅ Verification & Testing
- System Verification:
- Check Windows System Information for detected capacity
- Use CPU-Z to verify speed and timings
- Confirm dual-channel operation in CPU-Z Memory tab
- Stability Testing:
- Run MemTest86 for 4+ passes
- Test with memory-intensive applications
- Monitor for crashes or errors during extended use
🎯 Real-World Performance Impact
- Gaming:
- 5-15% FPS increase in CPU-bound games
- Reduced stuttering and smoother gameplay
- Better performance in open-world games
- Productivity:
- Faster application loading times
- Smoother multitasking with multiple applications
- Improved performance in virtual machines
- Content Creation:
- Faster rendering times in video editing
- Larger project handling capability
- Better performance with high-resolution assets
💰 Resale Value Impact
| Upgrade | Cost | Value Added | ROI |
|---|---|---|---|
| 8GB → 16GB | $40-$50 | $75-$100 | 80-100% |
| 8GB → 32GB | $80-$100 | $150-$200 | 70-100% |
| 16GB → 32GB | $60-$80 | $100-$125 | 60-70% |
🔍 Troubleshooting Common Issues
- RAM Not Detected:
- Reseat modules ensuring full insertion
- Test modules individually in each slot
- Clean contacts with isopropyl alcohol if needed
- System Unstable:
- Run MemTest86 to identify errors
- Reset BIOS to default settings
- Ensure matched pairs for dual-channel
- Running at Lower Speed:
- Enable XMP in BIOS if available
- Update to latest BIOS version
- Check CPU-Z for actual operating speed
6. Dell Vostro 5620 Motherboard Removal & Replacement Guide
📊 Motherboard Specifications & Variants
- Technical Details:
- Model: Dell Vostro 5620 Mainboard
- Chipset: Intel HM570
- Form Factor: Proprietary laptop design
- Integrated: Audio, LAN, WiFi, USB controllers
- Configuration Variants:
- Intel Core i3-1215U (part number: XYZ123)
- Intel Core i5-1235U (part number: XYZ124)
- Intel Core i7-1255U (part number: XYZ125)
- Different GPU options: Iris Xe vs discrete MX550
🔍 Compatibility Verification
- Check current motherboard part number (sticker near RAM slots)
- Verify CPU and GPU compatibility with replacement board
- Confirm port layout matches existing chassis cutouts
- Ensure BIOS version supports your components
🛠️ Pre-Removal Preparation
- Component Removal Required:
- Battery (already removed)
- RAM modules
- SSD storage
- WiFi card
- Heat sink and cooling system
- Keyboard and touchpad cables
- Documentation:
- Photograph every connection before removal
- Label cables with masking tape if needed
- Note screw sizes and locations
🔧 Step-by-Step Removal Process
- Disconnect All Cables:
- Display ribbon cable (lift black latch first)
- Keyboard and touchpad connectors
- USB board connections
- Audio jack cable
- Power button ribbon
- Remove Motherboard Screws:
- 8x Phillips #00 screws around perimeter
- 2x Phillips #00 screws near ports
- Note: Some screws may be different lengths
- Keep organized by location
- Lift Motherboard:
- Lift from port side first
- Angle upward to clear components
- Check for any missed connections
- Place on anti-static surface
🔄 Replacement Motherboard Installation
- Prepare New Motherboard:
- Inspect for physical damage
- Apply thermal paste to CPU/GPU if not pre-applied
- Install RAM and WiFi card before mounting
- Position Motherboard:
- Align with standoffs and port cutouts
- Lower evenly into chassis
- Ensure no cables are trapped underneath
- Reconnect Components:
- Refer to pre-removal photos
- Connect display cable first (secure latch)
- Reattach all ribbon cables and connectors
✅ Post-Installation Testing
- Basic Functionality:
- Power on without battery (AC only first)
- Check BIOS recognition of components
- Test all ports with known devices
- Verify display functionality
- Stress Testing:
- Run AIDA64 stability test
- Monitor temperatures with HWiNFO
- Check for any error messages
🔍 Common Issues & Solutions
- No Power:
- Check all power connections
- Verify power button ribbon secure
- Test with known-good charger
- No Display:
- Reseat display cable
- Test with external monitor
- Check RAM compatibility
- Device Recognition Issues:
- Update BIOS to latest version
- Install chipset drivers from Dell
- Check Device Manager for errors
💰 Resale Value Considerations
- Value Impact:
- Motherboard replacement adds $100-200 value
- Higher-spec boards command premium
- Documented professional repair increases buyer confidence
- Documentation:
- Keep receipt of motherboard purchase
- Document repair process with photos
- Provide benchmark comparisons
7. Dell Vostro 5620 Proper Reassembly Techniques: Professional Results
📋 Pre-Reassembly Checklist
- Component Verification:
- All screws accounted for and organized
- No leftover components or tools inside chassis
- All connectors properly seated and secured
- Thermal paste applied if needed
- Cleaning Steps:
- Remove dust from fans and heatsinks
- Clean keyboard and touchpad surfaces
- Wipe down interior with isopropyl alcohol
- Clean port openings with compressed air
🔧 Step-by-Step Reassembly Sequence
- Internal Components First:
- Install RAM modules (45-degree angle, press down)
- Secure SSD and WiFi card
- Reconnect all internal cables
- Verify no cables obstruct fan movement
- Motherboard Placement:
- Align with standoffs and port cutouts
- Lower evenly into chassis
- Secure with correct screws in proper sequence
- Follow Dell's torque specifications
- Bottom Panel Installation:
- Align panel with chassis guides
- Press around perimeter to engage all clips
- Install screws in correct locations
- Ensure no gap between panel and chassis
🔩 Proper Screw Management
| Screw Type | Quantity | Location | Torque Specification |
|---|---|---|---|
| Phillips #00 (4mm) | 4 | Corner positions | 3-4 inch-pounds |
| Phillips #00 (5mm) | 5 | Center positions | 4-5 inch-pounds |
| Phillips #00 (4mm) | 2 | Vent area | 3-4 inch-pounds |
| Motherboard screws | 10 | Various locations | 4-5 inch-pounds |
📞 Cable Management Best Practices
- Ribbon Cables:
- Ensure connectors are fully seated
- Secure locking mechanisms (lift-to-open types)
- Route away from heat sources and moving parts
- Use original cable routing paths
- Power Cables:
- Connect battery last
- Ensure firm connection to motherboard
- Verify no pin damage or bending
✅ Quality Control Checks
- Visual Inspection:
- No visible gaps between panels
- All screws installed and flush
- No tool marks or scratches on exterior
- Functional Testing:
- Keyboard and touchpad responsiveness
- All ports recognize devices
- Display opens and closes smoothly
- No unusual noises from fans or components
- Performance Verification:
- Boot into BIOS successfully
- All RAM and storage detected
- Temperatures within normal range
- No error messages during boot
🚫 Common Reassembly Mistakes to Avoid
- Over-tightening Screws:
- Can strip threads or damage components
- Use finger-tight plus quarter turn with screwdriver
- Stop when screw is flush with surface
- Missed Connections:
- Double-check all ribbon cables
- Verify antenna connections for WiFi
- Ensure display cable fully seated
- Incorrect Screw Placement:
- Using long screws in short holes
- Mixing screw types between components
- Refer to pre-disassembly photos
🔍 Final Testing Procedures
- Basic Functionality:
- Power on with AC adapter first
- Test battery charging functionality
- Verify all keys work on keyboard
- Check touchpad responsiveness
- Performance Benchmarks:
- Run UserBenchmark quick test
- Check temperatures with HWiNFO
- Verify fan operation at different speeds
- Stress Testing:
- Run Prime95 for CPU stability
- Test graphics with FurMark if discrete GPU
- Monitor for thermal throttling
✨ Professional Finishing Touches
- Exterior Cleaning:
- Wipe down with microfiber cloth
- Clean screen with appropriate cleaner
- Remove any fingerprints from surfaces
- Documentation:
- Take photos of completed reassembly
- Record benchmark results
- Note any observations for future reference
8. Dell Vostro 5620 Post-Repair Testing & Diagnostics: Professional Validation
🎯 Testing Philosophy & Objectives
- Comprehensive Validation:
- Ensure all repairs were successful
- Verify no new issues were introduced
- Confirm system stability under load
- Document performance for potential buyers
- Professional Standards:
- Follow industry-standard testing protocols
- Use reproducible testing methodologies
- Create detailed documentation
- Provide transparency to potential buyers
🔧 Hardware Component Testing
| Component | Testing Method | Success Criteria | Tools Needed |
|---|---|---|---|
| CPU | Stress test, temperature monitoring | No throttling, temps under 90°C | Prime95, HWiNFO |
| RAM | Memory validation, error checking | Zero errors, full capacity detected | MemTest86, Windows Memory Diagnostic |
| Storage | Speed test, SMART data review | Expected speeds, good health status | CrystalDiskMark, CrystalDiskInfo |
| Battery | Capacity test, charge/discharge cycles | >80% design capacity, holds charge | BatteryInfoView, built-in diagnostics |
| Display | Pixel check, color uniformity | No dead pixels, even backlight | EIZO Monitor Test, online test tools |
💻 Software & Performance Testing
- Operating System:
- Clean Windows installation
- All drivers installed from Dell Support Site
- Windows updates current
- No error messages in Event Viewer
- Performance Benchmarks:
- Run UserBenchmark for overall system score
- CPU-Z stress test for processor stability
- CrystalDiskMark for storage performance
- Note scores for comparison and documentation
⚡ Comprehensive Stress Testing
- CPU Stress Test:
- Run Prime95 for 1 hour
- Monitor temperatures with HWiNFO
- Watch for thermal throttling
- Check for computation errors
- GPU Stress Test:
- Use FurMark for integrated graphics
- Run for 30 minutes minimum
- Monitor for artifacts or crashes
- Check temperature stability
- Memory Stress Test:
- Run MemTest86 for 4 complete passes
- Note any errors (should be zero)
- Test each module individually if errors occur
🎮 Real-World Usage Testing
- Productivity Tests:
- Multiple browser tabs with video playback
- Office applications running simultaneously
- File compression and extraction
- PDF rendering and editing
- Connectivity Tests:
- WiFi speed test (5GHz and 2.4GHz)
- Bluetooth device pairing and transfer
- All USB ports with various devices
- HDMI/output port functionality
🌡️ Thermal Performance Validation
| Test Scenario | Maximum Allowable Temperature | Expected Fan Behavior | Performance Expectation |
|---|---|---|---|
| Idle (Desktop) | 40-50°C | Quiet or silent | No throttling |
| Web Browsing | 50-65°C | Intermittent low speed | Smooth performance |
| Productivity Work | 65-80°C | Consistent medium speed | No slowdowns |
| Stress Test | 80-95°C | High speed, may be loud | Minimal throttling acceptable |
🔋 Battery Health & Performance
- Capacity Test:
- Run
powercfg /batteryreportin Command Prompt - Check designed vs actual capacity
- Look for charge cycle count
- Run
- Runtime Test:
- Set power saver mode, 50% brightness
- Stream video until shutdown
- Document actual vs expected runtime
- Charge Test:
- Time 0-100% charge duration
- Verify charging indicator works
- Check for consistent charging rate
📊 Results Documentation Protocol
- Performance Records:
- Screenshot all benchmark results
- Record temperatures during stress tests
- Document any issues encountered
- Visual Documentation:
- Photos of system running tests
- Video of fan operation under load
- Close-ups of display quality
- Final Report:
- Summary of all tests performed
- Comparison to expected performance
- Recommendations for future maintenance
💰 Resale Preparation Testing
- Buyer Confidence Tests:
- Clean Windows installation with necessary drivers
- Remove all personal data and accounts
- Create restore point or system image
- Provide documentation of all tests performed
- Presentation:
- Thorough cleaning of exterior
- Organization of all documentation
- High-quality photos of final product
- Benchmark comparison charts
9. Maximizing Dell Vostro 5620 Resale Value After Repair: Expert Strategies
📈 Current Market Analysis
- 2024 Business Laptop Demand:
- Small businesses seeking reliable workstations
- Students needing affordable productivity machines
- Remote workers valuing portability and performance
- Budget-conscious professionals
- Vostro 5620 Specific Advantages:
- Business-grade build quality
- Professional appearance
- Dell reliability reputation
- Easy serviceability appeals to tech buyers
💰 Competitive Pricing Strategy
| Configuration | Base Value | After Repair Premium | Final Market Price |
|---|---|---|---|
| i3/8GB/256GB | $250-$300 | +$75-$100 | $325-$400 |
| i5/16GB/512GB | $350-$450 | +$100-$150 | $450-$600 |
| i7/16GB/512GB | $450-$550 | +$125-$175 | $575-$725 |
| Fully Upgraded | $500-$600 | +$150-$200 | $650-$800 |
✨ Value Enhancement Techniques
- Performance Upgrades:
- 16GB RAM (+$75 value)
- 512GB SSD (+$100 value)
- Clean thermal paste application (+$50 value)
- Fresh Windows installation (+$25 value)
- Cosmetic Improvements:
- Professional cleaning (+$25 value)
- Keyboard replacement if worn (+$40 value)
- Minor scratch removal (+$15 value)
- Brand-new charger included (+$35 value)
🌐 Optimal Sales Platforms
- Specialized Buyers:
- SellLaptopBack - Tech-focused marketplace
- SellLaptopBack - Refurbisher direct sales
- Reddit HardwareSwap - Enthusiast community
- General Marketplaces:
- eBay (largest audience, buyer protection)
- Facebook Marketplace (local, no fees)
- OfferUp (regional buyers)
- Institutional Buyers:
- GSA Auctions - Government surplus
- Public Surplus - Educational institutions
- Local school district surplus sales
📝 Listing Optimization Strategies
- Title Keywords:
- "Dell Vostro 5620 Business Laptop [Specs] [Condition]"
- Include: "Professionally Refurbished", "Tested", "Warranty"
- Mention key features: "USB-C", "Full HD", "Fast SSD"
- Description Essentials:
- Lead with benchmark scores and test results
- Detail all repairs and upgrades performed
- Include battery health percentage
- Specify included accessories
- Visual Content:
- 12+ high-quality photos from all angles
- Video showing boot-up and operation
- Close-ups of screen quality and keyboard
- Photos of benchmark results on screen
📊 Professional Documentation Package
- Performance Proof:
- UserBenchmark results
- Battery health report
- Temperature stress test results
- RAM and storage health metrics
- Repair Documentation:
- Before/after photos of repairs
- List of replaced components
- Testing methodology explanation
- Quality control checklist
🛡️ Value-Added Warranty Options
| Warranty Level | Duration | Cost Impact | Value Added |
|---|---|---|---|
| 30-Day Testing | 30 days | +$0 (included) | +$50 value |
| 90-Day Limited | 90 days | +$25 cost | +$100 value |
| 180-Day Parts | 180 days | +$50 cost | +$150 value |
| 1-Year Support | 1 year | +$100 cost | +$250 value |
🎯 Specific Buyer Targeting
- Small Businesses:
- Emphasize reliability and professional appearance
- Highlight Dell business-grade features
- Offer bulk pricing for multiple units
- Students:
- Focus on portability and battery life
- Highlight compatibility with school software
- Offer student discount
- Remote Workers:
- Emphasize webcam quality and microphone
- Highlight connectivity options
- Include video conferencing ready messaging
⭐ Transaction Excellence
- Packaging:
- Original Dell box or high-quality replacement
- Proper foam padding and protection
- Include all accessories neatly organized
- Shipping:
- Priority mail with insurance
- Signature confirmation required
- Fast handling time (<24 hours)
- Communication:
- Prompt responses to inquiries
- Professional language and tone
- Clear return policy stated upfront
Need to Sell Your Dell Laptop? Get Instant Cash!
If your Dell Vostro 5620 (or other Vostro model) has performance issues or you're upgrading to a newer business laptop, we offer competitive cash payouts for your device. We buy broken, used, and refurbished Dell Vostro laptops—including all 5620 configurations—with free insured shipping and hassle-free evaluations.
Sell Popular Dell Models Now: