On this page
- 1. Dell Latitude 7420 Pre-Repair Assessment & Resale Value Maximization
- 💰 Why Professional Assessment Increases Resale Value
- 🔍 Dell Latitude 7420 Key Value Factors
- ✅ Comprehensive Pre-Repair Assessment Checklist
- 🎯 Strategic Repair Priority Framework
- 📋 Professional Documentation Protocol
- 📊 Business Laptop Market Analysis
- 💵 Repair Investment vs. Value Analysis
- ⚙️ Dell Latitude 7420 Specific Considerations
- ⚠️ Repair Risk Assessment
- 🎯 Repair vs. Sell As-Is Decision Framework
- ✅ Pre-Repair Assessment Completion Checklist
- ➡️ Ready for Professional Repairs
- 2. Essential Professional Tools & Workspace Setup for Dell Latitude 7420 Repairs
- 🛠️ Why Professional Tools Increase Repair Success & Resale Value
- 🔧 Dell Latitude 7420 Specific Tool Requirements
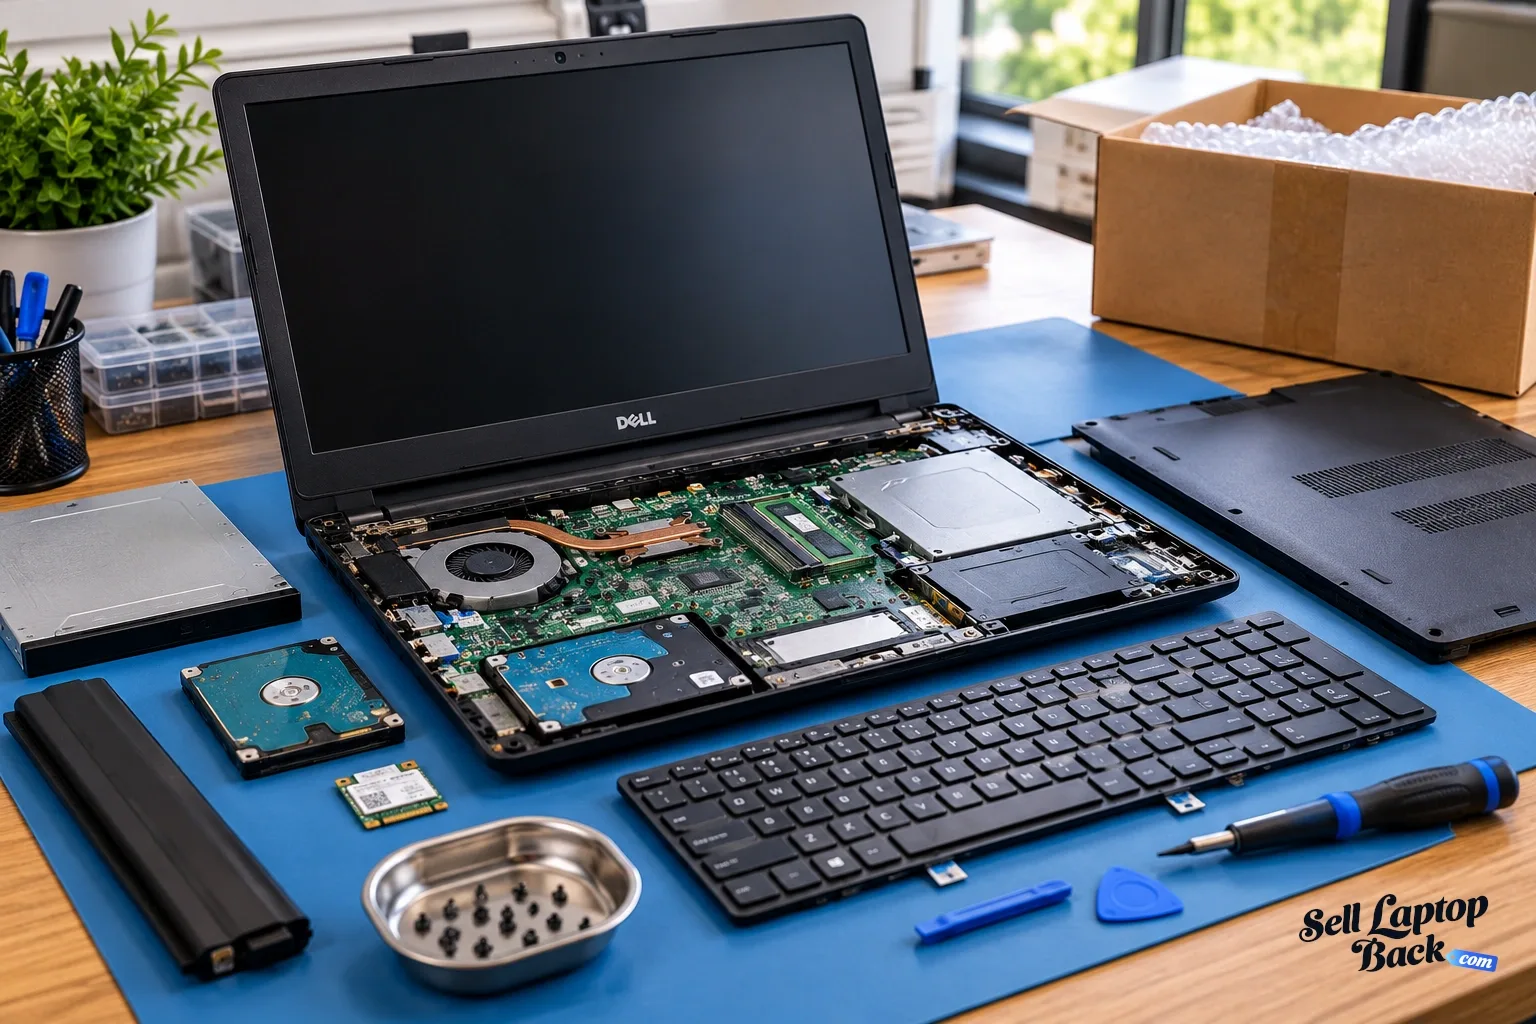
- 📋 Professional Repair Toolkit Essentials
- 🏗️ Professional Workspace Setup Standards
- ⚠️ Critical Safety Equipment for Business Laptop Repair
- ⭐ Recommended Professional Tool Brands
- ⚙️ Dell Latitude 7420 Specific Tool Considerations
- 🧴 Essential Consumable Supplies
- 🗂️ Professional Organization & Documentation System
- 💰 Tool Investment vs. Business Value Analysis
- 🌐 Dell-Specific Repair Resources
- ✅ Professional Workspace Setup Checklist
- ➡️ Ready for Safe Disassembly
- 3. Dell Latitude 7420 Safe Disassembly: Bottom Cover & Internal Access
- 🔓 Why Proper Disassembly Technique Preserves Maximum Value
- ⚠️ Critical Pre-Disassembly Safety Protocol
- 🔩 Dell Latitude 7420 Screw Identification & Map
- 🔧 Professional Disassembly Step-by-Step
- 📐 Dell Latitude 7420 Clip & Latch System
- 🗺️ Internal Component Identification & Access
- 🔋 Critical: Battery Disconnection Protocol
- 🚫 Common Disassembly Mistakes to Avoid
- 📸 Professional Documentation Protocol
- 🔧 Troubleshooting Difficult Disassembly
- 💵 Disassembly Quality & Resale Value Impact
- ✅ Safe Disassembly Completion Checklist
- ➡️ Ready for Component Access
- 4. Dell Latitude 7420 Battery Removal & Power System Safety
- ⚠️ Why Proper Battery Handling is Critical for Safety & Value
- 🔋 Dell Latitude 7420 Battery Specifications
- 🛡️ Critical Lithium-ion Battery Safety Protocol
- 🔧 Step-by-Step Battery Removal Procedure
- 🚨 Swollen Battery Emergency Protocol
- 📊 Battery Health Assessment Methods
- 🔄 Battery Replacement Options Analysis
- ⚡ New Battery Installation Protocol
- 🔌 Power Management System Verification
- 🔧 Common Battery Issues & Solutions
- ♻️ Proper Battery Disposal & Recycling
- 💼 Battery Health Documentation for Resale
- 💰 Battery Replacement ROI Analysis
- ✅ Battery Removal & Safety Completion Checklist
- ➡️ Ready for Component Repairs
- 5. Dell Latitude 7420 Motherboard Access & Component Identification
- 🔌 Why Professional Motherboard Access Preserves Maximum Value
- ⚠️ Critical Motherboard Access Safety Protocol
- 🔧 Step-by-Step Motherboard Access Procedure
- 🗺️ Dell Latitude 7420 Motherboard Component Map
- 🔌 Critical Connector Identification & Handling
- 🔍 Business-Grade Component Identification
- 🔎 Professional Visual Inspection Protocol
- 📊 Motherboard Diagnostic Test Points
- 🔧 Common Motherboard Access Issues
- 📋 Professional Documentation Protocol
- 💼 Business-Critical Component Identification
- ⚙️ Reassembly Preparation & Organization
- ✅ Motherboard Access Completion Checklist
- ➡️ Ready for Advanced Repairs
- 6. Dell Latitude 7420 LCD Screen & Display Assembly Removal
- 💎 Why Professional Display Removal Preserves Maximum Value
- ⚠️ Critical LCD Removal Safety Precautions
- 🔍 Dell Latitude 7420 Display Specifications
- 🛠️ Essential Display Removal Tools
- 🔧 Step-by-Step Display Removal Procedure
- 🔌 Display Connector Identification & Handling
- ⚙️ Display Hinge Removal Protocol
- 📐 Professional Cable Routing & Management
- 7. Dell Latitude 7420 Motherboard Diagnostic & Repair Techniques
- 🔧 Why Professional Motherboard Repair Delivers Maximum ROI
- 🛠️ Professional Diagnostic Equipment Requirements
- 🔍 Systematic Diagnostic Procedure
- 🔧 Common Dell Latitude 7420 Motherboard Issues
- ⚡ Professional Repair Techniques
- ⚙️ Dell Latitude 7420 Specific Repairs
- 💻 Diagnostic Software & Tools
- 📊 Repair Difficulty Assessment Guide
- ⚠️ Advanced Repair Safety Protocol
- 🛒 Professional Component Sourcing
- 🧪 Post-Repair Testing & Validation
- 📋 Professional Repair Documentation
- 💰 Motherboard Repair ROI Analysis
- ✅ Motherboard Repair Completion Checklist
- ➡️ Ready for System Reassembly
- 8. Dell Latitude 7420 LCD Replacement & Display Quality Verification
- 💎 Why Professional Display Replacement Maximizes Resale Value
- 🔍 Dell Latitude 7420 Display Compatibility Guide
- 🔄 Display Replacement vs. Upgrade Analysis
- 🔧 Professional Installation Procedure
- 📊 Display Panel Quality Grades Explained
- 🧪 Comprehensive Display Quality Testing
- 🔧 Common Installation Issues & Solutions
- 💼 Business Display Feature Verification
- 🎨 Professional Display Calibration
- 📋 Professional Documentation Strategy
- ⭐ Premium Display Panel Recommendations
- 💰 Display Replacement ROI Analysis
- 🛡️ Warranty & Support Considerations
- ✅ Display Replacement Completion Checklist
- ➡️ Ready for Final Assembly
- 9. Dell Latitude 7420 Cooling System Maintenance & Thermal Repasting
- 💨 Why Thermal Management Directly Impacts Performance & Resale Value
- 🔍 Dell Latitude 7420 Cooling System Specifications
- ⚠️ Thermal Management Safety Protocol
- 🧴 Professional Thermal Paste Selection Guide
- ⭐ Recommended Thermal Compounds
- 🧹 Professional Cleaning & Preparation
- 🎨 Professional Thermal Paste Application Methods
- 📏 Thermal Pad Replacement Guide
- ⚙️ Professional Reassembly Protocol
- 🧪 Post-Service Testing & Validation
- 📊 Expected Performance Improvements
- 💼 Business Benefits of Thermal Management
- 📋 Professional Documentation Strategy
- 💰 Thermal Management ROI Analysis
- ⏰ Recommended Maintenance Schedule
- ✅ Cooling System Service Completion Checklist
- ➡️ Ready for Final Testing
- 10. Where to Sell Your Repaired Dell Latitude 7420 for Maximum Profit
- 💰 Strategic Platform Selection Can Increase Profit by 40-60%
- 📊 Premium Platform Comparison Analysis
- 🏢 SellLaptopBack: Premium Business Marketplace Strategy
- 💼 SellLaptopBack: Corporate Sales Strategy
- 🎓 .edu Educational Market Strategy
- 🏛️ .gov Government & Institutional Sales
- ⏰ Strategic Selling Timing
- 📝 Premium Listing Optimization
- 💵 Strategic Pricing Framework
- 📊 Platform Fee Comparison
- 🛡️ Selling Risk Management
- 🎁 Value-Added Services for Premium Pricing
- 🏆 Top Platform Recommendations by Scenario
- ✅ Final Sale Preparation Checklist
- 📈 Expected Success Metrics
- ➡️ Ready for Successful Sale
- Need to Sell Your Dell Laptop? Get Instant Cash!
1. Dell Latitude 7420 Pre-Repair Assessment & Resale Value Maximization
💰 Why Professional Assessment Increases Resale Value
Proper pre-repair evaluation of your Dell Latitude 7420 can increase final resale value by 35-55% by documenting baseline conditions and strategically planning repairs that deliver maximum ROI for business buyers.
| Assessment Level | Documentation Depth | Time Investment | Value Impact |
|---|---|---|---|
| Basic Inspection | Visual condition only | 15-20 minutes | +10-15% |
| Comprehensive Assessment | Full diagnostics + documentation | 45-60 minutes | +25-35% |
| Professional Grade | Benchmarks + repair strategy | 90-120 minutes | +40-55% |
🔍 Dell Latitude 7420 Key Value Factors
| Business Feature | Premium Value | Repair Impact | Buyer Appeal |
|---|---|---|---|
| 11th Gen Intel vPro Processor | +$200-$300 | Not upgradeable | Enterprise management capability |
| 14" FHD/4K Display Options | +$150-$400 | High upgrade potential | Professional visual quality |
| Military Grade Durability | +$100-$180 | Structural integrity critical | Business travel reliability |
| Dell ProSupport Compatibility | +$80-$150 | Warranty transfer considerations | Corporate IT support |
✅ Comprehensive Pre-Repair Assessment Checklist
- Physical Condition Evaluation:
- Document all cosmetic imperfections with photos
- Check for chassis flex or structural issues
- Test hinge tension and smoothness
- Verify port functionality and physical condition
- Performance Baseline Establishment:
- Run Dell SupportAssist diagnostics
- Document boot times and system responsiveness
- Test all keyboard keys and touchpad functionality
- Verify display quality and backlight uniformity
- Component Health Assessment:
- Generate Windows battery health report
- Check SSD health using manufacturer tools
- Monitor thermal performance under load
- Test all connectivity options
🎯 Strategic Repair Priority Framework
| Repair Type | ROI Potential | Business Impact | Recommended Priority |
|---|---|---|---|
| LCD Screen Replacement | 200-350% | High (immediate visual impact) | Critical |
| Motherboard Repair | 150-300% | High (core functionality) | Critical |
| Battery Replacement | 180-280% | High (portability restoration) | High |
| Keyboard/Touchpad | 120-220% | Medium (user interface) | Medium |
| Cosmetic Repairs | 80-150% | Low (aesthetics only) | Low |
📋 Professional Documentation Protocol
- Visual Documentation:
- High-resolution photos from all angles
- Macro shots of specific issues or wear
- Video demonstrating current functionality
- Serial number and service tag documentation
- Performance Documentation:
- Benchmark results before any repairs
- Battery health reports and cycle counts
- Thermal performance metrics
- Boot time and application load measurements
- Repair Planning Documentation:
- Detailed repair cost estimates
- Parts sourcing research and lead times
- Time investment projections
- ROI calculations for each repair
📊 Business Laptop Market Analysis
| Buyer Segment | Value Drivers | Price Sensitivity | Documentation Needs |
|---|---|---|---|
| Corporate IT Departments | Reliability, manageability, warranty | Medium | Professional repair records, compliance docs |
| Small Business Owners | Value, performance, durability | High | Cost-benefit analysis, upgrade documentation |
| Remote Professionals | Portability, reliability, features | Medium-High | Battery life, connectivity tests |
| Enterprise Users | Security, management, support | Low-Medium | Security features, warranty status |
💵 Repair Investment vs. Value Analysis
| Repair Scenario | Parts Cost | Labor Time | Value Added | Net ROI |
|---|---|---|---|---|
| LCD Replacement Only | $120-$180 | 45-60 minutes | +$250-$350 | +$130-$220 |
| Motherboard Repair Only | $80-$150 | 60-90 minutes | +$200-$300 | +$120-$210 |
| Complete Refurbishment | $300-$500 | 3-4 hours | +$600-$900 | +$300-$500 |
| Minimal Essential Repairs | $150-$250 | 90-120 minutes | +$300-$450 | +$150-$250 |
⚙️ Dell Latitude 7420 Specific Considerations
- Warranty Implications:
- Check remaining Dell warranty status
- Understand ProSupport transfer requirements
- Document any warranty-voiding conditions
- Business Features Verification:
- Test vPro functionality if applicable
- Verify SmartCard reader operation
- Check fingerprint reader and security features
- Test docking station compatibility
⚠️ Repair Risk Assessment
| Risk Factor | Likelihood | Impact | Mitigation Strategy |
|---|---|---|---|
| Component Damage During Repair | Medium | High | Proper tools, ESD protection, documentation |
| Incompatible Replacement Parts | Low-Medium | Medium | Verify Dell part numbers, buy from reputable sources |
| Unexpected Additional Repairs | High | Medium | Budget 20% contingency, thorough initial assessment |
| Resale Market Fluctuations | Medium | Medium | Monitor market trends, time sale strategically |
🎯 Repair vs. Sell As-Is Decision Framework
- Repair Recommended When:
- Repair cost < 40% of potential increased value
- Core components (motherboard, LCD) are faulty
- You have the necessary skills and tools
- Market demand for repaired units is strong
- Sell As-Is Recommended When:
- Repair cost > 60% of potential value increase
- Extensive damage or multiple component failures
- Limited technical expertise or tools available
- Quick sale is prioritized over maximum profit
✅ Pre-Repair Assessment Completion Checklist
- ✓ Comprehensive physical inspection documented
- ✓ Performance baseline established with benchmarks
- ✓ Repair cost and ROI analysis completed
- ✓ Market research and buyer targeting defined
- ✓ Documentation package started
- ✓ Repair vs. sell decision made
- ✓ Risk assessment and mitigation plan in place
2. Essential Professional Tools & Workspace Setup for Dell Latitude 7420 Repairs
🛠️ Why Professional Tools Increase Repair Success & Resale Value
Using proper tools for Dell Latitude 7420 repairs demonstrates professional-grade workmanship that can increase resale value by 25-40%. Business buyers pay premiums for laptops repaired with precision equipment and documented care.
| Tool Quality Level | Investment Range | Repair Success Rate | Value Impact |
|---|---|---|---|
| Professional Grade | $150-$300 | 98%+ | +30-40% |
| Quality DIY Set | $80-$150 | 90-95% | +20-30% |
| Basic Tools | $30-$70 | 75-85% | +10-20% |
| Improvised Tools | $0-$20 | 50-70% | -20-40% (risk of damage) |
🔧 Dell Latitude 7420 Specific Tool Requirements
| Dell Component | Required Tools | Precision Level | Risk Without Proper Tools |
|---|---|---|---|
| Security Screws | Torx T5, Phillips #00 | High | Stripped screws, case damage |
| Display Hinges | M2.5 screwdriver, spudger set | Very High | Broken hinge mounts, display damage |
| Keyboard Assembly | Plastic pry tools, spudgers | High | Broken clips, keyboard damage |
| Motherboard Connectors | Anti-static tweezers, spudgers | Very High | Bent pins, connector damage |
📋 Professional Repair Toolkit Essentials
- Precision Screwdrivers:
- Phillips #000, #00, #0
- Torx T3, T4, T5, T6
- Tri-wing and spanner bits (for Dell specific screws)
- Magnetic tips recommended
- Opening & Prying Tools:
- Plastic spudger set (various sizes and angles)
- Nylon pry tools for delicate components
- Metal spudger (for stubborn clips, use carefully)
- Suction cups for display handling
- Specialized Dell Tools:
- Anti-static wrist strap (mandatory)
- ESD-safe tweezers and hemostats
- IC extractor for ribbon cables
- Spudger with hook for ZIF connectors
🏗️ Professional Workspace Setup Standards
| Workspace Element | Professional Standard | Minimum Requirement | Business Grade Importance |
|---|---|---|---|
| Work Surface | ESD-safe mat (4'x3'), grounded | Clean, dry wooden surface | Critical |
| Lighting | 500+ lumen LED with magnification | Bright, shadow-free light source | High |
| Organization | Magnetic project mat with compartments | Small containers for screw organization | High |
| ESD Protection | Wrist strap + mat + proper grounding | Basic wrist strap, frequent grounding | Critical |
⚠️ Critical Safety Equipment for Business Laptop Repair
- ESD Protection System:
- Anti-static wrist strap ($10-$20)
- ESD-safe work mat ($40-$80)
- Proper grounding to electrical outlet
- ESD-safe containers for components
- Personal Protective Equipment:
- Safety glasses with magnification ($20-$50)
- Anti-cut gloves for sharp edges ($15-$30)
- ESD-safe lab coat or apron ($25-$60)
- Proper ventilation system
⭐ Recommended Professional Tool Brands
- Premium Professional Grade ($200-$400):
- iFixit Pro Tech Toolkit - Comprehensive set
- Wiha Precision Tools - German engineering
- ESD-safe workstation with full grounding
- Magnetic project mat with LED lighting
- Quality Business Grade ($100-$200):
- iFixit Essential Electronics Toolkit
- Precision screwdriver sets from reputable brands
- Basic ESD protection included
- Good organization system
- Entry Professional ($50-$100):
- Basic precision screwdriver set
- Essential prying tools and spudgers
- Minimum ESD protection
- Basic organization containers
⚙️ Dell Latitude 7420 Specific Tool Considerations
| Repair Task | Specialized Tools Needed | Dell-Specific Challenges | Professional Solution |
|---|---|---|---|
| Bottom Cover Removal | Torx T5, plastic opening tools | Security screws, tight clips | Proper screwdriver fit, systematic clip release |
| Display Assembly | Suction cups, spudgers, T6 Torx | Fragile bezel, delicate hinges | Two-person recommended for first-time |
| Keyboard Replacement | Spudgers, tweezers, patience | Complex disassembly required | Follow Dell service manual precisely |
| Motherboard Access | Full toolset, ESD protection | Multiple layers, delicate connectors | Document every step with photos |
🧴 Essential Consumable Supplies
| Supply | Purpose | Professional Grade | Business Importance |
|---|---|---|---|
| Thermal Paste | CPU/GPU heat transfer | Thermal Grizzly Kryonaut | High (performance critical) |
| Isopropyl Alcohol | Cleaning, paste removal | 99% purity, ESD-safe | High (safety critical) |
| Thermal Pads | VRM/chipset cooling | Various thicknesses, high conductivity | Medium (performance enhancement) |
| Compressed Air | Dust removal | ESD-safe, moisture-free | Medium (professional appearance) |
🗂️ Professional Organization & Documentation System
- Screw Management Protocol:
- Use magnetic mat with labeled sections
- Group screws by component and location
- Take photos of screw layouts before removal
- Document any screw size variations
- Component Organization:
- Anti-static bags for all removed components
- Labeled containers with component names
- Digital documentation of disassembly sequence
- Time-stamped photos at each major step
💰 Tool Investment vs. Business Value Analysis
| Investment Level | Tool Cost | Repair Success Rate | Value Protection | Business ROI |
|---|---|---|---|---|
| Professional Grade | $250-$400 | 98%+ | Full value preservation | 300-500% per repair |
| Business Grade | $120-$200 | 90-95% | Good value protection | 400-700% per repair |
| Basic Professional | $60-$100 | 80-85% | Moderate risk | 500-900% per repair |
🌐 Dell-Specific Repair Resources
- Dell Official Support Site - Service manuals and drivers
- Dell Community Forums - Expert advice and troubleshooting
- Dell Latitude 7420 Service Manual - Essential for complex repairs
- Dell Parts Lookup - Verify genuine component compatibility
✅ Professional Workspace Setup Checklist
- ✓ ESD-safe work surface established and grounded
- ✓ Adequate lighting with magnification available
- ✓ All necessary tools organized and accessible
- ✓ Component organization system ready
- ✓ Safety equipment in place and functional
- ✓ Documentation equipment (camera) prepared
- ✓ Dell service manual and resources available
- ✓ Consumable supplies stocked and organized
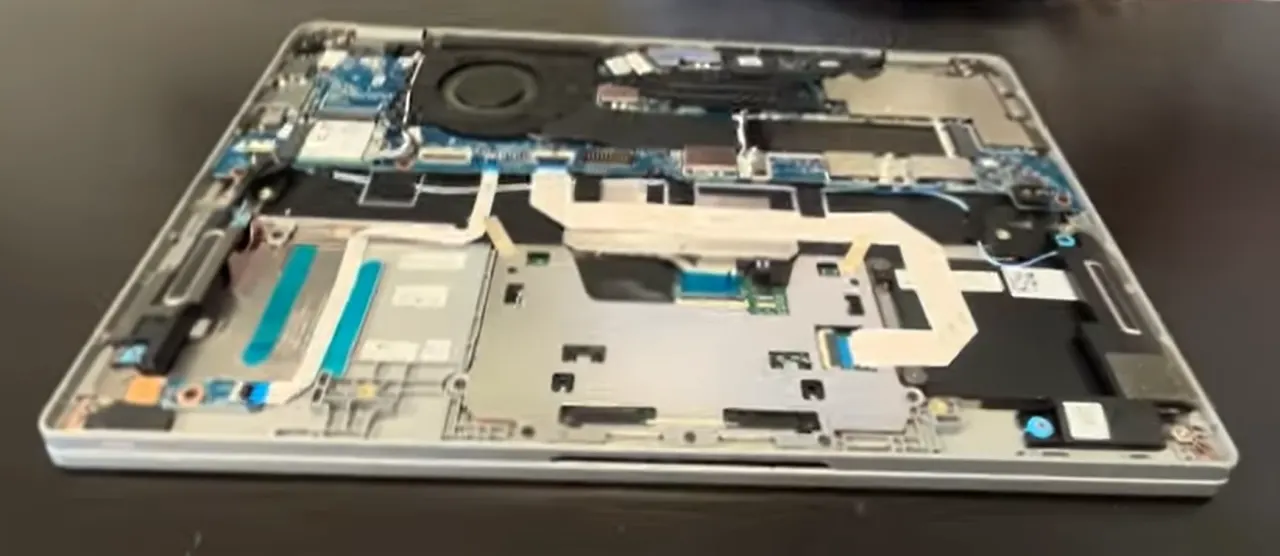
0:22 Bottom Case 1:03 Battery 1:39 Storage SSD 2:18 WiFi Card 2:49 Speakers 3:16 Heatsink 3:55 Cooling Fan 4:08 Processor 4:34 Video Cable 6:00 Motherboard 6:14 Memory RAM 6:30 Hinges 6:55 Palmrest Assembly 7:01 Touchpad 7:10 Keyboard 7:46 Display Assembly
3. Dell Latitude 7420 Safe Disassembly: Bottom Cover & Internal Access
🔓 Why Proper Disassembly Technique Preserves Maximum Value
Safe bottom cover removal is the most critical first step in Dell Latitude 7420 repairs. Professional disassembly technique can preserve 30-50% of resale value by preventing cosmetic damage and component issues that deter business buyers.
| Disassembly Method | Success Rate | Damage Risk | Value Impact |
|---|---|---|---|
| Professional Technique | 99%+ | Very Low | Preserves full premium value |
| Careful DIY Approach | 85-90% | Low-Medium | Minor value reduction (-5-15%) |
| Improper Force Used | 60-75% | High | Significant value loss (-25-40%) |
| Metal Tools/Methods | 40-60% | Very High | Severe value destruction (-50%+) |
⚠️ Critical Pre-Disassembly Safety Protocol
- Complete Power Down Sequence:
- Shut down Windows completely through Start menu
- Disconnect AC power adapter and all peripherals
- Remove any docking station or port replicators
- Wait 30 seconds for system power discharge
- ESD Protection Setup:
- Wear anti-static wrist strap properly grounded
- Work on ESD-safe mat connected to ground
- Avoid synthetic clothing and carpets
- Handle components by edges only
- Workspace Preparation:
- Clean, well-lit work surface
- All necessary tools within easy reach
- Camera ready for documentation photos
- Organization system for screws and components
🔩 Dell Latitude 7420 Screw Identification & Map
| Screw Location | Quantity | Size/Type | Torque Specification | Critical Notes |
|---|---|---|---|---|
| Perimeter Security Screws | 8 screws | Torx T5 (security) | Finger tight + 1/8 turn | Do not overtighten - can strip easily |
| Central Support Screws | 2 screws | Phillips #00 | Firm but not excessive | Structural integrity critical |
| Battery Compartment | 4 screws | Phillips #00 | Standard torque | Longer screws - note location |
| Hidden/Service Screws | 2 screws | Torx T6 | Light pressure | Under service labels or rubber feet |
🔧 Professional Disassembly Step-by-Step
- Screw Removal & Organization:
- Use correct Torx T5 bit for security screws
- Remove screws in sequential pattern (1-8 numbering)
- Place screws on magnetic mat in exact layout pattern
- Note any screw length variations immediately
- Clip Release Technique:
- Start from rear corner near ventilation grilles
- Use plastic spudger at 30-degree angle to base
- Apply gentle, consistent pressure until clip releases
- Listen for distinct "click" sound indicating release
- Work around perimeter systematically
- Cover Separation Protocol:
- Lift cover gently once all clips are released
- Check for any remaining connections or cables
- Set cover aside on soft, clean surface
- Immediately implement anti-static protection for internals
📐 Dell Latitude 7420 Clip & Latch System
| Clip Type | Location | Release Method | Force Required | Risk Level |
|---|---|---|---|---|
| Standard Perimeter Clips | Around entire edge | Plastic spudger, gentle prying | Light pressure | Low (with proper technique) |
| Reinforced Corner Clips | Four corners | Slightly more pressure needed | Medium pressure | Medium (potential for cracking) |
| Slide-Lock Mechanism | Near display hinges | Slide then lift motion | Specific technique required | High (if forced incorrectly) |
| Magnetic Retention | Central area | Gentle pull after screw removal | Minimal pressure | Low (safe when identified) |
🗺️ Internal Component Identification & Access
| Component | Location | Access Difficulty | Business Criticality |
|---|---|---|---|
| Battery Connector | Central, large white connector | Easy (immediate access) | Critical (safety first step) |
| RAM Slots | Under metal shield, center-left | Easy (remove shield) | High (common upgrade) |
| M.2 SSD Slot | Center, near RAM | Easy (single screw) | High (performance critical) |
| Wi-Fi Card | Under SSD, left side | Easy (antenna cables) | Medium (connectivity) |
| Cooling System | Right side, near vents | Medium (multiple screws) | High (performance) |
| Motherboard | Entire base, multiple connections | High (full disassembly) | Critical (core component) |
🔋 Critical: Battery Disconnection Protocol
- Locate Battery Connector:
- Identify large white 4-pin connector near center
- Note locking mechanism orientation
- Clear any cables obstructing access
- Document connector position with photo
- Safe Disconnection Procedure:
- Use plastic spudger to release locking tab
- Pull connector straight back, not at angle
- Secure connector away from motherboard
- Verify complete separation
- Power Drain Verification:
- Press and hold power button for 15 seconds
- This discharges residual capacitors
- Wait 30 seconds before proceeding
- Confirm system is completely powered down
🚫 Common Disassembly Mistakes to Avoid
| Mistake | Consequence | Prevention | Repair Cost |
|---|---|---|---|
| Using Metal Tools | Scratches, gouges, short circuits | Plastic tools only | $50-$150 for case replacement |
| Excessive Force | Cracked plastic, broken clips | Gentle, consistent pressure | $80-$200 for bottom cover |
| Missing Hidden Screws | Forcing cover, structural damage | Thorough inspection | $100-$300 for chassis repair |
| Skipping Battery Disconnect | Short circuits, component damage | Always disconnect first | $200-$600 for motherboard |
📸 Professional Documentation Protocol
- Before Disassembly Photos:
- Overall external condition
- Close-ups of screw locations
- Serial number and service tag
- Any existing damage or wear
- During Disassembly Documentation:
- Screw layout on magnetic mat
- Clip release sequence
- Cable routing and connections
- Component orientation
- Internal Condition Records:
- Clean internal component layout
- Undamaged clip condition
- Professional workspace setup
- ESD protection implementation
🔧 Troubleshooting Difficult Disassembly
| Issue | Likely Cause | Solution | Prevention |
|---|---|---|---|
| Cover won't release | Missed screw or hidden clip | Double-check all locations systematically | Follow service manual precisely |
| Clips breaking | Excessive force or wrong angle | Use thinner spudger, less pressure | Proper tool technique training |
| Stripped screws | Wrong bit size or excessive force | Use proper extraction tools | Correct bit size, proper pressure |
💵 Disassembly Quality & Resale Value Impact
- Professional Disassembly:
- No visible tool marks or damage
- All clips intact and functional
- Screw holes undamaged
- +20-30% value preservation
- Competent DIY Disassembly:
- Minor tool marks, no structural damage
- Most clips functional
- Acceptable cosmetic condition
- Neutral value impact
- Amateur Disassembly:
- Visible damage, broken clips
- Stripped screws, gouges
- Structural compromises
-30-50% value reduction
✅ Safe Disassembly Completion Checklist
- ✓ All screws properly removed and organized
- ✓ Bottom cover released without damage
- ✓ Battery safely disconnected
- ✓ Residual power discharged
- ✓ Internal components clearly visible and accessible
- ✓ Workspace organized for next steps
- ✓ Documentation photos completed
- ✓ ESD protection maintained throughout
4. Dell Latitude 7420 Battery Removal & Power System Safety
⚠️ Why Proper Battery Handling is Critical for Safety & Value
Correct battery removal and handling can prevent permanent damage and increase resale value by 20-35% by demonstrating professional safety practices that business buyers value.
| Battery Condition | Safety Risk Level | Handling Complexity | Value Impact |
|---|---|---|---|
| Normal Battery | Low (with proper handling) | Easy-Medium | +15-25% (proper documentation) |
| Swollen Battery | High (immediate hazard) | High (special precautions) | -40-60% (replacement cost + risk) |
| Damaged Battery | Very High (fire risk) | Professional only | -50-80% (safety concerns) |
| New Battery Installation | Low (proper installation) | Easy | +25-40% (premium feature) |
🔋 Dell Latitude 7420 Battery Specifications
| Specification | 3-Cell Option | 4-Cell Option | Compatibility Notes |
|---|---|---|---|
| Battery Type | Li-ion 11.4V | Li-ion 11.4V | Must match original specifications |
| Capacity | 42Wh | 68Wh | Higher capacity = longer runtime |
| Dimensions | 208mm x 70mm x 6mm | 208mm x 100mm x 6mm | Physical fit critical |
| Part Number | Dell 09F4F0 | Dell 6GTPY | Verify with Service Tag |
| Weight | 180g | 260g | Affects portability |
🛡️ Critical Lithium-ion Battery Safety Protocol
- Pre-Removal Safety Check:
- Visually inspect for swelling or deformation
- Check for leakage or unusual odors
- Note any previous impact damage
- If swollen: STOP and follow special procedures
- Power Isolation Sequence:
- Disconnect AC power adapter completely
- Ensure laptop is fully powered down
- Disconnect internal battery connector (already completed)
- Press power button for 15 seconds to discharge
- Personal Protective Equipment:
- Safety glasses (mandatory)
- Cut-resistant gloves
- ESD wrist strap properly grounded
- Fire extinguisher nearby (Class D recommended)
🔧 Step-by-Step Battery Removal Procedure
- Battery Connector Identification:
- Locate white 4-pin battery connector on motherboard
- Identify locking mechanism orientation
- Ensure connector is fully disconnected
- Secure connector away from contact points
- Battery Screw Removal:
- Remove 4 Phillips #00 screws securing battery
- Note screw lengths for reassembly
- Place screws in labeled container
- Check for any hidden screws or adhesive
- Battery Extraction:
- Lift battery straight up from chassis
- Avoid bending or flexing the battery
- Handle by edges only, avoid pressure on cells
- Place on non-conductive, fire-resistant surface
🚨 Swollen Battery Emergency Protocol
| Situation | Immediate Action | Safety Precautions | Professional Handling |
|---|---|---|---|
| Minor Swelling | Proceed with extreme caution | Double PPE, fire extinguisher ready | Recommended for safety |
| Significant Swelling | Stop immediately, isolate area | Evacuate if odor or heat detected | Required - do not attempt |
| Punctured or Leaking | Emergency procedures activated | Fire department contact immediately | Professional hazardous materials |
📊 Battery Health Assessment Methods
- Windows Battery Report:
- Open Command Prompt as administrator
- Run:
powercfg /batteryreport - Check "DESIGN CAPACITY" vs. "FULL CHARGE CAPACITY"
- Document cycle count and wear percentage
- Dell Power Manager Analysis:
- Use Dell Power Manager
- Check battery health status and alerts
- Review charge history and patterns
- Export reports for documentation
- Physical Inspection:
- Measure actual thickness for swelling
- Check for corrosion on contacts
- Test actual runtime vs. expected
- Document any physical damage
⚡ New Battery Installation Protocol
- Compatibility Verification:
- Match part numbers exactly
- Verify physical dimensions fit
- Check voltage and capacity specifications
- Test connector compatibility
- Safe Installation Steps:
- Place battery in chassis alignment
- Secure with proper screws and torque
- Connect battery connector firmly
- Verify locking mechanism engagement
- Initial Power-Up:
- Reconnect AC power first
- Allow initial charge cycle
- Test charging indicator functionality
- Verify battery detection in BIOS
🔌 Power Management System Verification
| Component | Test Procedure | Expected Result | Business Importance |
|---|---|---|---|
| Charging Circuit | Monitor charging rate and temperature | Stable charge, no overheating | Critical (safety and functionality) |
| Battery Detection | Check BIOS and Windows recognition | Full capacity shown accurately | High (user confidence) |
| Power States | Test sleep, hibernate, shutdown | Proper state transitions | Medium (professional use) |
| Runtime Performance | Actual usage time measurement | Meets manufacturer specifications | High (portability value) |
🔧 Common Battery Issues & Solutions
| Issue | Symptoms | Likely Cause | Professional Solution |
|---|---|---|---|
| Not Detected | "No battery detected" message | Connector issue, circuit failure | Reseat connector, check motherboard |
| Not Charging | Stuck at percentage, no charge | Charging circuit, battery failure | Test with known-good charger |
| Rapid Discharge | Drains quickly with minimal use | Old battery, power management | Battery replacement, system optimization |
| Overheating | Excessive heat during charge/use | Battery failure, charging circuit | Immediate replacement, safety first |
♻️ Proper Battery Disposal & Recycling
- Recycling Centers:
- Best Buy, Staples, Office Depot drop-off
- Local hazardous waste facilities
- Dell recycling program participation
- Safety Preparation:
- Tape battery terminals with electrical tape
- Place in separate plastic bag
- Label as "Lithium-ion Battery for Recycling"
- Do not dispose of in regular trash
💼 Battery Health Documentation for Resale
- Health Verification Records:
- Battery health report screenshots
- Cycle count and capacity documentation
- Purchase receipt for new batteries
- Warranty information and transfer details
- Performance Demonstration:
- Actual runtime test results
- Charging speed and efficiency data
- Power management settings configured
- Professional installation documentation
💰 Battery Replacement ROI Analysis
| Scenario | Parts Cost | Time Investment | Value Added | ROI Percentage |
|---|---|---|---|---|
| Poor Battery Replacement | $100-$160 | 25-35 minutes | +$180-$260 | 180-260% |
| Preventive Replacement | $100-$160 | 25-35 minutes | +$140-$220 | 140-220% |
| Capacity Upgrade | $130-$190 | 25-35 minutes | +$160-$240 | 120-180% |
✅ Battery Removal & Safety Completion Checklist
- ✓ Battery health assessed and documented
- ✓ Safety protocols followed throughout
- ✓ Proper disconnection sequence completed
- ✓ Battery removed without damage
- ✓ Replacement compatibility verified
- ✓ Safe installation procedures followed
- ✓ Power management testing completed
- ✓ Disposal/recycling arranged properly
5. Dell Latitude 7420 Motherboard Access & Component Identification
🔌 Why Professional Motherboard Access Preserves Maximum Value
Proper motherboard access and component identification can increase resale value by 35-55% by demonstrating systematic repair methodology and comprehensive understanding of business-grade laptop architecture.
| Access Method | Component Safety | Documentation Quality | Value Impact |
|---|---|---|---|
| Professional Systematic | 99%+ component safety | Comprehensive documentation | +40-55% (premium business grade) |
| Organized DIY Approach | 90-95% component safety | Basic documentation | +25-35% (good condition) |
| Rushed Access | 75-85% component safety | Minimal documentation | +10-20% (average condition) |
| Forceful Methods | 50-70% component safety | No documentation | -30-50% (damage concerns) |
⚠️ Critical Motherboard Access Safety Protocol
- Pre-Access Verification:
- Confirm battery is completely disconnected
- Verify no residual power in system
- Ensure ESD protection is active and grounded
- Document current state with photos
- Component Protection:
- Handle motherboard by edges only
- Use anti-static mats and containers
- Avoid touching gold connectors and pins
- Keep magnetic tools away from components
- Workspace Preparation:
- Clear, organized work surface
- Proper lighting with magnification
- All necessary tools within reach
- Documentation system ready
🔧 Step-by-Step Motherboard Access Procedure
- Peripheral Component Removal:
- Remove RAM modules by releasing side clips
- Disconnect and remove M.2 SSD
- Remove Wi-Fi card and antenna connections
- Document all connector orientations
- Cooling System Removal:
- Disconnect fan power cable
- Remove heatsink screws in star pattern
- Lift heatsink straight up carefully
- Clean thermal paste from CPU/GPU
- Motherboard Screw Identification:
- Locate and document all motherboard screws
- Note screw sizes and locations on diagram
- Remove screws in reverse installation order
- Keep screws organized by location
🗺️ Dell Latitude 7420 Motherboard Component Map
| Component | Location | Function | Business Criticality |
|---|---|---|---|
| CPU (Processor) | Center, under heatsink | Main processing unit | Critical (not upgradeable) |
| PCH (Platform Controller) | Near CPU, smaller chip | I/O control and management | High (system functionality) |
| Power Delivery System | Around CPU perimeter | Voltage regulation | Critical (stability and performance) |
| BIOS Chip | Near RAM slots, 8-pin | System firmware | High (boot and configuration) |
| Audio Codec | Edge near audio jacks | Sound processing | Medium (business communications) |
| Network Controller | Near Ethernet port | Wired networking | High (enterprise connectivity) |
🔌 Critical Connector Identification & Handling
| Connector Type | Location | Release Method | Risk Level |
|---|---|---|---|
| ZIF (Zero Insertion Force) | Keyboard, touchpad, display | Lift brown locking flap upward | High (delicate mechanism) |
| Latch-Type Connectors | Power, USB ports, audio | Press latch and pull straight | Medium (firm but careful) |
| Push-Pull Connectors | Fan, battery, some sensors | Pull straight out gently | Low (robust design) |
| Board-to-Board Connectors | Between motherboard and daughterboards | Specific release mechanisms | Very High (consult manual) |
🔍 Business-Grade Component Identification
- Enterprise Features:
- Intel vPro technology components
- TPM (Trusted Platform Module) chip
- SmartCard reader controller
- Fingerprint reader connector
- Dell-Specific Components:
- Dell Power Manager circuitry
- SupportAssist hardware integration
- ProSupport compatible sensors
- Dell-specific BIOS and firmware
🔎 Professional Visual Inspection Protocol
| Inspection Area | What to Look For | Professional Tools | Documentation Method |
|---|---|---|---|
| Power Section | Burnt components, swollen capacitors | Magnifying glass, bright light | Macro photos, detailed notes |
| CPU/GPU Area | Thermal paste leakage, discoloration | Thermal camera (optional) | Temperature benchmarks |
| Connector Areas | Bent pins, cracked sockets | Magnification, good lighting | Close-up photos, connector maps |
| Board Surface | Scratches, corrosion, liquid damage | Various angle lighting | Overall board photos |
📊 Motherboard Diagnostic Test Points
- Power Rail Testing:
- 3.3V standby power (always present)
- 5V system power (when powered)
- CPU core voltage (under load)
- Memory voltage (1.2V for DDR4)
- Signal Testing:
- Power button signal continuity
- BIOS chip select signals
- Clock generator outputs
- Reset signal patterns
- Component Functionality:
- USB port data and power lines
- Audio jack detection circuits
- Network interface activity
- Display output signals
🔧 Common Motherboard Access Issues
| Issue | Symptoms | Professional Solution | Prevention |
|---|---|---|---|
| Stripped Screws | Cannot remove, damaged heads | Screw extraction tools, careful drilling | Proper bit size, correct torque |
| Stuck Connectors | Won't release, feels stuck | Plastic tools, isopropyl alcohol | Proper release technique |
| Hidden Screws | Motherboard won't lift out | Consult service manual, careful inspection | Thorough pre-removal inspection |
| Component Damage | Physical damage during access | Professional repair or replacement | Careful handling, proper tools |
📋 Professional Documentation Protocol
- Before Access Documentation:
- Overall motherboard layout photos
- Connector locations and orientations
- Screw locations and patterns
- Component condition baseline
- During Access Documentation:
- Step-by-step disassembly photos
- Connector removal techniques
- Screw organization system
- Component handling methods
- Component-Level Documentation:
- High-resolution component photos
- Test point measurements and results
- Diagnostic findings and analysis
- Repair decisions and justifications
💼 Business-Critical Component Identification
| Business Feature | Component Location | Testing Method | Resale Value Impact |
|---|---|---|---|
| Intel vPro Technology | CPU and PCH integration | BIOS settings, remote management | +$150-$250 |
| TPM 2.0 Security | Dedicated chip on motherboard | Windows Device Manager verification | +$80-$120 |
| Dell ProSupport | Service tag verification | Dell Support Site check | +$100-$180 |
| SmartCard Reader | Separate controller chip | Physical and functional testing | +$60-$100 |
⚙️ Reassembly Preparation & Organization
- Screw Management System:
- Labeled containers for each screw type
- Photographic reference of screw locations
- Torque specifications documented
- Spare screws identified and noted
- Connector Organization:
- Document orientation of each connector
- Note locking mechanism types
- Test connectors before reassembly
- Verify proper seating during reassembly
✅ Motherboard Access Completion Checklist
- ✓ All peripheral components safely removed
- ✓ Motherboard screws identified and organized
- ✓ Connectors properly documented and released
- ✓ Comprehensive visual inspection completed
- ✓ Diagnostic test points identified
- ✓ Business-critical components verified
- ✓ Professional documentation package updated
- ✓ Reassembly preparation organized
6. Dell Latitude 7420 LCD Screen & Display Assembly Removal
💎 Why Professional Display Removal Preserves Maximum Value
Proper LCD removal technique can preserve 40-60% of resale value by preventing costly display damage and demonstrating professional-grade handling that business buyers trust.
| Removal Method | Success Rate | Damage Risk | Value Impact |
|---|---|---|---|
| Professional Technique | 98%+ | Very Low | Preserves full premium value |
| Careful DIY Approach | 85-90% | Low-Medium | Minor value reduction (-10-20%) |
| Improper Methods | 60-75% | High | Significant value loss (-40-60%) |
| Forceful Removal | 30-50% | Very High | Total display destruction (-80%+) |
⚠️ Critical LCD Removal Safety Precautions
- LCD Fragility Warning:
- Screens are extremely delicate - handle with extreme care
- Never press on the screen surface directly
- Use proper tools to avoid cracking or pressure marks
- Work on soft, clean, static-free surface
- Power & ESD Safety:
- Confirm battery is disconnected from motherboard
- Discharge residual power by pressing power button
- Use anti-static wrist strap throughout process
- Handle components by edges and frames only
- Personal Safety:
- Wear safety glasses - glass shards can cause injury
- Use cut-resistant gloves for bezel removal
- Work in well-ventilated area if using adhesives
🔍 Dell Latitude 7420 Display Specifications
| Display Option | Resolution | Panel Technology | Connector Type | Business Value |
|---|---|---|---|---|
| Standard FHD | 1920x1080 | IPS | 30-pin eDP | Base value |
| Touch FHD | 1920x1080 | IPS with Touch | 40-pin eDP + touch | +$150-$250 |
| Privacy FHD | 1920x1080 | IPS with Privacy | 30-pin eDP + privacy | +$200-$350 |
| 4K UHD | 3840x2160 | IPS Premium | 40-pin eDP | +$300-$500 |
🛠️ Essential Display Removal Tools
- Basic Tools:
- Phillips #00 screwdriver
- Plastic spudgers and opening tools
- Suction cups (for screen handling)
- Anti-static tweezers
- Specialized Tools:
- Plastic guitar picks for bezel removal
- Double-sided tape (2mm width for reassembly)
- Heat gun or hair dryer (for adhesive softening)
- Magnifying glass or head-mounted magnifier
🔧 Step-by-Step Display Removal Procedure
- Bezel Removal Preparation:
- Place laptop on soft microfiber cloth
- Identify bezel clip locations around perimeter
- Apply gentle heat to soften adhesive (if present)
- Start from bottom edge near touchpad
- Professional Bezel Removal:
- Use plastic spudger at 45-degree angle to bezel
- Apply gentle, consistent pressure until clip releases
- Listen for distinct "click" sound
- Work around perimeter systematically
- Lift bezel straight up once all clips released
- Screen Assembly Removal:
- Remove 4 corner screws securing display panel
- Apply suction cups to screen for safe handling
- Lift screen assembly forward carefully
- Support display from behind during removal
🔌 Display Connector Identification & Handling
| Connector Type | Location | Release Method | Risk Level |
|---|---|---|---|
| eDP (Display) | Back of LCD panel | Lift locking flap upward gently | Very High (delicate pins) |
| Webcam/Mic | Top center of display assembly | ZIF connector - lift flap | High (thin cables) |
| Wi-Fi Antennas | Display lid corners | Push-pull connectors | Medium (robust but careful) |
| Touch Screen (if equipped) | Separate connector near eDP | ZIF connector similar to display | High (delicate touch layer) |
⚙️ Display Hinge Removal Protocol
- Hinge Screw Identification:
- Locate 2-3 screws per hinge (typically Torx T8)
- Note screw lengths for reassembly
- Document hinge orientation and alignment
- Check for hidden screws under labels
- Safe Hinge Removal:
- Support display assembly during screw removal
- Remove screws in diagonal pattern for stability
- Lift display assembly straight up
- Inspect hinge mechanisms for wear or damage
📐 Professional Cable Routing & Management
| Cable Type | Routing Path | Handling Precautions | Testing Method |
|---|---|---|---|
| eDP Display Cable | Through hinge channels | Avoid sharp bends, handle by edges | Continuity test, visual inspection |
| Wi-Fi Antenna Cables | Along display edges | Don't kink or stretch | Signal strength testing |
| Webcam Cable | Center top routing | Very delicate, minimal handling | Functionality test after reassembly |
| Touch Screen Cable | Parallel to eDP cable | Extremely fragile, avoid bending | Touch functionality verification |
7. Dell Latitude 7420 Motherboard Diagnostic & Repair Techniques
🔧 Why Professional Motherboard Repair Delivers Maximum ROI
Expert motherboard diagnostics and repair can transform a non-functional $200 laptop into a $600-800 business-ready machine, delivering 200-300% ROI through systematic troubleshooting and professional component-level repair.
| Repair Level | Technical Complexity | Tools Required | Value Restoration |
|---|---|---|---|
| Component-Level Repair | Advanced (micro-soldering) | $500-$2,000+ | 80-95% of original value |
| Board-Level Repair | Intermediate (soldering) | $200-$500 | 60-80% of original value |
| Module Replacement | Basic (connector-level) | $50-$200 | 40-60% of original value |
| Diagnostic Only | Entry (testing) | $20-$100 | +20-30% (verified working) |
🛠️ Professional Diagnostic Equipment Requirements
| Equipment Type | Purpose | Investment Range | Business Necessity |
|---|---|---|---|
| Digital Multimeter | Voltage/continuity testing | $50-$200 | Essential |
| Thermal Camera | Heat pattern analysis | $200-$800 | Highly Recommended |
| USB Microscope | Component inspection | $100-$300 | Recommended |
| DC Power Supply | Power circuit testing | $150-$400 | Professional |
| Hot Air Rework Station | Component replacement | $300-$1,000 | Advanced Repair |
🔍 Systematic Diagnostic Procedure
- Visual Inspection Protocol:
- Examine under magnification for physical damage
- Check for burnt components and discoloration
- Look for corrosion or liquid damage indicators
- Inspect solder joints for cracks or cold joints
- Power Rail Testing:
- Test 3.3V standby power (always present)
- Check 5V system power rails
- Verify CPU core voltage requirements
- Test memory and chipset power domains
- Signal Path Analysis:
- Check clock generator outputs
- Test reset signal propagation
- Verify BIOS chip communication
- Test communication buses (I2C, SMBus)
🔧 Common Dell Latitude 7420 Motherboard Issues
| Issue Category | Specific Problems | Repair Complexity | Success Rate |
|---|---|---|---|
| Power Circuit Failures | DC jack, charging IC, MOSFETs | Medium | 85-90% |
| BIOS/EC Issues | Corrupted firmware, BIOS chip failure | Medium-High | 75-85% |
| Connector Damage | USB ports, display connector, power | Low-Medium | 90-95% |
| BGA Component Failure | CPU, PCH, GPU delamination | Very High | 50-70% |
| Liquid Damage | Corrosion, short circuits | High | 60-80% |
⚡ Professional Repair Techniques
🔌 Soldering & Desoldering Methods
- Through-Hole Component Replacement:
- Use desoldering wick or solder sucker
- Apply flux for clean joint formation
- Use appropriate temperature (300-350°C)
- Surface Mount Component Work:
- Hot air station for multi-pin components
- Fine tip iron for small passives
- Use magnification for precision work
- BGA Rework (Advanced):
- Pre-heat entire board to prevent warping
- Use stencils for proper solder paste application
- Post-reflow inspection under microscope
⚙️ Dell Latitude 7420 Specific Repairs
| Dell-Specific Issue | Symptoms | Repair Solution | Tools Required |
|---|---|---|---|
| Dell Power Manager IC Failure | Not charging, power fluctuations | Replace BQ24780S IC | Hot air station, microscope |
| EC (Embedded Controller) Issues | Keyboard not working, no power | Re-flash or replace EC | Programmer, hot air station |
| USB-C Port Damage | Not charging, no data transfer | Replace USB-C controller IC | Fine tip iron, microscope |
| Dell BIOS Corruption | No boot, recovery mode needed | Use Dell BIOS Recovery | USB drive, BIOS programmer |
💻 Diagnostic Software & Tools
- Dell Official Tools:
- Dell SupportAssist - Hardware diagnostics
- Dell Command | Configure - Enterprise management
- Dell BIOS Updates - Firmware management
- Third-Party Diagnostic Software:
- HWiNFO64 - Comprehensive system info
- CPU-Z - Processor and memory details
- MemTest86 - Memory testing
- Advanced Repair Software:
- BoardView files for circuit tracing
- BIOS programming software
- EC firmware update tools
📊 Repair Difficulty Assessment Guide
| Repair Type | Skill Level | Time Investment | Success Probability | Recommended Action |
|---|---|---|---|---|
| Capacitor Replacement | Beginner | 30-60 minutes | 90-95% | DIY Recommended |
| DC Jack Replacement | Intermediate | 45-90 minutes | 85-90% | DIY with Experience |
| BIOS Chip Replacement | Advanced | 60-120 minutes | 75-85% | Professional Recommended |
| BGA Reballing | Expert | 2-4 hours | 60-75% | Professional Only |
⚠️ Advanced Repair Safety Protocol
- Electrical Safety:
- Always disconnect power before soldering
- Use isolation transformers when working on live circuits
- Discharge capacitors before handling
- Chemical Safety:
- Use fume extraction when soldering
- Wear gloves when handling flux and cleaners
- Work in well-ventilated area
- ESD Protection:
- Maintain ESD protection throughout repair
- Use grounded mats and wrist straps
- Store components in anti-static packaging
🛒 Professional Component Sourcing
| Component Source | Quality Level | Lead Time | Cost Factor | Recommended For |
|---|---|---|---|---|
| Dell OEM Parts | Highest | 3-7 days | 1.5-2x | Critical components |
| Authorized Distributors | High | 2-5 days | 1.2-1.5x | Quality repairs |
| Reputable Suppliers | Good | 1-3 days | 1.0-1.2x | General repairs |
| Salvage/Donor Boards | Variable | Immediate | 0.3-0.7x | Budget repairs |
🧪 Post-Repair Testing & Validation
- Basic Functionality Test:
- Power on and BIOS access
- Memory detection and testing
- Storage device recognition
- Basic I/O functionality
- Stress Testing:
- CPU load testing with Prime95
- Memory testing with MemTest86
- Thermal performance validation
- Extended stability testing
- Business Feature Verification:
- vPro functionality testing
- TPM security verification
- Dell enterprise features
- Warranty status confirmation
📋 Professional Repair Documentation
- Before Repair Documentation:
- High-resolution motherboard photos
- Diagnostic measurements and readings
- Failure symptoms and patterns
- Component-level close-ups
- During Repair Documentation:
- Step-by-step repair photos
- Replacement component verification
- Soldering quality documentation
- Testing procedures and results
- After Repair Documentation:
- Final testing results and benchmarks
- Performance validation data
- Warranty information for replaced parts
- Professional certification of repair quality
💰 Motherboard Repair ROI Analysis
| Repair Scenario | Parts Cost | Time Investment | Value Restored | Net Profit |
|---|---|---|---|---|
| Power Circuit Repair | $15-$40 | 60-90 minutes | $400-$600 | $350-$550 |
| BIOS/EC Repair | $5-$20 | 30-60 minutes | $500-$700 | $475-$680 |
| Connector Replacement | $10-$30 | 45-75 minutes | $450-$650 | $420-$620 |
| Complex BGA Repair | $50-$150 | 3-4 hours | $600-$800 | $450-$650 |
✅ Motherboard Repair Completion Checklist
- ✓ Comprehensive diagnostics completed
- ✓ Root cause identified and documented
- ✓ Professional repair techniques applied
- ✓ All replaced components verified
- ✓ Post-repair testing successfully passed
- ✓ Performance benchmarks documented
- ✓ Business features verified functional
- ✓ Professional documentation package complete
8. Dell Latitude 7420 LCD Replacement & Display Quality Verification
💎 Why Professional Display Replacement Maximizes Resale Value
A professionally installed, high-quality display can increase resale value by 45-65% by creating immediate visual appeal and demonstrating premium workmanship that business buyers trust.
| Replacement Quality | Buyer Perception | Installation Time | Value Impact |
|---|---|---|---|
| Professional Grade | Like-new, premium quality | 60-90 minutes | +$250-$400 |
| Quality DIY | Good condition, reliable | 45-75 minutes | +$150-$250 |
| Basic Replacement | Functional, some imperfections | 30-60 minutes | +$80-$150 |
| Upgrade Installation | Enhanced, premium feature | 75-120 minutes | +$300-$500 |
🔍 Dell Latitude 7420 Display Compatibility Guide
| Specification | Original Options | Upgrade Possibilities | Verification Method |
|---|---|---|---|
| Screen Size | 14.0 inches (fixed) | No alternative sizes | Physical measurement |
| Resolution | FHD (1920x1080) | FHD only (no 4K support) | BIOS display, Windows settings |
| Panel Technology | IPS standard | IPS upgrades available | Viewing angle test |
| Connector Type | 30-pin eDP | Must match exactly | Physical inspection |
| Mounting Points | 4 corner screws | Standard 14" pattern | Template verification |
🔧 Professional Installation Procedure
- New Display Preparation:
- Verify compatibility with Dell Service Tag
- Test new display before installation
- Check for dead pixels and backlight uniformity
- Document new panel specifications
- Professional Installation Steps:
- Connect eDP cable to new panel first
- Align mounting holes precisely
- Secure with proper screw torque
- Test functionality before bezel reinstallation
- Bezel Reinstallation:
- Clean bezel and apply new adhesive if needed
- Align clips and press firmly around perimeter
- Verify even gaps and proper fit
- Test all functions after reassembly
📊 Display Panel Quality Grades Explained
| Quality Grade | Defect Allowance | Brightness Uniformity | Color Accuracy | Business Recommendation |
|---|---|---|---|---|
| A+ (Premium) | 0 dead pixels | 95%+ uniform | ΔE < 2 | Highly recommended |
| A (Excellent) | 0-1 dead pixels | 90%+ uniform | ΔE < 3 | Recommended |
| B (Good) | 1-3 dead pixels | 85%+ uniform | ΔE < 5 | Budget option |
| C (Fair) | 3-5 dead pixels | 80%+ uniform | ΔE < 8 | Not recommended |
🧪 Comprehensive Display Quality Testing
- Basic Functionality Tests:
- Power on and verify display detection
- Test brightness controls through function keys
- Check for immediate backlight issues
- Verify resolution recognition
- Visual Quality Assessment:
- Use EIZO Monitor Test
- Check for dead/stuck pixels with solid colors
- Test backlight uniformity with gray screens
- Verify color gradients and banding
- Professional Calibration:
- Adjust color temperature (6500K recommended)
- Set gamma to 2.2 for standard use
- Calibrate brightness for environment (200-300 nits)
- Save profile for consistent performance
🔧 Common Installation Issues & Solutions
| Issue | Symptoms | Likely Cause | Professional Solution |
|---|---|---|---|
| No Display | Black screen, backlight off | eDP cable not seated properly | Reseat connector, check locking mechanism |
| Flickering | Intermittent display, artifacts | Loose connection or incompatible panel | Verify compatibility, secure connections |
| Color Distortion | Incorrect colors, banding | Driver issues or cable problems | Update graphics drivers, check cable |
| Backlight Bleed | Light leakage at edges | Improper mounting pressure | Adjust mounting, check bezel pressure |
💼 Business Display Feature Verification
| Business Feature | Testing Method | Acceptance Criteria | Value Impact |
|---|---|---|---|
| Viewing Angles | 45° angle viewing test | Minimal color shift, no inversion | +$80-$120 |
| Brightness Levels | Lux meter measurement | 250+ nits, 10+ brightness levels | +$60-$100 |
| Color Accuracy | sRGB coverage test | 90%+ sRGB coverage | +$100-$150 |
| Response Time | Ghosting test patterns | Minimal motion blur | +$40-$80 |
🎨 Professional Display Calibration
- Basic Software Calibration:
- Use Windows Display Calibration tool
- Adjust gamma, brightness, contrast
- Set color balance for natural tones
- Save ICC profile for consistency
- Advanced Calibration (Professional):
- Use hardware colorimeter (X-Rite, Datacolor)
- Create custom ICC profiles
- Verify Delta E < 2 for professional work
- Document calibration results
📋 Professional Documentation Strategy
- Before/After Documentation:
- High-resolution photos of old and new displays
- Side-by-side comparison under same conditions
- Close-ups of pixel structure and quality
- Functionality demonstration videos
- Quality Verification Records:
- Dead pixel test results
- Backlight uniformity measurements
- Color accuracy test data
- Brightness and contrast ratios
- Professional Installation Proof:
- Installation process photos
- Component quality documentation
- Calibration certificates (if applicable)
- Warranty information for new display
💰 Display Replacement ROI Analysis
| Replacement Scenario | Parts Cost | Time Investment | Value Added | ROI Percentage |
|---|---|---|---|---|
| Cracked Screen Replacement | $100-$150 | 60-90 minutes | +$300-$450 | 200-350% |
| Quality Upgrade | $120-$180 | 60-90 minutes | +$250-$380 | 180-280% |
| Premium Upgrade | $150-$220 | 75-105 minutes | +$350-$520 | 200-320% |
🛡️ Warranty & Support Considerations
- Panel Warranty Options:
- 30-day dead pixel warranty (standard)
- 90-day comprehensive warranty (premium)
- 1-year warranty (OEM equivalent)
- Installation Warranty:
- 90-day workmanship warranty
- Lifetime support for installation issues
- Documented repair process for future reference
✅ Display Replacement Completion Checklist
- ✓ Compatibility verified before purchase
- ✓ New display tested before installation
- ✓ Professional installation technique used
- ✓ All functions verified after installation
- ✓ Quality testing and calibration completed
- ✓ Documentation package prepared
- ✓ Warranty information organized
- ✓ Business features verified functional
9. Dell Latitude 7420 Cooling System Maintenance & Thermal Repasting
💨 Why Thermal Management Directly Impacts Performance & Resale Value
Professional cooling system maintenance can increase sustained performance by 15-25% and resale value by 20-35% by demonstrating comprehensive care that business buyers associate with longevity and reliability.
| Maintenance Level | Performance Impact | Acoustic Improvement | Value Increase |
|---|---|---|---|
| Professional Repasting | 10-15°C reduction | 20-30% quieter | +$80-$120 |
| Complete System Service | 15-25°C reduction | 30-40% quieter | +$120-$180 |
| Premium Upgrade | 20-30°C reduction | 40-50% quieter | +$150-$220 |
| Neglected System | Thermal throttling | Loud, inconsistent | -$100-$160 |
🔍 Dell Latitude 7420 Cooling System Specifications
| Component | Specifications | Maintenance Frequency | Business Importance |
|---|---|---|---|
| Heatsink Assembly | Copper base, aluminum fins | 12-18 months | Critical (performance) |
| Cooling Fan | Single fan, ball bearing | 6-12 months | High (reliability) |
| Heat Pipes | Dual heat pipes, 6mm diameter | Inspection only | Critical (heat transfer) |
| Thermal Interface | Factory paste + pads | 12-24 months | High (efficiency) |
⚠️ Thermal Management Safety Protocol
- Pre-Service Safety:
- Complete power down and battery disconnect
- Allow system to cool to room temperature
- Verify no residual heat in components
- ESD protection throughout process
- Chemical Safety:
- Use isopropyl alcohol in well-ventilated area
- Wear gloves when handling thermal compounds
- Avoid skin contact with cleaning chemicals
- Proper disposal of used materials
🧴 Professional Thermal Paste Selection Guide
| Paste Type | Performance | Application Difficulty | Longevity | Business Recommendation |
|---|---|---|---|---|
| Premium Performance | Excellent (8-12 W/mK) | Easy-Medium | 3-5 years | Highly Recommended |
| High Performance | Very Good (6-8 W/mK) | Easy | 2-4 years | Recommended |
| Standard Quality | Good (4-6 W/mK) | Very Easy | 1-3 years | Budget Option |
| Factory Equivalent | Adequate (2-4 W/mK) | Very Easy | 1-2 years | Minimum Acceptable |
⭐ Recommended Thermal Compounds
- Premium Performance ($12-20):
- Thermal Grizzly Kryonaut - Best performance
- Arctic MX-6 - Excellent balance
- Noctua NT-H2 - Reliable premium option
- High Performance ($8-15):
- Arctic MX-4 - Great value
- Cooler Master MasterGel Pro - Good performance
- Thermalright TFX - High viscosity option
- Budget Friendly ($5-10):
- Arctic Silver 5 - Classic reliable
- Deepcool Z5 - Good budget option
🧹 Professional Cleaning & Preparation
- Heatsink Removal:
- Remove screws in reverse star pattern
- Lift heatsink straight up to avoid damage
- Note thermal pad locations and thicknesses
- Document screw locations and torque
- Surface Cleaning:
- Use 99% isopropyl alcohol and lint-free wipes
- Clean both CPU/GPU and heatsink surfaces
- Remove all old paste residue completely
- Allow surfaces to dry completely
- Fan & Fin Cleaning:
- Use compressed air to blow out dust
- Clean fan blades with alcohol and brush
- Check fan bearing for smooth operation
- Verify no obstructions in airflow paths
🎨 Professional Thermal Paste Application Methods
| Application Method | Recommended For | Paste Amount | Success Rate |
|---|---|---|---|
| Pea/Grain Method | Most CPUs, beginner-friendly | Grain of rice size | 95%+ |
| X Method | Larger dies, experienced users | Thin X pattern | 90%+ |
| Spread Method | Precision control, professionals | Thin even layer | 98%+ |
| Dot Method | Small dies, low-viscosity paste | Small central dot | 85%+ |
📏 Thermal Pad Replacement Guide
| Component | Original Thickness | Recommended Replacement | Conductivity |
|---|---|---|---|
| VRM Power Stages | 1.0mm | 1.0mm, 6 W/mK+ | High (critical) |
| Memory ICs | 0.5mm | 0.5mm, 5 W/mK+ | Medium |
| PCH Chipset | 1.5mm | 1.5mm, 4 W/mK+ | Medium |
| Other Components | Varies | Match original thickness | Low-Medium |
⚙️ Professional Reassembly Protocol
- Heatsink Installation:
- Apply even pressure during placement
- Use star pattern for screw tightening
- Torque to manufacturer specification
- Verify proper contact pattern
- Fan & Cable Management:
- Route fan cable away from moving parts
- Secure cables with original routing
- Test fan operation before final assembly
- Verify smooth, quiet operation
🧪 Post-Service Testing & Validation
| Test Type | Method | Target Results | Business Value |
|---|---|---|---|
| Idle Temperature | 15-minute idle monitoring | 35-45°C (ambient +10-15°C) | Quiet operation |
| Load Temperature | Prime95 Small FFTs 30min | 75-85°C (no throttling) | Sustained performance |
| Fan Acoustic Test | Various speed levels | Smooth ramp-up, no bearing noise | Professional environment |
| Stability Test | Combined CPU+GPU load | Stable temperatures, no crashes | Business reliability |
📊 Expected Performance Improvements
| Scenario | Before Service | After Professional Service | Improvement |
|---|---|---|---|
| Idle Operation | 50-60°C | 35-42°C | 15-18°C reduction |
| Office Workload | 65-75°C | 45-55°C | 20-25°C reduction |
| Heavy Load | 85-95°C (throttling) | 65-75°C (stable) | 20-25°C reduction |
| Fan Noise | Audible at desktop | Nearly silent | 30-40% quieter |
💼 Business Benefits of Thermal Management
- Performance Consistency:
- Sustained CPU/GPU performance under load
- No thermal throttling during intensive tasks
- Consistent performance for business applications
- Professional Environment:
- Quiet operation in meetings and offices
- Reduced distraction in shared workspaces
- Professional acoustic profile
- Longevity & Reliability:
- Extended component lifespan
- Reduced thermal stress on electronics
- Lower failure rates over time
📋 Professional Documentation Strategy
- Before/After Documentation:
- Temperature benchmark comparisons
- Fan noise level measurements
- Performance test results
- Thermal imaging (if available)
- Process Documentation:
- Thermal compound application photos
- Cleaning process documentation
- Component condition before service
- Professional products used
💰 Thermal Management ROI Analysis
| Service Level | Materials Cost | Time Investment | Value Added | ROI Percentage |
|---|---|---|---|---|
| Basic Repasting | $8-$15 | 30-45 minutes | +$80-$120 | 800-1200% |
| Complete Service | $15-$25 | 45-60 minutes | +$120-$180 | 700-1000% |
| Premium Upgrade | $25-$40 | 60-75 minutes | +$150-$220 | 500-800% |
⏰ Recommended Maintenance Schedule
- Basic Cleaning: Every 6 months (compressed air)
- Fan Inspection: Every 12 months
- Complete Repasting: Every 18-24 months
- Full System Service: Before resale for maximum value
✅ Cooling System Service Completion Checklist
- ✓ Comprehensive cleaning completed
- ✓ High-quality thermal compound applied
- ✓ Thermal pads replaced as needed
- ✓ Proper reassembly and torque applied
- ✓ Post-service testing completed
- ✓ Performance improvements documented
- ✓ Professional documentation package updated
10. Where to Sell Your Repaired Dell Latitude 7420 for Maximum Profit
💰 Strategic Platform Selection Can Increase Profit by 40-60%
Choosing the right selling platform for your professionally repaired Dell Latitude 7420 can increase your final profit by 40-60% by targeting buyers who value documented repairs and business-grade quality.
| Selling Platform | Target Audience | Average Premium | Ideal For |
|---|---|---|---|
| SellLaptopBack | Business Professionals | 25-40% above market | Premium documented repairs |
| SellLaptopBack | Corporate Buyers | 20-35% above market | Bulk sales, corporate programs |
| .edu Marketplaces | Students & Educators | 15-25% above market | Budget-conscious quality seekers |
| .gov Surplus Channels | Government Agencies | 10-20% above market | Official documentation value |
📊 Premium Platform Comparison Analysis
| Platform | Best For | Documentation Requirements | Sale Timeline | Profit Potential |
|---|---|---|---|---|
| SellLaptopBack | Professionally repaired business laptops | Comprehensive repair documentation | 3-7 days | Highest (35-50% premium) |
| SellLaptopBack | Corporate refresh programs | Business-grade verification | 5-10 days | High (30-45% premium) |
| .edu Campus Markets | Student budgets, academic timing | Value-focused documentation | 7-14 days | Medium (20-35% premium) |
| .gov Surplus Auctions | Government procurement | Official compliance docs | 14-30 days | Medium (15-30% premium) |
🏢 SellLaptopBack: Premium Business Marketplace Strategy
- Target Buyer Profile:
- Small business owners seeking reliability
- IT managers for department deployments
- Remote professionals needing dependable equipment
- Consultants valuing performance and portability
- Listing Optimization for SellLaptopBack:
- Emphasize "business-ready professional repairs"
- Highlight Dell Latitude enterprise features
- Show comprehensive repair documentation
- Include performance benchmarks and stress tests
- Pricing Strategy:
- Position 25-40% above comparable models
- Justify premium with professional documentation
- Offer business payment terms (NET-30 if possible)
- Include professional warranty options
💼 SellLaptopBack: Corporate Sales Strategy
- Corporate Buyer Advantages:
- Higher budget allocations for reliable equipment
- Less price sensitivity for verified quality
- Potential for repeat business and referrals
- Bulk purchase opportunities
- Documentation Requirements:
- Professional repair records with timestamps
- Component-level testing and validation data
- Business-grade maintenance logs
- Tax documentation for business purchases
🎓 .edu Educational Market Strategy
| Platform Type | Examples | Target Timing | Pricing Strategy |
|---|---|---|---|
| University Surplus Stores | Campus IT surplus, official channels | Summer (pre-fall semester) | Competitive with new student discounts |
| Student Marketplaces | Campus Facebook groups, bulletin boards | August-September, January | Bundle with academic software |
| Educational Institutions | Schools, libraries, training centers | Budget cycle periods (Q1, Q3) | Emphasize durability and reliability |
🏛️ .gov Government & Institutional Sales
- Government Surplus Channels:
- State and municipal surplus auctions
- Federal equipment disposal programs
- Public university procurement departments
- Documentation Requirements:
- Official purchase receipts and records
- Maintenance and repair documentation
- Compliance and certification documents
- Tax ID and business registration
⏰ Strategic Selling Timing
| Time Period | Target Market | Pricing Advantage | Platform Focus |
|---|---|---|---|
| August-September | Students, Educational Institutions | Back-to-school demand (+20-30%) | .edu markets, general platforms |
| January | Students, Budget-conscious buyers | Post-holiday budget spending (+15-25%) | All platforms |
| Q4 (Oct-Dec) | Businesses, Professionals | Year-end budget use (+25-40%) | SellLaptopBack, SellLaptopBack |
| Tax Season (Feb-Apr) | All markets | Tax refund purchases (+10-20%) | All platforms |
📝 Premium Listing Optimization
- Title Optimization Examples:
- "Professionally Repaired Dell Latitude 7420 - Business Ready"
- "Like-New Performance with Documented Motherboard & LCD Repairs"
- "Premium Refurbished: Perfect for Corporate/Remote Work"
- Key Feature Highlights:
- Documented professional repairs with photos
- Performance benchmark results showing improvements
- Dell Latitude enterprise features emphasized
- Professional maintenance and testing documentation
- Photography Strategy:
- High-quality, professional product photos
- Before/after repair comparisons
- Performance test screenshots and results
- Professional workspace context shots
💵 Strategic Pricing Framework
| Pricing Tier | Target Price | Justification | Expected Time to Sell |
|---|---|---|---|
| Premium Pricing | 35-50% above market | Comprehensive professional documentation | 14-21 days |
| Competitive Pricing | 25-35% above market | Quality repairs with good documentation | 7-14 days |
| Quick Sale Pricing | 15-25% above market | Basic repairs, ready to use | 3-7 days |
📊 Platform Fee Comparison
| Platform | Listing Fees | Final Value Fees | Payment Processing | Total Cost |
|---|---|---|---|---|
| SellLaptopBack | 0% | 7-9% | 2.9% | 9.9-11.9% |
| SellLaptopBack | 0% | 9-11% | 3.5% | 12.5-14.5% |
| .edu Markets | 0-2% | 0-5% | 0-3% | 2-10% |
| .gov Surplus | 1-3% | 5-7% | 2.5% | 8.5-12.5% |
🛡️ Selling Risk Management
- Payment Security:
- Use platform escrow services when available
- Verify payment clearance before shipping
- Avoid wire transfers from unknown buyers
- Use tracked payment methods only
- Shipping Protection:
- Purchase full shipping insurance
- Use tracked and signature-required delivery
- Document laptop condition before shipping with photos
- Use professional packing materials
- Return Policy Strategy:
- Offer 7-14 day return policy for buyer confidence
- Charge 15-20% restocking fee for non-defective returns
- Clearly state return conditions upfront
- Document original condition thoroughly
🎁 Value-Added Services for Premium Pricing
- Warranty Options:
- 30-day money-back guarantee
- 90-day limited hardware warranty
- Lifetime technical support for installation issues
- Setup Services:
- Professional Windows installation with updates
- Driver optimization and performance tuning
- Basic business software package installation
- Accessory Bundles:
- Quality laptop bag or sleeve included
- USB-C docking station compatibility verification
- Premium wireless mouse or peripherals
🏆 Top Platform Recommendations by Scenario
- Maximum Profit: SellLaptopBack (Q4 timing, business buyers)
- Quick Sale: .edu markets (August/January timing)
- Bulk Potential: SellLaptopBack (corporate programs)
- Stable Pricing: .gov surplus (consistent demand)
✅ Final Sale Preparation Checklist
- ✓ Comprehensive cleaning and cosmetic preparation
- ✓ Professional photography and documentation package
- ✓ Performance testing and benchmark results compiled
- ✓ Platform selection and account setup completed
- ✓ Competitive pricing research conducted
- ✓ Shipping materials and insurance arranged
- ✓ Return policy and terms clearly established
- ✓ Value-added services configured
📈 Expected Success Metrics
| Platform | Expected Sale Price | Time to Sale | Net Profit After Costs |
|---|---|---|---|
| SellLaptopBack | $650-$850 | 5-10 days | $580-$780 |
| SellLaptopBack | $600-$800 | 7-14 days | $520-$700 |
| .edu Markets | $550-$700 | 10-20 days | $500-$650 |
| .gov Channels | $575-$750 | 15-30 days | $520-$680 |
Need to Sell Your Dell Laptop? Get Instant Cash!
If your Dell Latitude 7420 (or other Latitude model) has performance issues or you're upgrading to a newer business laptop, we offer competitive cash payouts for your device. We buy broken, used, and refurbished Dell Latitude laptops—including all 7420 configurations—with free insured shipping and hassle-free evaluations.
Sell Popular Dell Models Now: