On this page
- 1. Dell Inspiron 5593 Preparation & Maximizing Your Laptop's Resale Value
- 💰 Why Proper Preparation Increases Resale Value
- ✅ Pre-Disassembly Value Assessment Checklist
- 🔍 Dell Inspiron 5593 Specific Value Factors
- 🎯 Strategic Upgrade Priority Guide
- 📋 Professional Documentation for Maximum Value
- 💾 Data Backup & System Preparation
- ⚠️ Safety & Workspace Preparation
- 🎯 Target Market Positioning Strategy
- 📊 Upgrade Investment vs. Return Analysis
- ⏱️ Efficient Preparation Timeline
- ➡️ Ready for Strategic Upgrades
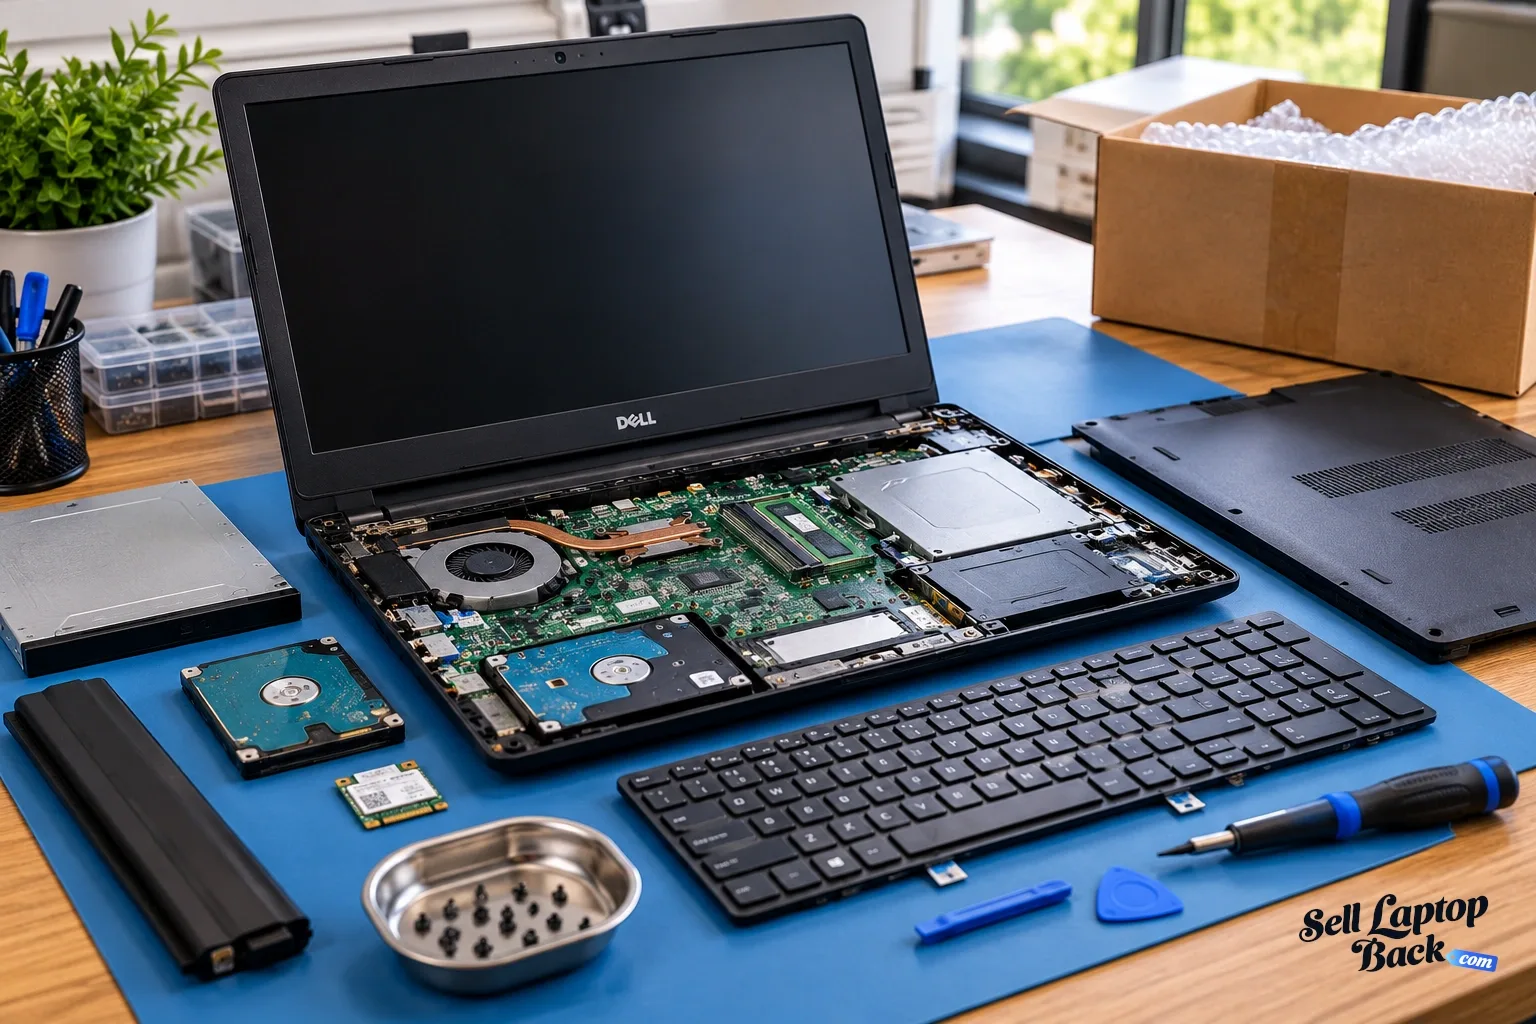
- 2. Essential Tools & Safe Workspace Setup for Dell Inspiron 5593 Repairs
- 🛠️ Why Proper Tools Increase Repair Success & Resale Value
- 📋 Dell Inspiron 5593 Essential Tool Kit
- 🔧 Dell-Specific Tool Requirements
- 🏗️ Professional Workspace Setup
- ⚠️ Safety Equipment & ESD Protection
- ⭐ Recommended Tool Brands & Sets
- 🧴 Essential Consumable Supplies
- 🗂️ Professional Organization System
- 💡 Budget-Friendly Tool Alternatives
- ✅ Workspace Setup Checklist
- 📊 Tool Investment vs. Value Analysis
- 🌐 Dell-Specific Repair Resources
- ➡️ Ready for Safe Disassembly
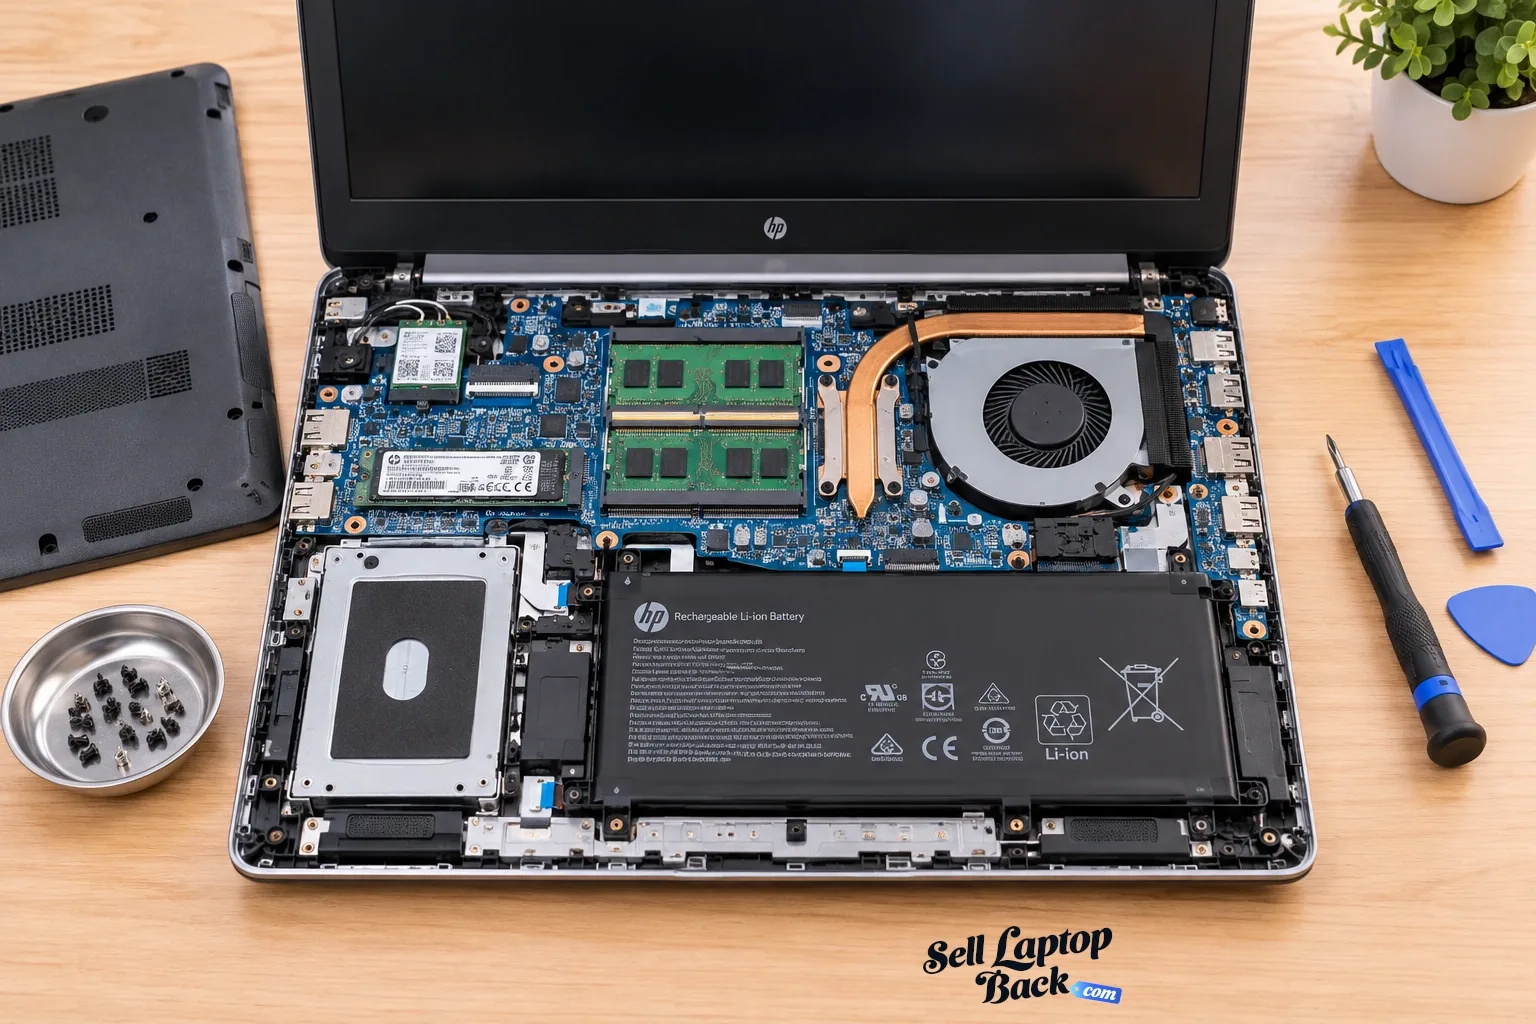
- 3. Dell Inspiron 5593 Bottom Cover Removal & Internal Component Access
- 🔓 Why Proper Bottom Cover Removal Matters
- ⚠️ Critical Pre-Removal Safety Steps
- 🔩 Dell Inspiron 5593 Screw Identification
- 🔧 Step-by-Step Bottom Cover Removal
- 📐 Dell's Clip & Latch System Explained
- 🚫 Common Bottom Cover Removal Mistakes
- 🗺️ Internal Component Identification
- 🔋 Critical: Battery Disconnection Protocol
- 📸 Professional Documentation Steps
- 🔧 Troubleshooting Stubborn Covers
- 💵 Bottom Cover Condition & Resale Value
- ✅ Bottom Cover Removal Completion Checklist
- ➡️ Ready for Component Upgrades
- 4. Dell Inspiron 5593 Motherboard Diagnostics & Easy Repair Solutions
- 🔌 Why Motherboard Health Impacts Resale Value
- ⚠️ Critical Pre-Diagnostic Safety Steps
- 🔍 Step 1: Comprehensive Visual Inspection
- 🛠️ Essential Motherboard Diagnostic Tools
- 🔧 Step-by-Step Diagnostic Procedure
- 🔧 Common Dell Inspiron 5593 Motherboard Issues
- 🛠️ Easy DIY Motherboard Repairs
- 🚨 Advanced Repair Warning: Know Your Limits
- 📋 Professional Diagnostic Documentation
- 💰 Repair Cost vs. Value Analysis
- 🔄 Motherboard Replacement Decision Guide
- ✅ Motherboard Diagnostic Completion Checklist
- ➡️ Continue Your Upgrade Journey
- 5. Dell Inspiron 5593 RAM Memory Upgrade: Boost Multitasking Performance & Resale Value
- 🚀 Why RAM Upgrades Deliver Maximum Resale ROI
- 🔍 Dell Inspiron 5593 RAM Compatibility Guide
- ⚠️ Pre-Upgrade Safety & Preparation
- 🛒 Recommended RAM Brands & Specifications
- 🔧 Step-by-Step RAM Installation
- ⚡ Performance Optimization Tips
- 🔧 Troubleshooting Common RAM Issues
- 🧪 Post-Installation Testing & Validation
- 📊 Expected Performance Improvements
- 💼 Maximizing Resale Value Presentation
- 💰 RAM Upgrade Cost vs. Value Analysis
- ✅ RAM Upgrade Completion Checklist
- ➡️ Continue Enhancing Your Dell Inspiron
- 6. Dell Inspiron 5593 SSD/HDD Storage Upgrade & Data Migration: Speed Transformation
- ⚡ Why Storage Upgrades Deliver the Most Noticeable Performance Boost
- 🔍 Dell Inspiron 5593 Storage Compatibility
- 🛒 Recommended SSD Brands & Specifications
- 📊 Data Migration Strategy Comparison
- 🔧 Step-by-Step SSD Installation
- 📋 Professional Data Cloning Procedure
- ⚡ SSD Performance Optimization
- 🔧 Common Storage Upgrade Issues & Solutions
- 📊 Expected Performance Improvements
- 💼 Maximizing Resale Value with Storage Upgrades
- 💰 Storage Upgrade ROI Analysis
- 🛠️ Recommended Migration Tools & Software
- ✅ Storage Upgrade Completion Checklist
- ➡️ Continue Your Performance Transformation
- 7. Dell Inspiron 5593 LCD Screen Replacement & Display Assembly Guide
- 💎 Why Display Quality Drives Maximum Resale Value
- 🔍 Dell Inspiron 5593 Display Compatibility
- ⚠️ Critical Display Replacement Safety Precautions
- 🔄 Screen Replacement vs. Upgrade Analysis
- 🛠️ Essential Display Replacement Tools
- 🔧 Step-by-Step Screen Replacement
- 🔌 eDP Cable & Connector Identification
- 🔄 Display Upgrade Considerations
- 🚫 Common Screen Replacement Mistakes
- 🧪 Post-Replacement Testing Protocol
- 📊 Recommended Panel Brands & Specifications
- 💼 Maximizing Resale Value with Display Quality
- 💰 Screen Replacement ROI Analysis
- 🔧 Common Issues & Solutions
- ✅ Screen Replacement Completion Checklist
- ➡️ Continue Your Display Enhancement
- 8. Dell Inspiron 5593 Battery Replacement & Power System Maintenance
- 🔋 Why Battery Health Directly Impacts Resale Value
- 🔍 Dell Inspiron 5593 Battery Specifications
- ⚠️ Critical Battery Safety Precautions
- 📊 Battery Health Assessment Methods
- 🔧 Step-by-Step Battery Replacement
- 🛒 Battery Replacement Options
- ⚡ Power Management Optimization
- 🔌 Battery Charging Best Practices
- 🔧 Common Battery Issues & Solutions
- 📋 Battery Calibration Procedure
- 💼 Battery Health Documentation for Resale
- 💰 Battery Replacement ROI Analysis
- ♻️ Proper Battery Disposal Guidelines
- ✅ Battery Replacement Completion Checklist
- ➡️ Continue Your System Optimization
- 9. Dell Inspiron 5593 Keyboard & Touchpad Repair Solutions
- ⌨️ Why Input Device Quality Drives User Satisfaction & Resale Value
- 🔍 Dell Inspiron 5593 Keyboard Specifications
- 🔧 Keyboard & Touchpad Diagnostic Procedure
- 🔍 Common Keyboard & Touchpad Issues
- 🧹 Professional Cleaning & Maintenance
- 🔧 Keyboard Replacement Procedure
- 👆 Touchpad Repair Solutions
- 🛒 Replacement Parts Guide
- 💧 Liquid Spill Recovery Procedure
- 🛡️ Preventive Maintenance Tips
- 🔧 Advanced Troubleshooting Guide
- ⚡ Repair Complexity Assessment
- 💼 Maximizing Resale Value with Input Devices
- 💰 Keyboard & Touchpad Repair ROI
- ✅ Keyboard & Touchpad Repair Checklist
- ➡️ Continue Your System Restoration
- 10. Where to Sell Your Upgraded Dell Inspiron 5593 for Maximum Profit
- 💰 Strategic Selling: Maximize Your Upgrade ROI
- 📊 Premium Platform Comparison Analysis
- 🏢 SellLaptopBack: Premium Business Marketplace Strategy
- 💼 SellLaptopBack: Corporate Sales Strategy
- 🎓 .edu Educational Market Strategy
- 🏛️ .gov Government & Institutional Sales
- ⏰ Strategic Selling Timing
- 📝 Premium Listing Optimization
- 💵 Strategic Pricing Framework
- 📊 Platform Fee Comparison
- 🛡️ Selling Risk Management
- 🎁 Value-Added Services for Premium Pricing
- ✅ Final Sale Preparation Checklist
- 🏆 Top Platform Recommendations by Scenario
- ➡️ Ready for Successful Sale
- Need to Sell Your Dell Laptop? Get Instant Cash!
1. Dell Inspiron 5593 Preparation & Maximizing Your Laptop's Resale Value
💰 Why Proper Preparation Increases Resale Value
Strategic planning before disassembling your Dell Inspiron 5593 can increase your final resale price by 30-50%. Business buyers and students pay premiums for laptops with documented upgrades and professional maintenance records.
| Preparation Step | Time Investment | Value Impact | Target Buyer Appeal |
|---|---|---|---|
| Complete Diagnostics | 15-20 minutes | +$80-$120 | Verified functionality |
| Professional Documentation | 30-45 minutes | +$150-$200 | Trust in maintenance quality |
| Strategic Upgrade Planning | 20-30 minutes | +$200-$300 | Optimal performance enhancements |
| Market Research | 25-35 minutes | +$100-$180 | Competitive pricing strategy |
✅ Pre-Disassembly Value Assessment Checklist
- Current Condition Evaluation:
- Document existing scratches, dents, or cosmetic issues
- Test all ports, keys, and functions
- Record battery health and cycle count
- Verify display quality and backlight uniformity
- Performance Baseline Establishment:
- Run UserBenchmark for system performance metrics
- Check boot times and application load speeds
- Document thermal performance under load
- Record current specifications for before/after comparison
- Market Value Research:
- Research sold prices for similar Inspiron 5593 models
- Identify competitive advantages of your specific configuration
- Note premium features buyers value most
🔍 Dell Inspiron 5593 Specific Value Factors
| Feature | Value Impact | Upgrade Potential | Buyer Appeal |
|---|---|---|---|
| 10th Gen Intel Processor | +$100-$150 | CPU replacement not practical | Modern performance capability |
| DDR4 RAM Slots (2) | +$80-$120 per 8GB upgrade | Easy memory expansion | Future-proof multitasking |
| Dual Storage Support | +$150-$220 | SSD+HDD combination possible | Speed and capacity balance |
| 15.6" Display Options | +$100-$180 for upgrades | Panel replacement feasible | Visual experience quality |
🎯 Strategic Upgrade Priority Guide
- High ROI Upgrades (Essential):
- RAM upgrade to 16GB: 200-300% return
- SSD installation: 150-250% return
- Battery replacement: 100-180% return
- Professional cleaning: 200-400% return
- Medium ROI Upgrades (Recommended):
- Display upgrade to IPS panel
- Thermal system maintenance
- Keyboard/touchpad replacement if worn
- Low ROI Upgrades (Selective):
- Cosmetic case replacements
- Motherboard-level repairs
- Major display assembly upgrades
📋 Professional Documentation for Maximum Value
- Before-Disassembly Records:
- High-quality photos from all angles
- Video demonstrating full functionality
- Performance benchmark screenshots
- Battery health reports
- Upgrade Process Documentation:
- Photos of upgrade components with receipts
- Step-by-step process images
- Professional workspace setup photos
- Quality control checkpoints
- Final Validation Records:
- After-upgrade performance comparisons
- Stress test results and thermal performance
- Functionality verification documentation
💾 Data Backup & System Preparation
- Complete Data Backup:
- Use Windows Backup for system image
- Cloud backup for important documents
- External drive for full data preservation
- Document software licenses and product keys
- System Reset Preparation:
- Create Windows recovery media
- Download latest Dell drivers from Dell Support
- Prepare clean Windows installation media
- Document current system configuration
⚠️ Safety & Workspace Preparation
| Safety Element | Preparation Requirement | Importance Level | Value Impact |
|---|---|---|---|
| ESD Protection | Anti-static mat and wrist strap | Critical | Prevents component damage |
| Workspace Organization | Clean, well-lit, organized area | High | Professional results presentation |
| Tool Preparation | All necessary tools ready | High | Efficient, damage-free work |
| Component Storage | Static-safe containers | Medium | Professional image for buyers |
🎯 Target Market Positioning Strategy
- Student Market:
- Emphasize value and durability
- Highlight compatibility with educational software
- Position as "perfect college laptop"
- Home Office Users:
- Focus on reliability and performance
- Highlight video conferencing capabilities
- Emphasize productivity enhancements
- Budget-Conscious Professionals:
- Position as "small business ready"
- Highlight cost savings versus new equivalent
- Emphasize upgrade potential and longevity
📊 Upgrade Investment vs. Return Analysis
| Upgrade Component | Estimated Cost | Value Added | ROI Percentage | Priority |
|---|---|---|---|---|
| 8GB RAM Upgrade | $25-$40 | +$80-$120 | 200-300% | Essential |
| 256GB SSD Installation | $35-$55 | +$100-$150 | 185-270% | Essential |
| Battery Replacement | $60-$90 | +$100-$140 | 110-180% | High |
| Professional Cleaning | $15-$25 | +$50-$80 | 230-400% | High |
⏱️ Efficient Preparation Timeline
- Day 1: Research, documentation, backup preparation
- Day 2: Performance testing, market research Day 3: Tool preparation, workspace setup
- Day 4: Begin physical upgrades with confidence
2. Essential Tools & Safe Workspace Setup for Dell Inspiron 5593 Repairs
🛠️ Why Proper Tools Increase Repair Success & Resale Value
Using the right tools for your Dell Inspiron 5593 teardown not only prevents damage but demonstrates professional-grade workmanship that can increase resale value by 20-35%. Buyers pay premiums for laptops repaired with proper equipment and care.
| Tool Quality Level | Investment Range | Success Rate | Resale Value Impact |
|---|---|---|---|
| Professional Grade | $80-$150 | 98%+ | +25-35% |
| Quality DIY Set | $40-$80 | 90-95% | +15-25% |
| Basic Tools | $15-$35 | 75-85% | +5-15% |
| Improvised Tools | $0-$10 | 50-70% | -10-25% (risk of damage) |
📋 Dell Inspiron 5593 Essential Tool Kit
- Precision Screwdrivers:
- Phillips #00 (primary for Dell screws)
- Phillips #0 (for larger chassis screws)
- Magnetic tips recommended for easier handling
- JIS #000 for delicate connectors (optional)
- Opening & Prying Tools:
- Plastic spudger set (various sizes)
- Guitar picks or plastic cards
- Metal spudger for stubborn clips (use carefully)
- Suction cup for display removal
- Specialized Dell Tools:
- Anti-static wrist strap (critical)
- Tweezers (non-magnetic, anti-static)
- Nylon pry tools for bezel removal
- Spudger with hook for cable connectors
🔧 Dell-Specific Tool Requirements
| Dell Component | Required Tools | Alternative Options | Risk Level |
|---|---|---|---|
| Bottom Cover Clips | Plastic spudger, opening picks | Old credit card, guitar pick | Low (with care) |
| M2.5x3mm Screws | Phillips #00 screwdriver | #0 Phillips (risk of stripping) | Medium |
| Display Bezel Clips | Nylon pry tools | Plastic spudger, careful fingers | High (display damage risk) |
| ZIF Connectors | Spudger with hook | Tweezers, careful fingernails | High (connector damage) |
🏗️ Professional Workspace Setup
| Workspace Element | Ideal Setup | Minimum Requirements | Importance |
|---|---|---|---|
| Work Surface | ESD-safe mat (3'x2') | Clean, dry wooden table | Critical |
| Lighting | 500+ lumen LED lamp | Bright natural light | High |
| Organization | Magnetic project mat | Small containers, labeled | High |
| ESD Protection | Wrist strap + mat | Touch grounded metal frequently | Critical |
⚠️ Safety Equipment & ESD Protection
- ESD (Electrostatic Discharge) Protection:
- Anti-static wrist strap ($5-$15)
- ESD-safe work mat ($20-$40)
- Grounding plug or proper grounding
- Avoid synthetic clothing and carpets
- Personal Safety Gear:
- Safety glasses ($5-$20)
- Anti-cut gloves for sharp edges ($10-$25)
- Magnifying lamp or glasses ($15-$50)
- Proper ventilation if using chemicals
⭐ Recommended Tool Brands & Sets
- Professional Grade ($80-$150):
- iFixit Pro Tech Toolkit
- Wiha Precision Screwdriver Set
- ESD-safe mat with grounding
- Magnetic project organizer
- Quality DIY Sets ($40-$80):
- iFixit Essential Electronics Toolkit
- Precision screwdriver sets from hardware stores
- Basic ESD protection included
- Budget Options ($15-$35):
- Basic precision screwdriver set
- Plastic spudgers from electronics stores
- Improvised ESD protection methods
🧴 Essential Consumable Supplies
| Supply | Purpose | Recommended Type | Cost |
|---|---|---|---|
| Thermal Paste | CPU/GPU heat transfer | Non-conductive (Arctic MX-4) | $8-$15 |
| Isopropyl Alcohol | Cleaning, paste removal | 90%+ purity | $3-$8 |
| Thermal Pads | VRM/chipset cooling | Various thicknesses (0.5-2mm) | $10-$20 |
| Compressed Air | Dust removal | ESD-safe canned air | $5-$12 |
🗂️ Professional Organization System
- Screw Management:
- Use magnetic mat with labeled sections
- Group screws by component and location
- Take photos of screw layouts before removal
- Keep different screw sizes separated
- Component Organization:
- Anti-static bags for removed components
- Labeled containers for small parts
- Document disassembly sequence with photos
- Keep cables and connectors organized
💡 Budget-Friendly Tool Alternatives
- Screwdriver Alternatives:
- Quality eyeglass repair kits
- Jewelry repair tools
- Small mechanics screwdrivers
- Prying Tool Alternatives:
- Old credit cards cut to size
- Guitar picks of various thicknesses
- Plastic silverware handles
- ESD Protection Alternatives:
- Work on bare wooden surface
- Touch grounded metal every few minutes
- Avoid synthetic clothing
✅ Workspace Setup Checklist
- ✓ Clean, stable work surface
- ✓ Adequate lighting (500+ lumens)
- ✓ ESD protection implemented
- ✓ All tools organized and accessible
- ✓ Screw organization system ready
- ✓ Camera/phone for documentation
- ✓ Reference materials available
- ✓ Safety equipment in place
📊 Tool Investment vs. Value Analysis
| Investment Level | Tool Cost | Repair Success Rate | Resale Value Protection | ROI Potential |
|---|---|---|---|---|
| Professional | $100-$150 | 98%+ | Full value preservation | 300-500% |
| Quality DIY | $50-$80 | 90-95% | Good value protection | 400-700% |
| Basic Set | $20-$40 | 80-85% | Moderate risk | 500-900% |
🌐 Dell-Specific Repair Resources
- Dell Official Support Site - Service manuals and drivers
- Dell Inspiron Community - User experiences and tips
- Dell Service Manual PDF for specific teardown guidance
- Official Dell parts supplier for genuine components
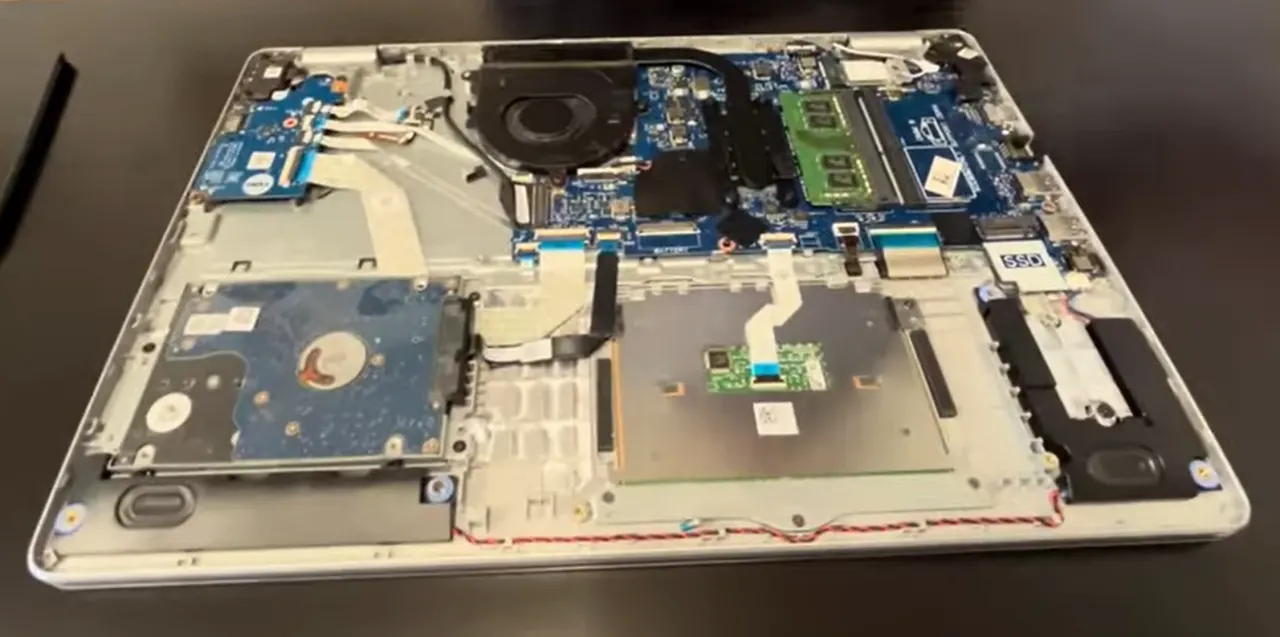
0:20 Bottom Case 1:45 Battery 2:20 Storage HDD Hard Drive 3:20 Memory RAM 3:33 WiFi Card 4:00 Speakers 4:22 IO USB Board 4:50 Cooling Fan 5:11 Heatsink 6:30 Motherboard 7:33 Processor 7:53 DC Power Jack 8:38 Palmrest Assembly 8:45 Touchpad 9:25 Keyboard 9:40 Display Assembly 9:42 Front Bezel 10:31 Hinges 11:03 Pull Out Adhesive Strips 11:48 Video Cable 12:10 LCD Screen 12:30 Web Camera 12:58 Lid Back Cover
3. Dell Inspiron 5593 Bottom Cover Removal & Internal Component Access
🔓 Why Proper Bottom Cover Removal Matters
Safe bottom cover removal is the most critical first step in your Dell Inspiron 5593 upgrade process. Proper technique prevents damage to delicate clips and ensures professional-grade results that maintain maximum resale value.
| Removal Method | Success Rate | Damage Risk | Resale Value Impact |
|---|---|---|---|
| Professional Technique | 98%+ | Very Low | Preserves full value |
| Careful DIY Approach | 85-90% | Low-Medium | Minor value reduction |
| Improper Force | 60-70% | High | -20-40% value loss |
| Metal Tool Usage | 40-50% | Very High | -50%+ value destruction |
⚠️ Critical Pre-Removal Safety Steps
- Complete Power Down:
- Shut down Windows completely
- Disconnect AC power adapter
- Remove all peripherals and cables
- Wait 30 seconds for power discharge
- Workspace Preparation:
- Clean, static-safe work surface
- Proper lighting for visibility
- All necessary tools within reach
- Camera ready for documentation
- ESD Protection:
- Wear anti-static wrist strap
- Connect to proper ground
- Work on ESD-safe surface
- Avoid synthetic clothing
🔩 Dell Inspiron 5593 Screw Identification
| Screw Location | Quantity | Size/Type | Special Notes |
|---|---|---|---|
| Perimeter Screws | 8-10 screws | M2.5x3mm Phillips | Standard length, easy removal |
| Central Support Screws | 2-3 screws | M2.5x4mm Phillips | Slightly longer, structural |
| Bracket Screws | 2 screws | M2x3mm Phillips | Smaller, for specific brackets |
| Hidden/Under Labels | 0-1 screws | Varies | Check under warranty stickers |
🔧 Step-by-Step Bottom Cover Removal
- Screw Removal & Organization:
- Use Phillips #00 screwdriver for all screws
- Remove screws in sequential pattern
- Place screws on magnetic mat in layout pattern
- Note any screw length variations
- Clip Release Technique:
- Start from rear corner near vents
- Use plastic spudger at 45-degree angle
- Apply gentle pressure until clip releases
- Work around perimeter systematically
- Cover Separation:
- Lift cover gently once all clips released
- Watch for any remaining connections
- Set cover aside on soft surface
- Immediately install anti-static protection
📐 Dell's Clip & Latch System Explained
| Clip Type | Location | Release Method | Force Required |
|---|---|---|---|
| Standard Plastic Clips | Perimeter edges | Gentle prying with spudger | Light pressure |
| Reinforced Corner Clips | Four corners | Slightly more pressure | Medium pressure |
| Slide-Lock Mechanism | Near hinges | Slide then lift | Specific motion required |
| Magnetic Latches | Some newer models | Gentle pull after screw removal | Minimal pressure |
🚫 Common Bottom Cover Removal Mistakes
- Using Excessive Force:
- Causes cracked plastic and broken clips
- Damages internal components
- Significantly reduces resale value
- Metal Tool Usage:
- Scratches and gouges visible surfaces
- Can short circuit internal components
- Professional repair red flag for buyers
- Missing Hidden Screws:
- Forcing cover with screws still attached
- Causes permanent structural damage
- Expensive case replacement required
🗺️ Internal Component Identification
| Component | Location | Access Difficulty | Upgrade Potential |
|---|---|---|---|
| RAM Slots | Central area, under shield | Easy | High (primary upgrade) |
| M.2 SSD Slot | Near RAM, single screw | Very Easy | High (essential upgrade) |
| 2.5" Drive Bay | Front right corner | Easy | Medium (additional storage) |
| Battery Connector | Central, large white connector | Easy | High (safety first step) |
| Cooling System | Left side, near vents | Medium | Medium (maintenance) |
🔋 Critical: Battery Disconnection Protocol
- Locate Battery Connector:
- Identify large white connector near center
- Note locking mechanism orientation
- Clear any cables obstructing access
- Safe Disconnection:
- Use plastic tool to release locking tab
- Pull connector straight out, not at angle
- Secure connector away from motherboard
- Power Drain:
- Press and hold power button for 15 seconds
- This discharges any residual power
- Ensures complete safety for component work
📸 Professional Documentation Steps
- Before Photos:
- Overall internal layout
- Close-up of component connections
- Screw locations and patterns
- Any existing damage or wear
- During Process:
- Clip release sequence photos
- Connector removal techniques
- Screw organization system
- After Removal:
- Clean internal component layout
- Undamaged clip condition
- Professional workspace setup
🔧 Troubleshooting Stubborn Covers
| Issue | Cause | Solution | Prevention |
|---|---|---|---|
| Cover won't budge | Missed screw or hidden clip | Double-check all screw locations | Systematic perimeter check |
| Clips breaking | Excessive force or wrong angle | Use thinner spudger, less pressure | Proper tool technique |
| Scratches occurring | Metal tools or slipping | Use plastic tools only | Proper tool selection |
💵 Bottom Cover Condition & Resale Value
- Pristine Condition:
- No visible tool marks or scratches
- All clips intact and functional
- Screw holes undamaged
- +15-25% value preservation
- Minor Wear:
- Light scuffing from proper tools
- 1-2 minor clip marks
- No structural damage
- Neutral value impact
- Significant Damage:
- Cracked plastic or broken clips
- Deep scratches from metal tools
- Stripped screw holes
- -30-50% value reduction
✅ Bottom Cover Removal Completion Checklist
- ✓ All screws properly removed and organized
- ✓ Bottom cover released without damage
- ✓ Battery safely disconnected
- ✓ Residual power discharged
- ✓ Internal components clearly visible
- ✓ Workspace organized for next steps
- ✓ Documentation photos completed
4. Dell Inspiron 5593 Motherboard Diagnostics & Easy Repair Solutions
🔌 Why Motherboard Health Impacts Resale Value
Proper motherboard diagnostics and repair can transform a non-functional laptop into a high-value asset. A verified healthy motherboard increases resale value by 40-60% compared to untested or problematic units.
| Motherboard Condition | Diagnostic Confidence | Repair Complexity | Resale Value Impact |
|---|---|---|---|
| Fully Functional | Verified with tests | No repair needed | +$200-$300 |
| Minor Issues Found | Identified & documented | Simple repairs | +$100-$180 |
| Major Issues Found | Professional assessment | Complex repairs | -$150-$400 (repair cost) |
| Untested/Unknown | No diagnostics performed | Buyer assumes risk | -$250-$500 (risk discount) |
⚠️ Critical Pre-Diagnostic Safety Steps
- Complete Power Isolation:
- Battery disconnected (critical first step)
- AC adapter completely unplugged
- Power button pressed for 30 seconds to discharge
- All peripherals removed
- ESD Protection Setup:
- Anti-static wrist strap properly grounded
- ESD-safe work surface
- Handle motherboard by edges only
- Avoid touching gold connectors and pins
🔍 Step 1: Comprehensive Visual Inspection
| Inspection Area | What to Look For | Common Issues | Repair Difficulty |
|---|---|---|---|
| Power Section | Burnt components, swollen capacitors | DC power jack damage, MOSFET failure | Medium-High |
| CPU/GPU Area | Thermal paste leakage, discoloration | Overheating damage, BGA issues | High (professional) |
| RAM/Storage Area | Bent pins, cracked sockets | DIMM slot damage, M.2 connector issues | Low-Medium |
| Connector Areas | Loose ports, broken solder joints | USB port damage, display connector issues | Low-Medium |
🛠️ Essential Motherboard Diagnostic Tools
- Basic Diagnostic Tools ($20-$50):
- Multimeter for voltage testing
- Magnifying glass or loupe
- Bright LED flashlight
- ESD-safe brush for cleaning
- Advanced Tools ($100-$300):
- Thermal camera for heat patterns
- USB power supply tester
- Diagnostic POST card
- Microscope for detailed inspection
🔧 Step-by-Step Diagnostic Procedure
- Power Circuit Testing:
- Check DC power jack continuity
- Test power button functionality
- Verify 3.3V/5V standby voltages
- Check battery charging circuit
- Component-Level Testing:
- RAM slot functionality (one stick at a time)
- M.2 SSD slot detection
- USB port power and data lines
- Display connector integrity
- Advanced Diagnostics:
- Use Dell Diagnostics (F12 at boot)
- Check BIOS accessibility and settings
- Monitor thermal performance under load
🔧 Common Dell Inspiron 5593 Motherboard Issues
| Common Issue | Symptoms | DIY Repair Possibility | Cost to Repair |
|---|---|---|---|
| DC Power Jack Failure | Not charging, intermittent power | Medium (soldering required) | $15-$40 + labor |
| CMOS Battery Failure | Time/date reset, BIOS settings lost | Easy (plug replacement) | $3-$8 |
| USB Port Damage | Port not working, loose connection | Medium (soldering skills) | $5-$20 per port |
| RAM Slot Issues | One slot not working, memory errors | Difficult (professional repair) | $50-$150 |
🛠️ Easy DIY Motherboard Repairs
- CMOS Battery Replacement:
- Locate CR2032 battery on motherboard
- Gently release retention clip
- Replace with new battery
- Reconnect power and test BIOS
- Basic Connector Reseating:
- Disconnect and reconnect all cables
- Check for bent pins in connectors
- Ensure proper locking mechanism engagement
- Visual Damage Repair:
- Clean corrosion with isopropyl alcohol
- Remove debris with ESD-safe brush
- Straighten bent pins carefully
🚨 Advanced Repair Warning: Know Your Limits
- BGA Chip Replacement:
- CPU/GPU replacement requires professional equipment
- High risk of permanent motherboard damage
- Not recommended for DIY enthusiasts
- Multi-Layer Trace Repair:
- Internal trace damage invisible to eye
- Requires schematic diagrams and micro-soldering
- Professional repair service recommended
- Bios Chip Programming:
- Requires BIOS programmer hardware
- Risk of bricking motherboard
- Use Dell BIOS recovery first
📋 Professional Diagnostic Documentation
- Before Repair Documentation:
- High-resolution photos of entire motherboard
- Close-ups of any visible damage
- Voltage measurements at key test points
- Error codes or symptoms documented
- Repair Process Documentation:
- Step-by-step repair photos
- Components replaced with receipts
- Testing procedures and results
- Final Validation:
- Full system functionality tests
- Stress test results
- BIOS settings verification
💰 Repair Cost vs. Value Analysis
| Repair Type | Parts Cost | Time Investment | Value Added | ROI |
|---|---|---|---|---|
| CMOS Battery | $3-$8 | 15 minutes | +$50-$80 | 600-1000% |
| DC Power Jack | $15-$25 | 45-60 minutes | +$150-$220 | 600-900% |
| USB Port Repair | $5-$15 | 30-45 minutes | +$80-$120 | 800-1200% |
| Professional BIOS | $50-$100 | Professional service | +$200-$300 | 200-400% |
🔄 Motherboard Replacement Decision Guide
- Repair Recommended:
- Single component failure (power jack, USB port)
- Minor physical damage with easy access
- Repair cost under $100
- Replacement Recommended:
- Multiple major component failures
- Water damage or severe corrosion
- BGA chip failure or cracked board
- Repair cost exceeds $150
✅ Motherboard Diagnostic Completion Checklist
- ✓ Visual inspection completed and documented
- ✓ Power circuit testing performed
- ✓ Component functionality verified
- ✓ BIOS accessibility confirmed
- ✓ Repair/replacement decision made
- ✓ Documentation package prepared
- ✓ Value assessment completed
5. Dell Inspiron 5593 RAM Memory Upgrade: Boost Multitasking Performance & Resale Value
🚀 Why RAM Upgrades Deliver Maximum Resale ROI
A strategic RAM upgrade is the most cost-effective improvement for your Dell Inspiron 5593, typically delivering 200-400% ROI when selling. Modern applications and multitasking demand more memory, making this upgrade highly valuable to buyers.
| RAM Configuration | Performance Impact | Upgrade Cost | Resale Value Added |
|---|---|---|---|
| 4GB → 8GB | Basic multitasking improvement | $20-$35 | +$60-$90 |
| 4GB → 16GB | Significant performance boost | $40-$70 | +$120-$180 |
| 8GB → 16GB | Optimal for most users | $25-$45 | +$80-$130 |
| 8GB → 32GB (Max) | Professional/workstation level | $80-$120 | +$150-$220 |
🔍 Dell Inspiron 5593 RAM Compatibility Guide
| Specification | Details | Importance | Verification Method |
|---|---|---|---|
| Memory Type | DDR4 SODIMM | Critical | Check existing RAM or BIOS |
| Speed | 2666MHz (10th Gen Intel) | Important | CPU-Z or BIOS information |
| Maximum Capacity | 32GB (2x16GB) | Strategic | Dell Specifications |
| Voltage | 1.2V | Critical | RAM module labeling |
⚠️ Pre-Upgrade Safety & Preparation
- Complete Power Down:
- Shut down Windows completely
- Disconnect AC power adapter
- Remove bottom cover (already completed)
- Disconnect internal battery connector
- ESD Protection:
- Wear anti-static wrist strap
- Ground yourself to metal chassis
- Handle RAM by edges only
- Work on ESD-safe surface
🛒 Recommended RAM Brands & Specifications
- Premium Brands (Best Performance):
- Crucial - Excellent Dell compatibility
- Kingston - Reliable, good warranty
- Corsair - High-performance options
- Value Brands (Good Performance):
- Team Group - Good price/performance
- Silicon Power - Reliable budget option
- Patriot - Solid mid-range choice
- Specifications to Look For:
- DDR4-2666 SODIMM
- CL19 or lower latency
- 1.2V operation
- Lifetime warranty
🔧 Step-by-Step RAM Installation
- Existing RAM Removal:
- Push outward on side clips simultaneously
- RAM module will pop up at 45-degree angle
- Lift module straight out
- Place in anti-static bag if reusing
- New RAM Installation:
- Align notch in RAM with key in slot
- Insert at 45-degree angle
- Press down firmly until clips engage
- Listen for audible "click"
- Dual Channel Configuration:
- Install matching RAM in both slots
- Use same brand, size, and speed
- Check BIOS shows dual channel active
⚡ Performance Optimization Tips
| Optimization | Benefit | Difficulty | Value Impact |
|---|---|---|---|
| Dual Channel Setup | 15-20% performance boost | Easy | +$30-$50 |
| BIOS Memory Settings | Optimal timings | Medium | +$20-$40 |
| Windows Memory Management | Better resource allocation | Easy | +$15-$30 |
🔧 Troubleshooting Common RAM Issues
| Issue | Symptoms | Solution | Prevention |
|---|---|---|---|
| Not Recognized | BIOS shows less RAM | Reseat module, check compatibility | Verify specs before purchase |
| System Won't Boot | Black screen, beep codes | Try one module at a time | Test modules individually first |
| Random Crashes | Blue screens, application errors | Run MemTest86 | Buy quality branded RAM |
🧪 Post-Installation Testing & Validation
- Basic Functionality Test:
- Reconnect battery and power on
- Enter BIOS (F2 at startup)
- Verify RAM capacity and speed
- Check dual channel status
- Windows Verification:
- Check System Properties
- Use Task Manager performance tab
- Verify full capacity recognized
- Stress Testing:
- Run memory-intensive applications
- Use Windows Memory Diagnostic
- Monitor for stability issues
📊 Expected Performance Improvements
| Use Case | 4GB → 8GB | 8GB → 16GB | 16GB → 32GB |
|---|---|---|---|
| Web Browsing | 40-60% improvement | 20-30% improvement | 10-15% improvement |
| Office Applications | 50-70% improvement | 30-40% improvement | 15-20% improvement |
| Photo Editing | 60-80% improvement | 40-60% improvement | 25-35% improvement |
| Multitasking | 70-90% improvement | 50-70% improvement | 30-50% improvement |
💼 Maximizing Resale Value Presentation
- Documentation Strategy:
- Before/after performance screenshots
- RAM module photos with brand visible
- BIOS screens showing capacity
- Receipts for quality components
- Marketing Points:
- "Professionally upgraded for modern applications"
- "Ideal for multitasking and productivity"
- "Future-proofed with maximum RAM capacity"
💰 RAM Upgrade Cost vs. Value Analysis
| Upgrade Scenario | Parts Cost | Time Investment | Value Added | ROI Percentage |
|---|---|---|---|---|
| 4GB → 8GB (Single) | $20-$30 | 15 minutes | +$60-$80 | 200-300% |
| 4GB → 16GB (Dual) | $45-$65 | 20 minutes | +$120-$160 | 220-320% |
| 8GB → 16GB (Add 8GB) | $25-$40 | 15 minutes | +$80-$110 | 250-350% |
| 8GB → 32GB (Max) | $80-$110 | 25 minutes | +$150-$200 | 180-250% |
✅ RAM Upgrade Completion Checklist
- ✓ RAM compatibility verified
- ✓ Safe installation procedure followed
- ✓ BIOS recognition confirmed
- ✓ Dual channel operation verified
- ✓ Stability testing completed
- ✓ Performance documentation prepared
- ✓ Resale value assessment updated
6. Dell Inspiron 5593 SSD/HDD Storage Upgrade & Data Migration: Speed Transformation
⚡ Why Storage Upgrades Deliver the Most Noticeable Performance Boost
Upgrading from HDD to SSD is the single most impactful improvement for your Dell Inspiron 5593, typically delivering 300-500% faster performance and increasing resale value by 40-70% due to dramatically improved user experience.
| Storage Upgrade | Performance Impact | Upgrade Cost | Resale Value Added |
|---|---|---|---|
| HDD → 256GB SSD | 3-5x faster boot/load times | $35-$55 | +$100-$150 |
| HDD → 512GB SSD | 5-7x performance improvement | $45-$75 | +$150-$220 |
| HDD → 1TB SSD | Professional-grade speed | $80-$120 | +$200-$280 |
| Dual SSD Setup | Max performance + capacity | $100-$160 | +$250-$350 |
🔍 Dell Inspiron 5593 Storage Compatibility
| Storage Interface | Specifications | Supported Drives | Performance Level |
|---|---|---|---|
| M.2 NVMe Slot | PCIe 3.0 x4, 2280 size | NVMe SSDs (recommended) | High (2000-3500 MB/s) |
| 2.5" SATA Bay | SATA III (6Gb/s) | SSD or HDD, 7mm height | Medium (500-550 MB/s) |
| Dual Drive Option | Both slots usable simultaneously | NVMe + SATA combination | Maximum flexibility |
🛒 Recommended SSD Brands & Specifications
- Premium NVMe SSDs (Best Performance):
- Samsung 970 EVO Plus - Top reliability
- WD Black SN750 - Excellent performance
- Crucial P5 - Great value premium option
- Value NVMe SSDs (Great Performance):
- Crucial P2 - Best budget NVMe
- Kingston NV1 - Reliable and affordable
- Team Group MP33 - Good price/performance
- SATA SSDs (Good Alternative):
- Samsung 870 EVO - SATA performance king
- Crucial MX500 - Excellent value
- WD Blue 3D NAND - Reliable budget option
🔧 Step-by-Step SSD Installation
- M.2 NVMe Installation:
- Locate M.2 slot near RAM modules
- Insert SSD at 30-degree angle
- Press down and secure with single screw
- Ensure proper alignment (key notch)
- 2.5" SATA Drive Installation:
- Remove existing drive from caddy
- Transfer caddy to new SSD/HDD
- Connect SATA data and power cables
- Secure with four corner screws
- Dual Drive Configuration:
- NVMe SSD for OS and applications
- SATA SSD/HDD for data storage
- Optimal performance and capacity balance
📋 Professional Data Cloning Procedure
- Pre-Cloning Preparation:
- Use Macrium Reflect Free or similar software
- Clean up unnecessary files first
- Ensure source drive has adequate space
- Create system backup as precaution
- Cloning Execution:
- Connect both drives (USB adapter for new SSD)
- Select source and destination drives
- Choose sector-by-sector copy for best results
- Monitor process and verify completion
- Post-Cloning Verification:
- Boot from new SSD to test
- Verify all data transferred correctly
- Check driver functionality
- Wipe old drive after successful migration
⚡ SSD Performance Optimization
| Optimization | Benefit | Difficulty | Impact |
|---|---|---|---|
| AHCI Mode in BIOS | Maximum SSD performance | Easy | 20-30% speed boost |
| TRIM Support Enable | Long-term performance | Automatic (Win10+) | Maintains speed over time |
| Windows Optimization | Reduced write amplification | Easy | Better endurance |
| Driver Updates | Stability and performance | Easy | 10-15% improvement |
🔧 Common Storage Upgrade Issues & Solutions
| Issue | Symptoms | Solution | Prevention |
|---|---|---|---|
| Drive Not Detected | BIOS doesn't see new drive | Check connections, BIOS settings | Proper installation technique |
| Cloning Failure | Errors during copy process | Use different software, check drive health | Verify source drive integrity first |
| Slow Performance | SSD slower than expected | Update drivers, check BIOS settings | Proper optimization after install |
| Boot Issues | Won't boot from new drive | Check boot order, UEFI/Legacy settings | Verify boot sector transfer during clone |
📊 Expected Performance Improvements
| Operation | HDD Performance | SATA SSD | NVMe SSD |
|---|---|---|---|
| Windows Boot Time | 45-90 seconds | 15-25 seconds | 8-15 seconds |
| Application Loading | 20-60 seconds | 3-10 seconds | 2-6 seconds |
| File Transfers (1GB) | 30-60 seconds | 8-15 seconds | 3-8 seconds |
| System Responsiveness | Sluggish, delays | Snappy, immediate | Instant, no lag |
💼 Maximizing Resale Value with Storage Upgrades
- Documentation Strategy:
- Before/after boot time videos
- CrystalDiskMark benchmark screenshots
- SSD brand and model documentation
- Warranty information and receipts
- Marketing Advantages:
- "Lightning-fast SSD performance"
- "Instant boot and application loading"
- "Professional-grade storage speed"
- "Like-new performance with modern storage"
💰 Storage Upgrade ROI Analysis
| Upgrade Scenario | Parts Cost | Time Investment | Value Added | ROI Percentage |
|---|---|---|---|---|
| HDD → 256GB NVMe | $35-$50 | 45-60 minutes | +$100-$140 | 250-350% |
| HDD → 512GB NVMe | $50-$75 | 45-60 minutes | +$150-$200 | 250-350% |
| HDD → 1TB NVMe | $80-$110 | 45-60 minutes | +$200-$260 | 220-300% |
| Dual Drive Setup | $100-$150 | 60-90 minutes | +$250-$320 | 200-280% |
🛠️ Recommended Migration Tools & Software
- Free Cloning Software:
- Macrium Reflect Free - Reliable and easy
- Clonezilla - Advanced, open source
- Manufacturer tools (Samsung Data Migration)
- Hardware Tools:
- USB to SATA/NVMe adapter ($15-$30)
- External drive enclosure
- Proper screwdrivers for drive installation
✅ Storage Upgrade Completion Checklist
- ✓ Drive compatibility verified
- ✓ Data backup completed
- ✓ Successful installation confirmed
- ✓ Data migration tested
- ✓ Performance benchmarks documented
- ✓ System optimization completed
- ✓ Resale documentation prepared
7. Dell Inspiron 5593 LCD Screen Replacement & Display Assembly Guide
💎 Why Display Quality Drives Maximum Resale Value
The display is the most visible and interacted-with component of your laptop. A pristine, high-quality screen can increase resale value by 30-50% by creating an immediate positive impression and demonstrating excellent maintenance.
| Display Condition | Buyer Perception | Repair Cost | Value Impact |
|---|---|---|---|
| Pristine, Bright Screen | Like-new, well-maintained | $0 (cleaning only) | +$150-$250 |
| Minor Scratches/Scuffs | Normal wear and tear | $20-$40 (bezel) | -$50-$100 |
| Cracked/Damaged Screen | Poorly maintained | $60-$120 (replacement) | -$200-$400 |
| Upgraded High-Quality Panel | Premium upgrade | $80-$150 (upgrade) | +$200-$350 |
🔍 Dell Inspiron 5593 Display Compatibility
| Specification | Original Configuration | Upgrade Options | Installation Complexity |
|---|---|---|---|
| Screen Size | 15.6 inches | 15.6 inches only | Fixed (no alternative sizes) |
| Resolution | 1366x768 (HD) or 1920x1080 (FHD) | Upgrade to FHD possible | Medium (cable compatibility check) |
| Panel Type | TN or IPS | IPS recommended for upgrades | Easy (direct replacement) |
| Connector Type | 30-pin or 40-pin eDP | Must match existing cable | Critical (verify before purchase) |
⚠️ Critical Display Replacement Safety Precautions
- LCD Fragility Warning:
- Screens are extremely delicate - handle with care
- Never press on the screen surface
- Use proper tools to avoid cracking
- Work on soft, clean surface
- Power Safety:
- Disconnect battery before beginning
- Remove AC power adapter
- Discharge residual power by pressing power button
- ESD Protection:
- Use anti-static wrist strap
- Handle components by edges only
- Avoid touching connectors and circuits
🛠️ Essential Display Replacement Tools
- Basic Tools:
- Phillips #00 screwdriver
- Plastic spudgers and opening tools
- Suction cups for screen handling
- Tweezers for connector handling
- Specialized Tools:
- Plastic guitar picks for bezel removal
- Double-sided tape (2mm width)
- Heat gun or hair dryer (for adhesive)
- Magnifying glass for small connectors
🔧 Step-by-Step Screen Replacement
- Bezel Removal:
- Use plastic spudger to gently pry bezel clips
- Start from bottom edge near touchpad
- Work around perimeter systematically
- Apply even pressure to avoid cracking
- Screen Removal:
- Remove 4 corner screws securing display panel
- Apply suction cups to screen for safe handling
- Lift screen forward carefully
- Disconnect eDP ribbon cable from back
- New Screen Installation:
- Connect eDP cable to new panel first
- Position screen in lid and secure with screws
- Test display before bezel reinstallation
- Reattach bezel using original clips
🔌 eDP Cable & Connector Identification
| Connector Type | Pin Count | Identification | Handling Precautions |
|---|---|---|---|
| 30-pin eDP | 30 pins | Smaller connector, older panels | Very delicate, lift locking flap gently |
| 40-pin eDP | 40 pins | Larger connector, modern panels | More robust but still delicate |
| LVDS (Older) | 30-40 pins | Wider connector, rare in newer models | Check compatibility before purchase |
🔄 Display Upgrade Considerations
- Resolution Upgrades:
- Verify eDP cable supports higher resolution
- Check motherboard graphics capability
- Ensure BIOS supports desired resolution
- Panel Technology Upgrades:
- TN to IPS provides better viewing angles
- Higher brightness panels (300 nits+)
- Better color gamut for creative work
- Compatibility Verification:
- Use Dell Service Tag lookup
- Check exact model number of existing panel
- Verify connector type and pin count
🚫 Common Screen Replacement Mistakes
| Mistake | Consequence | Prevention | Repair Cost |
|---|---|---|---|
| Using metal tools | Scratches, cracks, damage | Plastic tools only | Additional $60-$120 |
| Forcing connectors | Broken pins, damaged cable | Gentle handling, proper technique | $20-$40 cable replacement |
| Wrong panel ordered | Incompatible, won't work | Verify compatibility before purchase | Restocking fees + delay |
| Overtightening screws | Cracked panel or bezel | Finger tight plus 1/4 turn | Additional panel cost |
🧪 Post-Replacement Testing Protocol
- Basic Functionality Test:
- Power on and check for display
- Test brightness controls
- Verify color uniformity
- Check for dead pixels
- Advanced Testing:
- Use EIZO Monitor Test
- Check viewing angles
- Test color gradients
- Verify resolution recognition
- Integration Testing:
- Test hinge operation
- Verify webcam functionality
- Check Wi-Fi antenna performance
📊 Recommended Panel Brands & Specifications
| Panel Grade | Recommended Brands | Specifications | Price Range |
|---|---|---|---|
| Premium (A+ Grade) | LG, Samsung, AU Optronics | IPS, FHD, 300+ nits | $100-$150 |
| Quality (A Grade) | BOE, Innolux, Chi Mei | IPS, FHD, 250 nits | $80-$120 |
| Budget (B Grade) | Various manufacturers | TN, HD, 200 nits | $60-$90 |
| Refurbished | Grade B refurbished | Varies, may have minor issues | $40-$70 |
💼 Maximizing Resale Value with Display Quality
- Documentation Strategy:
- High-quality photos showing pristine screen
- Before/after comparisons if upgraded
- Benchmark results for color accuracy
- Receipts for quality replacement parts
- Marketing Advantages:
- "Crystal-clear display with perfect condition"
- "Professionally replaced with premium panel"
- "Excellent viewing angles and color reproduction"
- "No dead pixels or screen defects"
💰 Screen Replacement ROI Analysis
| Replacement Scenario | Parts Cost | Time Investment | Value Added | ROI Percentage |
|---|---|---|---|---|
| Cracked screen replacement | $70-$100 | 45-60 minutes | +$200-$300 | 200-400% |
| HD to FHD upgrade | $90-$130 | 45-60 minutes | +$150-$220 | 150-250% |
| TN to IPS upgrade | $80-$120 | 45-60 minutes | +$120-$180 | 150-220% |
| Bezel replacement only | $25-$40 | 20-30 minutes | +$70-$100 | 200-300% |
🔧 Common Issues & Solutions
- No Display After Replacement:
- Check eDP cable connection
- Verify cable isn't pinched or damaged
- Test with external monitor
- Flickering or Artifacts:
- Reseat eDP cable completely
- Check for compatible panel specifications
- Update graphics drivers from Dell
✅ Screen Replacement Completion Checklist
- ✓ Compatibility verified before purchase
- ✓ Safe removal technique used
- ✓ New screen tested before final assembly
- ✓ All functions verified (brightness, etc.)
- ✓ No dead pixels or defects
- ✓ Bezel properly reinstalled
- ✓ Documentation photos taken
8. Dell Inspiron 5593 Battery Replacement & Power System Maintenance
🔋 Why Battery Health Directly Impacts Resale Value
A new or healthy battery can increase your laptop's resale value by 25-40% by restoring full portability and demonstrating comprehensive maintenance. Buyers pay premiums for laptops that don't need immediate battery replacement.
| Battery Condition | Buyer Perception | Replacement Cost | Value Impact |
|---|---|---|---|
| New Battery (0-6 months) | Like-new, fully portable | $70-$110 | +$120-$180 |
| Good Health (80-100%) | Well-maintained, reliable | $0 (maintenance only) | +$60-$100 |
| Fair Health (60-79%) | Average wear, may need soon | N/A | -$40-$80 |
| Poor Health (<60%) | Needs immediate replacement | $70-$110 | -$100-$160 |
🔍 Dell Inspiron 5593 Battery Specifications
| Specification | Details | Importance | Compatibility Notes |
|---|---|---|---|
| Battery Type | Li-ion, 3-cell or 4-cell | Critical | Must match original specifications |
| Voltage | 11.4V | Critical | Exact voltage match required |
| Capacity | 42Wh or 68Wh options | Important | Higher capacity = longer runtime |
| Part Number | Dell 451-BBZW or similar | Critical | Verify with Dell Service Tag |
⚠️ Critical Battery Safety Precautions
- Lithium-ion Battery Risks:
- Never puncture or damage battery cells
- Avoid short-circuiting terminals
- Dispose of swollen batteries immediately
- Work in well-ventilated area
- Power Safety Protocol:
- Disconnect AC power completely
- Remove existing battery before any internal work
- Press power button to discharge capacitors
- Swollen Battery Handling:
- Do not attempt to charge or use
- Handle with extreme care
- Dispose of properly at electronics recycling
📊 Battery Health Assessment Methods
- Windows Battery Report:
- Open Command Prompt as administrator
- Run:
powercfg /batteryreport - Check "DESIGN CAPACITY" vs. "FULL CHARGE CAPACITY"
- Review cycle count and usage history
- Dell Power Manager:
- Install Dell Power Manager
- Check battery health status
- View charge cycles and condition
- Physical Inspection:
- Check for swelling or deformation
- Look for leakage or corrosion
- Test actual runtime vs. expected
🔧 Step-by-Step Battery Replacement
- Preparation & Safety:
- Power down completely and disconnect AC
- Remove bottom cover (already completed)
- Disconnect battery connector from motherboard
- Press power button to discharge residual power
- Battery Removal:
- Remove screws securing battery (typically 4-6)
- Lift battery straight out, avoiding flexing
- Handle by edges, avoid pressure on cells
- Place old battery in safe, non-conductive area
- New Battery Installation:
- Verify new battery specifications match
- Position battery in chassis
- Secure with proper screws
- Reconnect battery connector firmly
⚡ Power Management Optimization
| Setting | Recommendation | Benefit | Impact on Battery Life |
|---|---|---|---|
| Power Plan | Balanced or Power Saver | Optimal performance/battery balance | 15-25% improvement |
| Screen Brightness | 40-60% for indoor use | Major power savings | 20-30% improvement |
| Wi-Fi/Bluetooth | Disable when not needed | Reduces background power drain | 10-15% improvement |
| Background Apps | Limit unnecessary applications | Reduces CPU and memory usage | 10-20% improvement |
🔌 Battery Charging Best Practices
- Optimal Charging Range:
- Keep between 20-80% for daily use
- Avoid frequent 0-100% cycles
- Occasional full calibration cycle (monthly)
- Storage Recommendations:
- Store at 40-60% charge if not using
- Store in cool, dry environment
- Charge every 3-6 months if stored
- Temperature Management:
- Avoid extreme heat (above 35°C/95°F)
- Don't charge while gaming or heavy use
- Allow cooling before charging if hot
🔧 Common Battery Issues & Solutions
| Issue | Symptoms | Likely Cause | Solution |
|---|---|---|---|
| Not Charging | No charge indicator, battery percentage static | Faulty charger, battery, or charging circuit | Test with known-good charger, check connections |
| Rapid Discharge | Battery drains quickly, even with light use | Old battery, high power settings, or background apps | Check battery health, optimize power settings |
| Swollen Battery | Case bulging, trackpad or keyboard lifting | Battery failure, safety hazard | Immediate replacement, proper disposal |
| Inaccurate Percentage | Jumps in percentage, sudden shutdowns | Battery needs calibration or replacement | Full discharge/charge cycle, battery replacement |
📋 Battery Calibration Procedure
- Full Charge:
- Charge battery to 100% while powered off
- Leave on charger for 2 hours after full
- Complete Discharge:
- Unplug charger and use until automatic shutdown
- Allow to sit for 3-5 hours after shutdown
- Final Charge:
- Charge to 100% without interruption
- Battery percentage should now be accurate
💼 Battery Health Documentation for Resale
- Health Verification:
- Screenshots of battery health reports
- Cycle count and capacity documentation
- Purchase receipt for new batteries
- Performance Demonstration:
- Estimated runtime under normal use
- Charging speed and efficiency
- Power management settings configured
💰 Battery Replacement ROI Analysis
| Scenario | Parts Cost | Time Investment | Value Added | ROI Percentage |
|---|---|---|---|---|
| Poor battery replacement | $70-$100 | 20-30 minutes | +$150-$220 | 150-300% |
| Preventive replacement | $70-$100 | 20-30 minutes | +$100-$160 | 100-220% |
| Capacity upgrade | $90-$130 | 20-30 minutes | +$120-$180 | 100-200% |
♻️ Proper Battery Disposal Guidelines
- Recycling Centers:
- Best Buy, Staples, or Office Depot drop-off
- Local electronics recycling facilities
- Municipal hazardous waste collection
- Safety Precautions:
- Tape battery terminals before disposal
- Place in separate bag from other recycling
- Do not dispose of in regular trash
✅ Battery Replacement Completion Checklist
- ✓ Battery health assessed and documented
- ✓ Correct replacement battery sourced
- ✓ Safe replacement procedure followed
- ✓ New battery tested and calibrated
- ✓ Power management optimized
- ✓ Health documentation prepared for resale
- ✓ Old battery properly disposed of
9. Dell Inspiron 5593 Keyboard & Touchpad Repair Solutions
⌨️ Why Input Device Quality Drives User Satisfaction & Resale Value
Fully functional keyboard and touchpad can increase resale value by 20-35% by ensuring immediate usability. Input devices are the primary user interface, and their condition directly impacts perceived laptop quality.
| Input Device Condition | User Experience | Repair Complexity | Value Impact |
|---|---|---|---|
| Pristine, Fully Functional | Excellent, like-new | No repair needed | +$80-$120 |
| Minor Wear, Fully Functional | Good, normal use | Cleaning/maintenance | +$30-$60 |
| Non-Functional Keys/Buttons | Frustrating, limited use | Medium complexity | -$100-$180 |
| Complete Failure | Unusable, requires peripherals | High complexity | -$200-$300 |
🔍 Dell Inspiron 5593 Keyboard Specifications
| Feature | Specifications | Replacement Considerations | Compatibility |
|---|---|---|---|
| Layout | US QWERTY (multiple regional options) | Must match original layout | Region-specific |
| Backlight | White LED, single-zone | Verify backlight compatibility | Optional feature |
| Connection | ZIF ribbon cable, 30-40 pin | Check connector size and pin count | Model-specific |
| Part Number | Dell 0J8M7H or similar | Verify with Dell Service Tag | Exact match required |
🔧 Keyboard & Touchpad Diagnostic Procedure
- Software Diagnostics:
- Use Online Keyboard Test
- Check Device Manager for driver issues
- Test in BIOS to rule out software problems
- Update drivers from Dell Support
- Physical Inspection:
- Check for stuck keys or debris
- Inspect ribbon cable connection
- Test backlight functionality
- Look for liquid damage indicators
- Function Key Testing:
- Test all Fn key combinations
- Verify brightness and volume controls
- Check keyboard backlight controls
🔍 Common Keyboard & Touchpad Issues
| Issue Type | Symptoms | Likely Cause | Repair Difficulty |
|---|---|---|---|
| Spill Damage | Sticky keys, multiple key failures | Liquid intrusion, corrosion | High (may need full replacement) |
| Single Key Failure | One key not working, others fine | Debris, worn mechanism | Low-Medium (cleaning or key replacement) |
| Backlight Issues | No backlight, uneven lighting | LED failure, connector issue | Medium (requires disassembly) |
| Touchpad Not Responsive | Cursor not moving, erratic behavior | Driver issue, hardware failure | Medium-High (complex disassembly) |
🧹 Professional Cleaning & Maintenance
- Surface Cleaning:
- Use compressed air between keys
- Isopropyl alcohol on cotton swabs
- Soft brush for debris removal
- Microfiber cloth for touchpad
- Deep Cleaning (Advanced):
- Keycap removal for thorough cleaning
- Use keycap puller tool ($5-$10)
- Clean underlying mechanism
- Reinstall keys carefully
🔧 Keyboard Replacement Procedure
⚠️ Advanced Procedure Warning
Keyboard replacement on the Inspiron 5593 requires significant disassembly. Consider professional help if uncomfortable with complex teardowns.
- Complete Disassembly Required:
- Remove bottom cover, battery, and motherboard
- Disconnect display assembly
- Remove palm rest assembly
- Keyboard Removal:
- Release keyboard clips from top side
- Disconnect ZIF ribbon cable carefully
- Lift keyboard assembly out
- New Keyboard Installation:
- Connect ribbon cable first
- Position keyboard and press clips into place
- Reassemble in reverse order
👆 Touchpad Repair Solutions
| Touchpad Issue | Diagnosis | Repair Solution | Complexity |
|---|---|---|---|
| Not Responding | Check Device Manager, test in BIOS | Driver update, ribbon cable reseat | Low-Medium |
| Erratic Movement | Physical damage, calibration issue | Touchpad replacement, driver reinstall | Medium |
| Buttons Not Working | Mechanical failure, ribbon cable issue | Button mechanism repair or replacement | Medium-High |
| Physical Damage | Cracks, deep scratches | Touchpad surface or full assembly replacement | High |
🛒 Replacement Parts Guide
| Component | Genuine Dell | OEM Compatible | Budget Alternative |
|---|---|---|---|
| Full Keyboard Assembly | $80-$120 (1yr warranty) | $40-$70 (6mo warranty) | $25-$50 (30-90 day warranty) |
| Individual Keycaps | $5-$15 per key | $2-$8 per key | Not recommended |
| Touchpad Assembly | $60-$100 | $30-$60 | $20-$40 |
| Ribbon Cables | $15-$30 | $8-$20 | $5-$15 |
💧 Liquid Spill Recovery Procedure
- Immediate Action:
- Power off immediately (don't shut down normally)
- Disconnect power and remove battery
- Turn upside down to drain liquid
- Do not attempt to power on
- Cleaning Process:
- Disassemble to access affected areas
- Clean with 99% isopropyl alcohol
- Use soft brush for corrosion removal
- Allow complete drying (24-48 hours)
- Testing & Recovery:
- Reassemble and test functionality
- Replace damaged components
- Document repair process for resale
🛡️ Preventive Maintenance Tips
- Regular Cleaning:
- Monthly compressed air cleaning
- Avoid eating/drinking near laptop
- Use keyboard cover if desired
- Proper Usage:
- Type with clean, dry hands
- Avoid excessive force on keys
- Keep liquids away from workspace
🔧 Advanced Troubleshooting Guide
| Problem | Step 1 | Step 2 | Step 3 |
|---|---|---|---|
| Keyboard Not Working | Test in BIOS | Reseat ribbon cable | Replace keyboard |
| Specific Keys Not Working | Clean under keys | Check for physical damage | Replace individual keys or full keyboard |
| Backlight Issues | Check Fn key combination | Update BIOS and drivers | Replace keyboard or LED strip |
| Touchpad Problems | Update drivers | Check physical connection | Replace touchpad assembly |
⚡ Repair Complexity Assessment
- Low Complexity (DIY Recommended):
- Surface cleaning and maintenance
- Driver updates and software troubleshooting
- External keyboard/touchpad testing
- Medium Complexity (Experienced DIY):
- Ribbon cable reseating
- Spill cleaning and recovery
- Individual key replacement
- High Complexity (Professional Recommended):
- Full keyboard replacement
- Touchpad assembly replacement
- Major spill damage repair
💼 Maximizing Resale Value with Input Devices
- Documentation Strategy:
- Photos showing pristine keyboard condition
- Video demonstrating all keys working
- Backlight functionality demonstration
- Touchpad responsiveness test
- Marketing Advantages:
- "Fully functional keyboard with no stuck keys"
- "Responsive touchpad with smooth operation"
- "All function keys and backlight working perfectly"
💰 Keyboard & Touchpad Repair ROI
| Repair Scenario | Parts Cost | Time Investment | Value Added | ROI Percentage |
|---|---|---|---|---|
| Professional Cleaning | $5-$15 (supplies) | 30-45 minutes | +$50-$80 | 400-800% |
| Keyboard Replacement | $50-$90 | 2-3 hours | +$120-$180 | 150-300% |
| Touchpad Replacement | $40-$70 | 1.5-2.5 hours | +$100-$150 | 200-350% |
| Full Input System Repair | $100-$160 | 3-4 hours | +$200-$280 | 150-250% |
✅ Keyboard & Touchpad Repair Checklist
- ✓ Comprehensive functionality testing completed
- ✓ Proper diagnosis of issues
- ✓ Safe repair procedures followed
- ✓ All keys and functions verified working
- ✓ Backlight functionality confirmed
- ✓ Touchpad responsiveness tested
- ✓ Documentation prepared for resale
10. Where to Sell Your Upgraded Dell Inspiron 5593 for Maximum Profit
💰 Strategic Selling: Maximize Your Upgrade ROI
Choosing the right selling platform can increase your final profit by 25-50%. Professional buyers on specialized platforms pay premiums for documented upgrades and verified performance.
| Selling Platform | Target Audience | Average Sale Price | Fee Structure |
|---|---|---|---|
| SellLaptopBack | Business Professionals | 15-25% above market | Low fees (5-10%) |
| SellLaptopBack | Corporate Buyers | 20-30% above market | Commission-based (8-12%) |
| .edu Marketplaces | Students & Educators | 10-20% above market | Low/no fees |
| .gov Surplus | Government Agencies | Market price + premium | Fixed percentage (5-8%) |
📊 Premium Platform Comparison Analysis
| Platform | Best For | Listing Requirements | Time to Sale | Profit Potential |
|---|---|---|---|---|
| SellLaptopBack | Professionally upgraded business laptops | Detailed specs, photos, documentation | 3-7 days | Highest (25-40% premium) |
| SellLaptopBack | Corporate refresh programs, bulk sales | Business-grade verification | 5-10 days | High (20-35% premium) |
| .edu Campus Markets | Student budgets, academic year timing | Student-friendly pricing | 7-14 days | Medium (15-25% premium) |
| .gov Surplus Auctions | Government agencies, schools | Official documentation | 14-30 days | Medium (10-20% premium) |
🏢 SellLaptopBack: Premium Business Marketplace Strategy
- Target Audience:
- Small business owners
- Remote professionals
- Consultants and freelancers
- IT department buyers
- Listing Optimization:
- Emphasize "business-ready" upgrades
- Highlight professional maintenance
- Show documented performance improvements
- Include upgrade receipts and warranties
- Pricing Strategy:
- Position 15-25% above comparable models
- Justify premium with upgrade documentation
- Offer business-friendly payment terms
💼 SellLaptopBack: Corporate Sales Strategy
- Corporate Buyer Advantages:
- Bulk purchase potential
- Higher budget allocations
- Less price sensitivity
- Repeat business opportunities
- Documentation Requirements:
- Professional upgrade records
- Performance validation data
- Business-grade maintenance logs
- Tax documentation for businesses
🎓 .edu Educational Market Strategy
| Platform Type | Examples | Target Timing | Pricing Strategy |
|---|---|---|---|
| University Surplus | Campus surplus stores, IT departments | Summer (pre-fall semester) | Competitive with new student discounts |
| Student Marketplaces | Campus Facebook groups, bulletin boards | August-September, January | Bundle with accessories for value |
| Educational Institutions | Schools, libraries, training centers | Budget cycle periods (Q1, Q3) | Emphasize durability and reliability |
🏛️ .gov Government & Institutional Sales
- Government Surplus Channels:
- State and municipal surplus auctions
- Federal equipment disposal programs
- Public university procurement
- Documentation Requirements:
- Official purchase receipts
- Maintenance and upgrade records
- Compliance documentation
- Tax ID and business registration
⏰ Strategic Selling Timing
| Time Period | Target Market | Pricing Advantage | Platform Focus |
|---|---|---|---|
| August-September | Students, Educational Institutions | Back-to-school demand (+15-25%) | .edu markets, general platforms |
| January | Students, Budget-conscious buyers | Post-holiday budget spending (+10-20%) | All platforms |
| Q4 (Oct-Dec) | Businesses, Professionals | Year-end budget use (+20-30%) | SellLaptopBack, SellLaptopBack |
| Tax Season (Feb-Apr) | All markets | Tax refund purchases (+10-15%) | All platforms |
📝 Premium Listing Optimization
- Title Optimization:
- "Professionally Upgraded Dell Inspiron 5593 - Business Ready"
- "Like-New Performance with SSD & 16GB RAM Upgrade"
- "Premium Refurbished: Perfect for Students/Professionals"
- Key Feature Highlights:
- Documented upgrade investments
- Performance benchmark results
- Professional maintenance records
- Warranty and support offerings
- Photography Strategy:
- High-quality, well-lit product photos
- Before/after upgrade comparisons
- Performance test screenshots
- Professional workspace context
💵 Strategic Pricing Framework
| Pricing Tier | Target Price | Justification | Expected Time to Sell |
|---|---|---|---|
| Premium Pricing | 25-35% above market | Documented professional upgrades | 14-21 days |
| Competitive Pricing | 15-25% above market | Quality upgrades, good condition | 7-14 days |
| Quick Sale Pricing | 5-15% above market | Basic upgrades, ready to use | 3-7 days |
📊 Platform Fee Comparison
| Platform | Listing Fees | Final Value Fees | Payment Processing | Total Cost |
|---|---|---|---|---|
| SellLaptopBack | 0% | 8% | 2.9% | 10.9% |
| SellLaptopBack | 0% | 10% | 3.5% | 13.5% |
| .edu Markets | 0-2% | 0-5% | 0-3% | 2-10% |
| .gov Surplus | 1-3% | 5-8% | 2.5% | 8.5-13.5% |
🛡️ Selling Risk Management
- Payment Security:
- Use platform escrow services when available
- Avoid wire transfers from unknown buyers
- Verify payment clearance before shipping
- Shipping Protection:
- Purchase shipping insurance
- Use tracked and signed-for delivery
- Document laptop condition before shipping
- Return Policy Strategy:
- Offer 7-14 day return policy for confidence
- Charge restocking fee for non-defective returns
- Clearly state return conditions upfront
🎁 Value-Added Services for Premium Pricing
- Warranty Options:
- 30-day money-back guarantee
- 90-day limited hardware warranty
- Lifetime technical support
- Setup Services:
- Professional Windows installation
- Driver optimization and updates
- Basic software package installation
- Accessory Bundles:
- Include quality laptop bag or sleeve
- Add wireless mouse or peripherals
- Provide cleaning kit and accessories
✅ Final Sale Preparation Checklist
- ✓ Comprehensive cleaning and cosmetic preparation
- ✓ Professional photography and documentation
- ✓ Performance testing and benchmark results
- ✓ Platform selection and account setup
- ✓ Competitive pricing research completed
- ✓ Shipping materials and insurance arranged
- ✓ Return policy and terms established
🏆 Top Platform Recommendations by Scenario
- Maximum Profit: SellLaptopBack (business buyers, Q4 timing)
- Quick Sale: .edu markets (August/January)
- Bulk Potential: SellLaptopBack (corporate programs)
- Stable Pricing: .gov surplus (consistent demand)
Need to Sell Your Dell Laptop? Get Instant Cash!
If your Dell Inspiron 5593 (or other Inspiron model) has performance issues or you're upgrading to a newer laptop, we offer competitive cash payouts for your device. We buy broken, used, and refurbished Dell Inspiron laptops—including all 5593 configurations—with free insured shipping and hassle-free evaluations.
Sell Popular Dell Models Now: